Lab1: Camera Capture with OpenCV and Threading
Introduction
In this lab, you will learn how to capture video from a Raspberry Pi camera using OpenCV and Python threading. Threading allows the camera capture to run in the background while keeping the Jupyter notebook responsive. This is essential for robotics applications where you need to process video frames while performing other tasks.
Prerequisites
Before starting, install the required packages:
pip install opencv-python-headless ipywidgets opencv-python==4.10.0.84
Understanding Threading for Camera Capture
When capturing video in a Jupyter notebook, running the capture loop in the main thread would block the notebook and make it unresponsive. By using Python’s threading module, we can run the camera capture in a separate thread, allowing the notebook to remain interactive.
Key Concepts
- Thread: A separate flow of execution that runs concurrently with the main program
- Global Variable for Control: A shared variable (
running) to control when the thread should stop - OpenCV VideoCapture: The interface to capture frames from the camera
- ipywidgets: Widgets for displaying images and creating interactive controls in Jupyter
Example Output
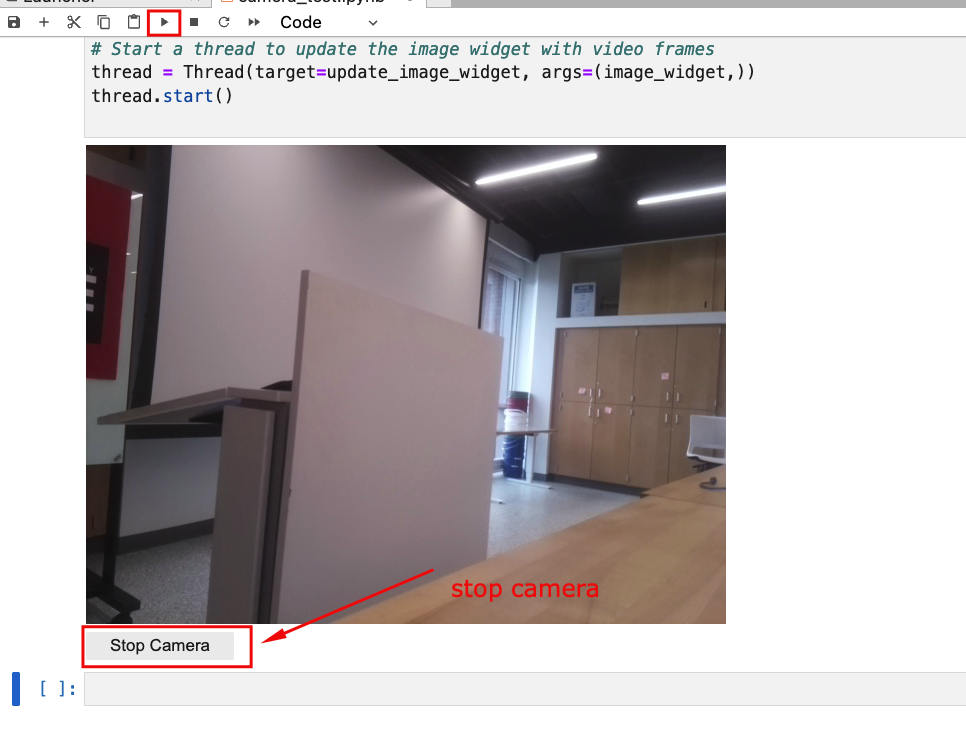
Here is an example of the camera running in a Jupyter notebook:
Code Implementation
Complete Camera Capture Code
# Import necessary libraries
import cv2
from IPython.display import display
import ipywidgets as widgets
from threading import Thread

# Create a global variable to control the running state of the video capture loop
running = True

# Function to continuously update the image widget with video frames
def update_image_widget(image_widget):
    global running
    # Open a connection to the RPi camera
    cap = cv2.VideoCapture(0)  # 0 is usually the default camera
    while running:
        # Capture frame-by-frame
        ret, frame = cap.read()
        if not ret:
            continue

        # Convert the frame to JPEG format
        _, frame_jpeg = cv2.imencode('.jpeg', frame)

        # Update the image widget with the new frame
        image_widget.value = frame_jpeg.tobytes()

    # Release the camera resource
    cap.release()

# Function to stop the video capture loop
def stop_camera(button):
    global running
    running = False
    stop_button.disabled = True  # Disable the stop button once clicked

# Create an Image widget to display video frames
image_widget = widgets.Image(format='jpeg', width=640, height=480)

# Create a Button widget to stop the video capture
stop_button = widgets.Button(description="Stop Camera")

# Set the button's on-click event to call the stop_camera function
stop_button.on_click(stop_camera)

# Display the image widget and the stop button
display(image_widget, stop_button)

# Start a thread to update the image widget with video frames
thread = Thread(target=update_image_widget, args=(image_widget,))
thread.start()
Code Breakdown
1. Import Libraries
import cv2
from IPython.display import display
import ipywidgets as widgets
from threading import Thread
cv2: OpenCV library for computer vision tasksdisplay: Function to render widgets in Jupyterwidgets: Interactive UI components for JupyterThread: Python threading class for concurrent execution
2. Global Control Variable
running = True
This boolean variable controls the camera capture loop. When set to False, the loop exits and the camera is released.
3. Camera Capture Function
def update_image_widget(image_widget):
    global running
    cap = cv2.VideoCapture(0)
    while running:
        ret, frame = cap.read()
        if not ret:
            continue
        _, frame_jpeg = cv2.imencode('.jpeg', frame)
        image_widget.value = frame_jpeg.tobytes()
    cap.release()
This function:
- Opens the camera using
VideoCapture(0) - Continuously reads frames in a loop
- Converts each frame to JPEG format
- Updates the widget with the new frame bytes
- Releases the camera when the loop ends
4. Stop Function
def stop_camera(button):
    global running
    running = False
    stop_button.disabled = True
This callback function is triggered when the stop button is clicked. It sets running to False to stop the capture loop.
5. Creating and Starting the Thread
thread = Thread(target=update_image_widget, args=(image_widget,))
thread.start()
target: The function to run in the threadargs: Arguments to pass to the functionstart(): Begins thread execution
Exercises
Exercise 1: Add Frame Rate Display
Modify the code to calculate and display the frames per second (FPS) on each frame.
Hint: Use cv2.putText() and track time between frames.
Exercise 2: Add Image Processing
Add a grayscale conversion option with a toggle button.
# Hint: Use cv2.cvtColor(frame, cv2.COLOR_BGR2GRAY)
Exercise 3: Save Snapshot
Add a button that saves the current frame as an image file when clicked.
Hint: Use cv2.imwrite('snapshot.jpg', frame)
Troubleshooting
| Issue | Solution |
|---|---|
| Camera not found | Check if camera is connected and try different index (0, 1, 2) |
| Black frames | Ensure camera is not being used by another application |
| Slow performance | Reduce frame resolution or add frame skip |
Summary
In this lab, you learned:
- How to use OpenCV to capture video from a Raspberry Pi camera
- How to use Python threading to run camera capture in the background
- How to create interactive widgets in Jupyter notebooks
- How to properly manage camera resources