Lab 3: AWS Greengrass with Docker
Introduction
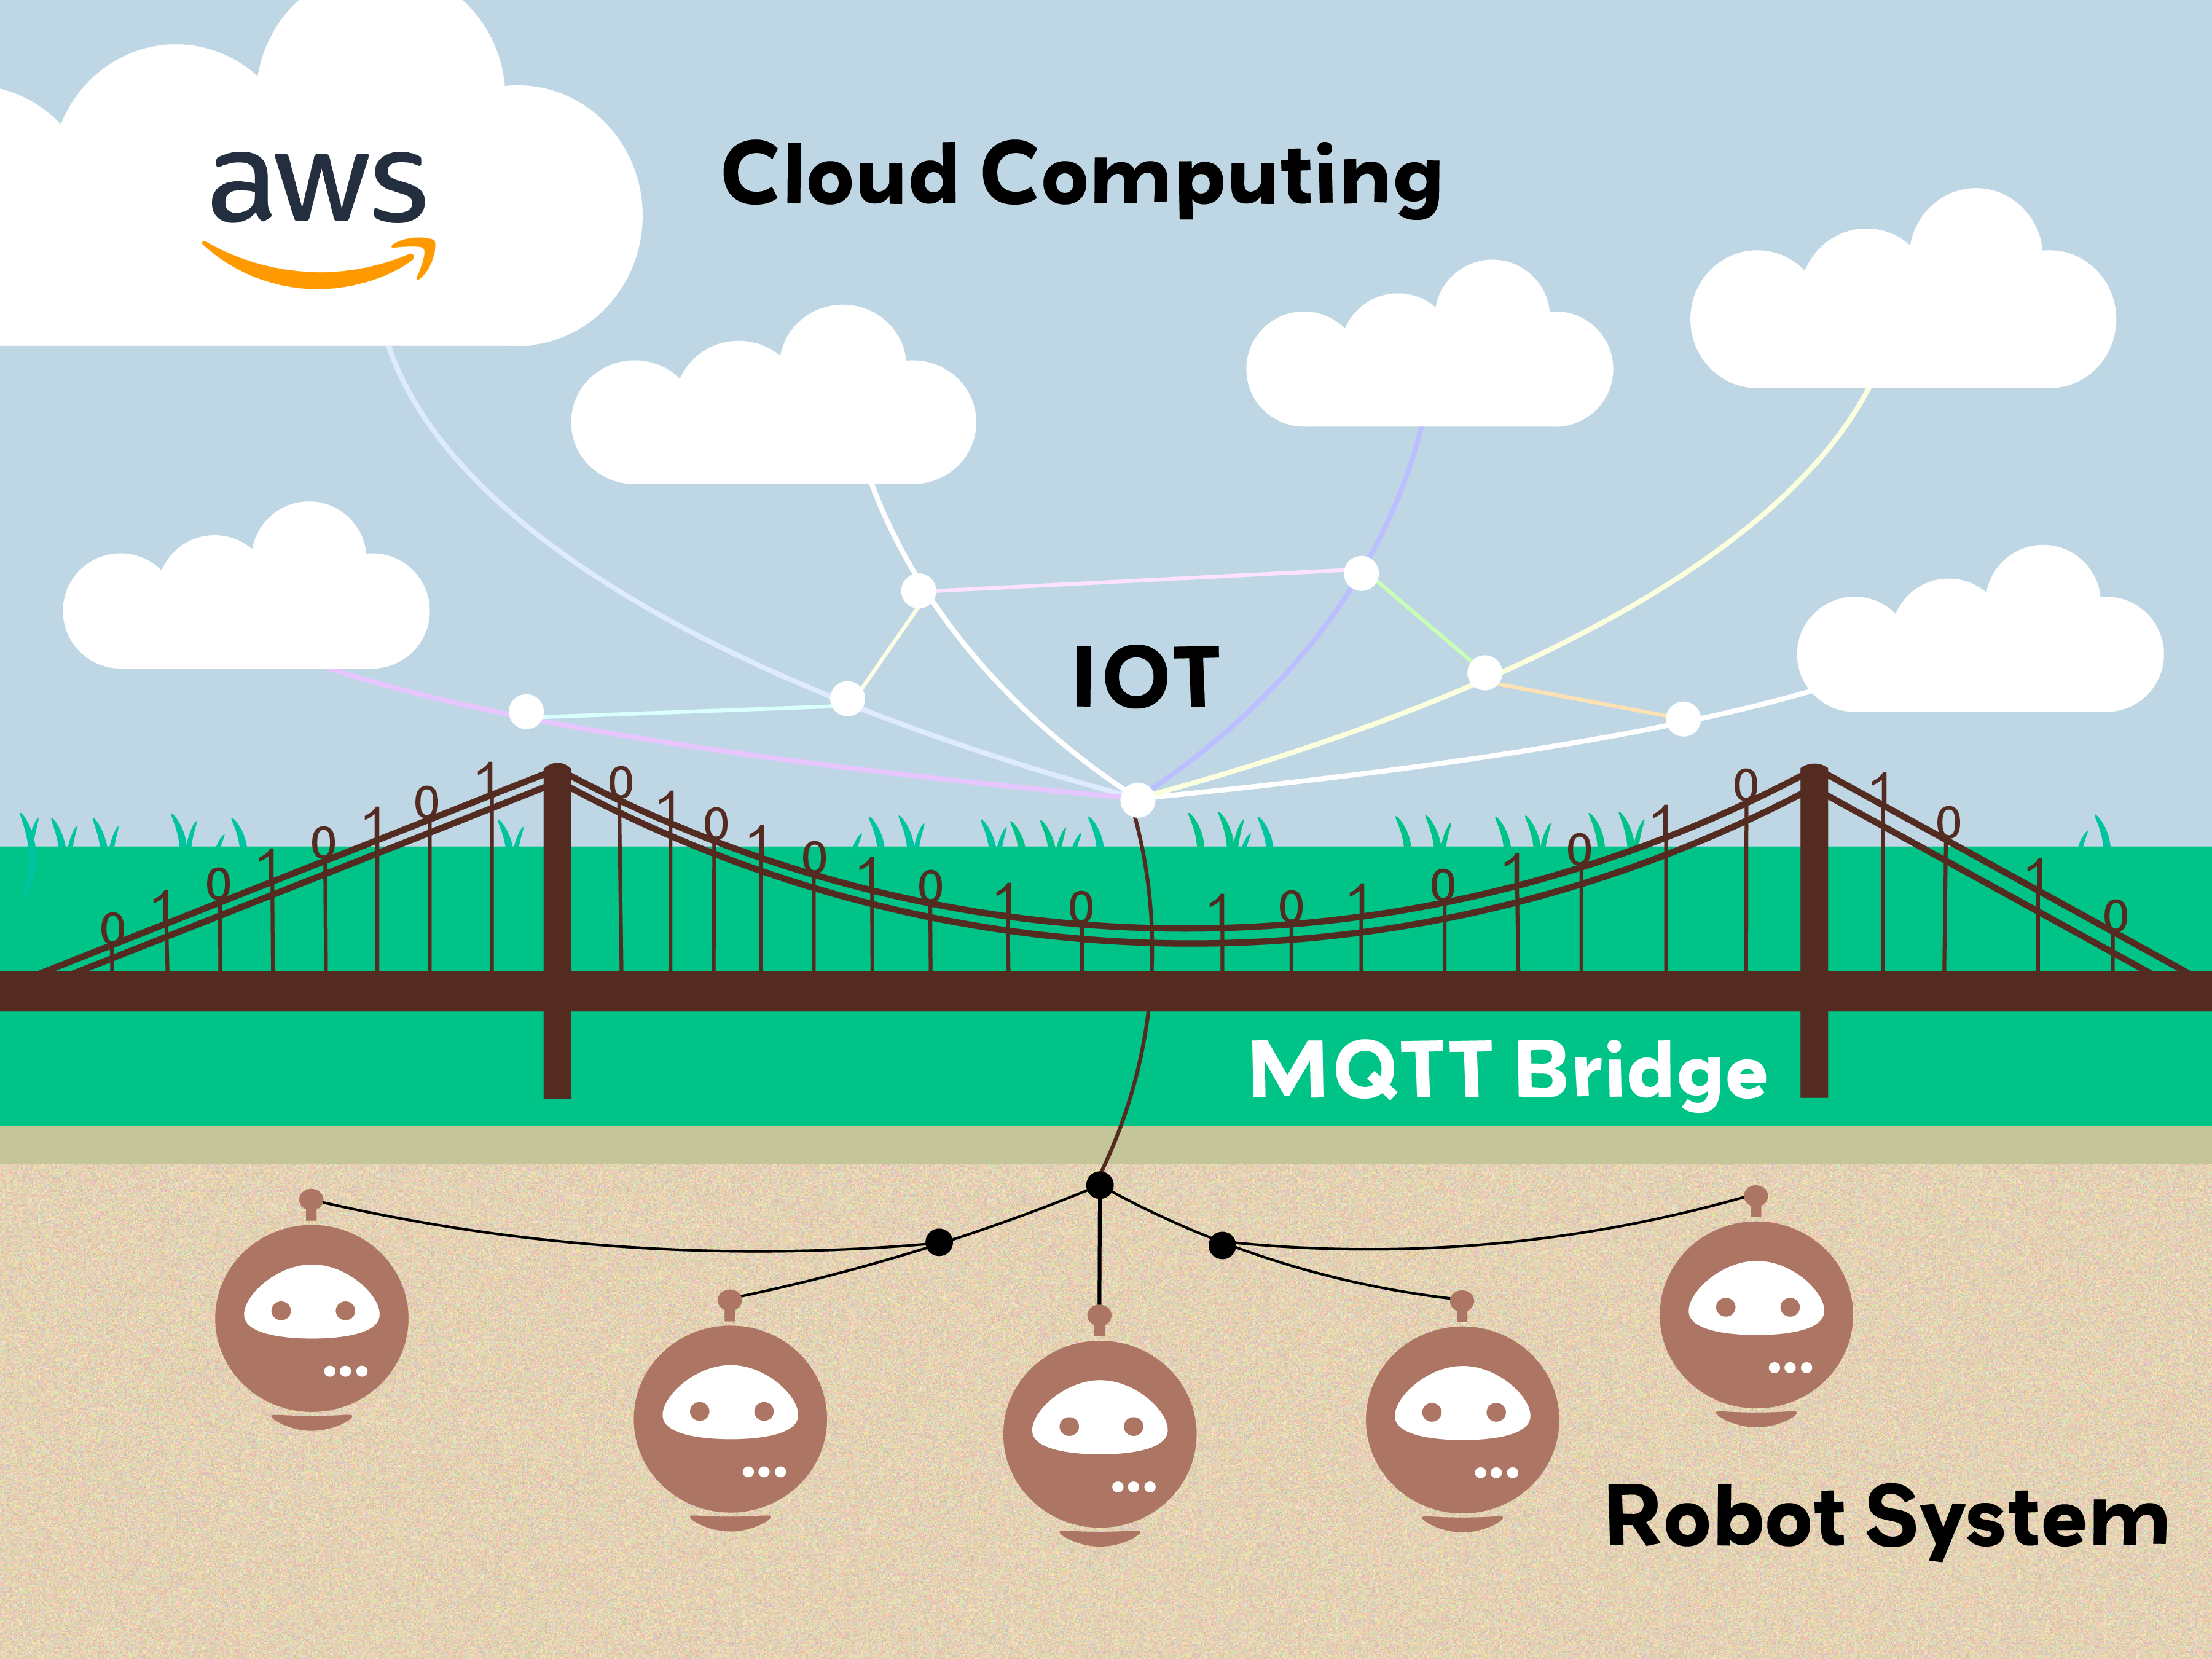
In this lab, you will learn how to deploy ROS2 Docker containers to Mini Pupper using AWS IoT Greengrass. This enables cloud-connected robotics where you can remotely control your robot through AWS IoT MQTT topics.
Prerequisites
- Completed Lab 1 and Lab 2 (Docker Fundamentals and ROS2 in Docker)
- AWS Academy account
- Mini Pupper with Ubuntu installed
- WSL or Cloud9 instance for building Docker images
Architecture Overview
┌─────────────────────────────────────────────────────────────────────┐
│                         AWS Cloud                                   │
│  ┌─────────────┐    ┌─────────────┐    ┌─────────────────────────┐ │
│  │     S3      │    │     ECR     │    │      IoT Core           │ │
│  │  (Config)   │    │   (Images)  │    │  ┌─────────────────┐    │ │
│  └──────┬──────┘    └──────┬──────┘    │  │  Greengrass     │    │ │
│         │                  │           │  │  Component      │    │ │
│         └──────────┬───────┘           │  └────────┬────────┘    │ │
│                    │                   │           │             │ │
│                    ▼                   │           │             │ │
│              ┌─────────────┐           │  ┌────────▼────────┐    │ │
│              │ Deployment  │◄──────────┼──│     MQTT        │    │ │
│              └──────┬──────┘           │  │   Topics        │    │ │
│                     │                  │  └─────────────────┘    │ │
└─────────────────────┼──────────────────┴─────────────────────────┘
                      │
                      ▼ WiFi
┌─────────────────────────────────────────────────────────────────────┐
│                      Mini Pupper                                    │
│  ┌───────────────────────────────────────────────────────────────┐ │
│  │                 Greengrass Core                               │ │
│  │  ┌─────────────────────────────────────────────────────────┐ │ │
│  │  │              Docker Container                           │ │ │
│  │  │  ┌─────────────┐    ┌─────────────┐                    │ │ │
│  │  │  │ ROS2 Humble │    │ Music/Dance │                    │ │ │
│  │  │  │ Environment │    │   Nodes     │                    │ │ │
│  │  │  └─────────────┘    └─────────────┘                    │ │ │
│  │  └─────────────────────────────────────────────────────────┘ │ │
│  └───────────────────────────────────────────────────────────────┘ │
└─────────────────────────────────────────────────────────────────────┘
AWS Services Used
| Service | Purpose |
|---|---|
| ECR (Elastic Container Registry) | Store Docker images for Mini Pupper |
| S3 (Simple Storage Service) | Store configuration files and docker-compose.yaml |
| IoT Core | Manage things, thing groups, and MQTT communication |
| Greengrass | Deploy and manage components on edge devices |
Part 1: WSL/Cloud9 Setup
Step 1: Clone the Repository
cd ~
git clone http://github.com/lbaitemple/mangdang
If you already have the mangdang folder, update it:
cd ~/mangdang
git pull
Step 2: Install Docker in WSL
cd ~/mangdang
bash ./docker_wsl.sh
exit
Restart WSL:
wsl --terminate ubuntu-22.04
wsl --shutdown
If Docker is not working properly:
sudo usermod -aG docker $USER
newgrp docker
ls -l /var/run/docker.sock
sudo chmod 666 /var/run/docker.sock
sudo systemctl restart docker
sudo systemctl status docker
Step 3: Setup ARM Cross-Compilation
Login to WSL and install cross-compilation tools:
wsl -d ubuntu-22.04
sudo apt-get install -y qemu-user-static binfmt-support
sudo apt install docker-compose -y
docker run --rm --privileged multiarch/qemu-user-static --reset -p yes
Step 4: Build Docker Image
cd ~/
git clone -b ros2-dev-music https://github.com/lbaitemple/mini_pupper_ros_aws/ mini_pupper_ros_music
cd mini_pupper_ros_music/
docker-compose build
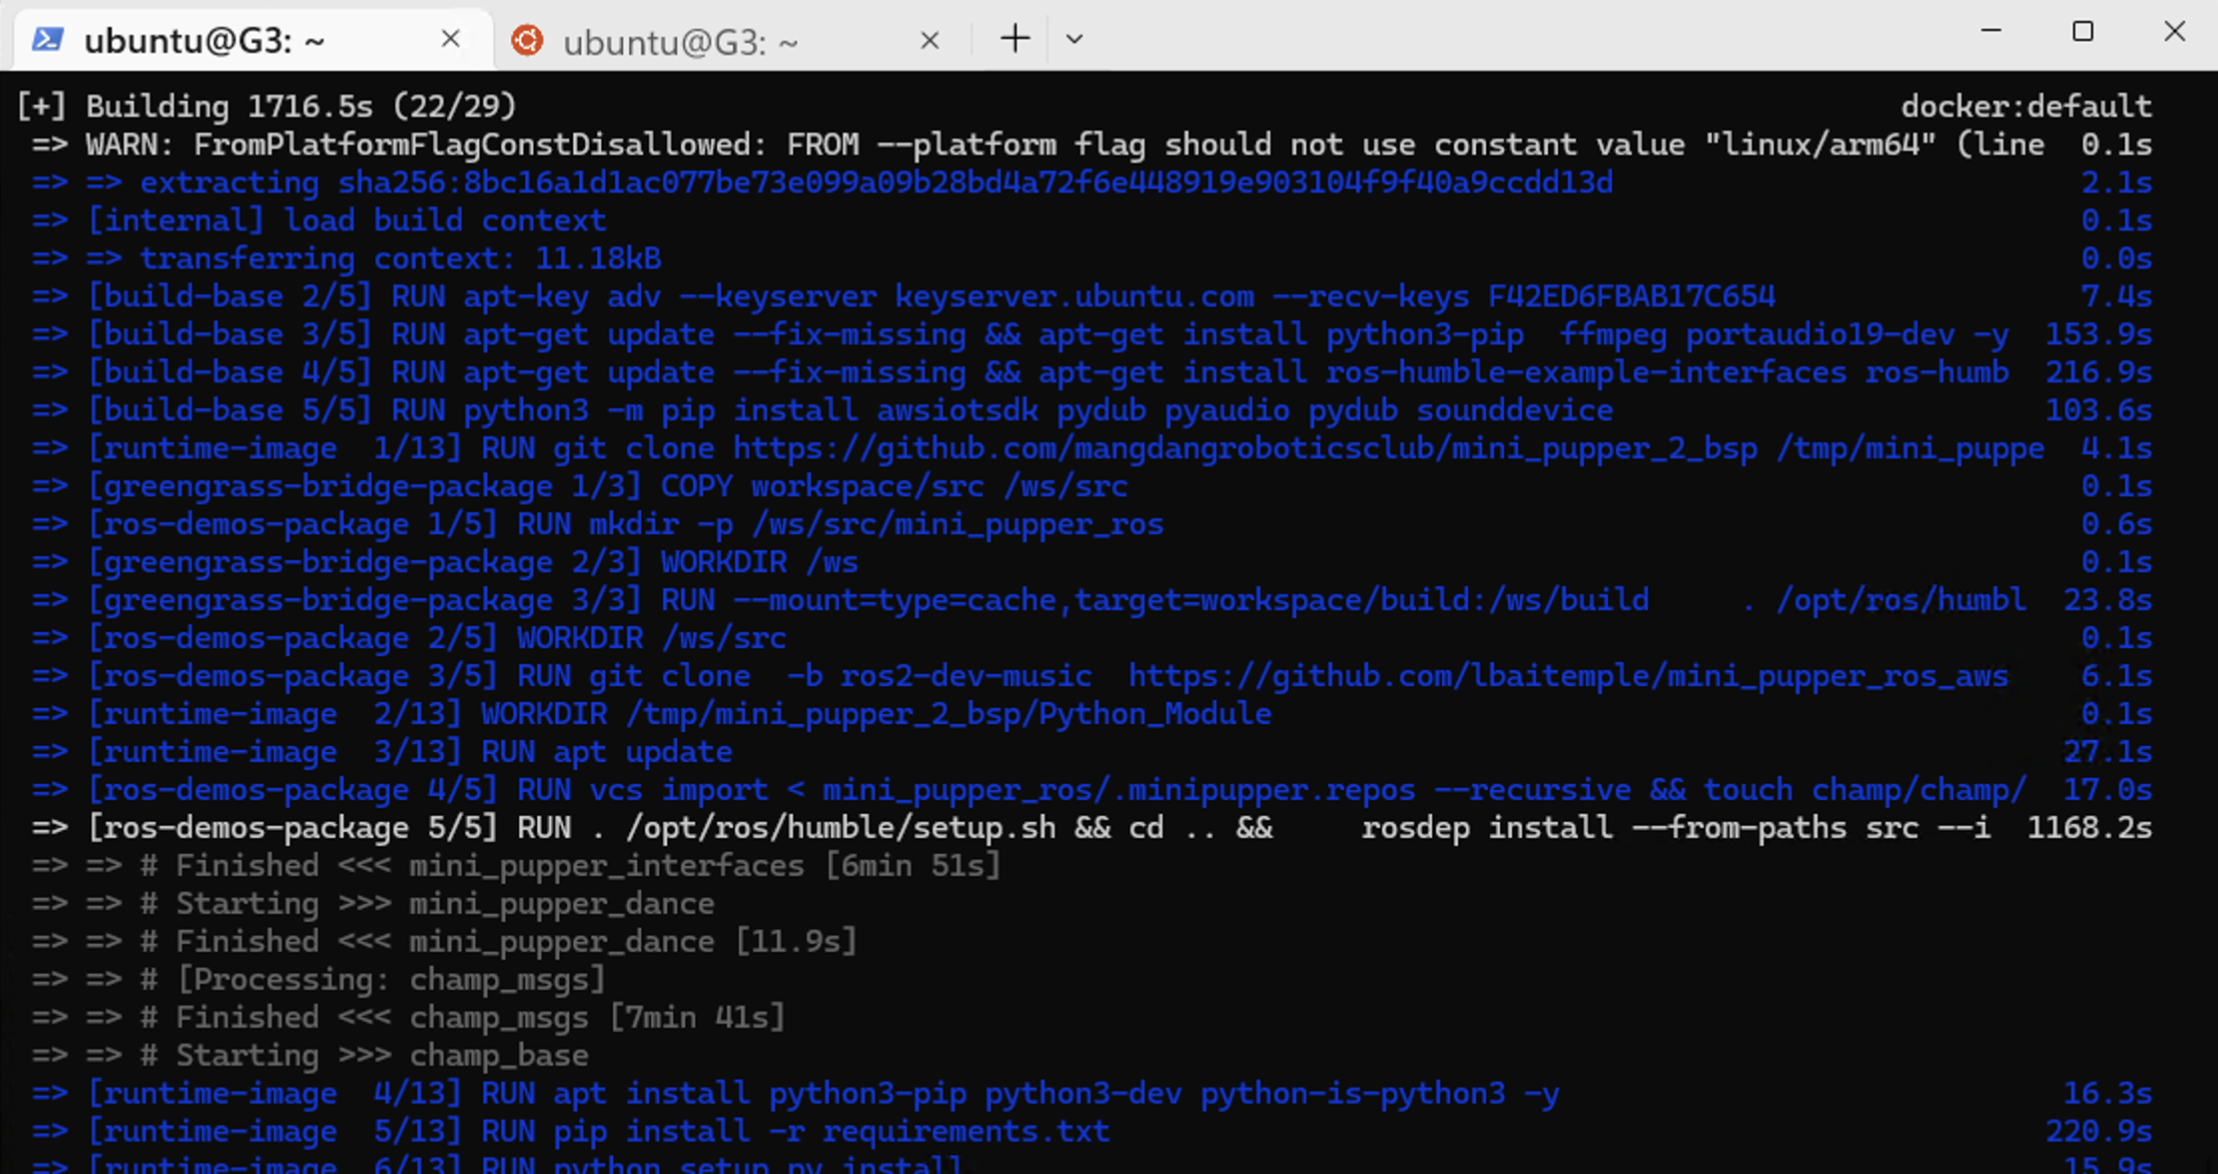
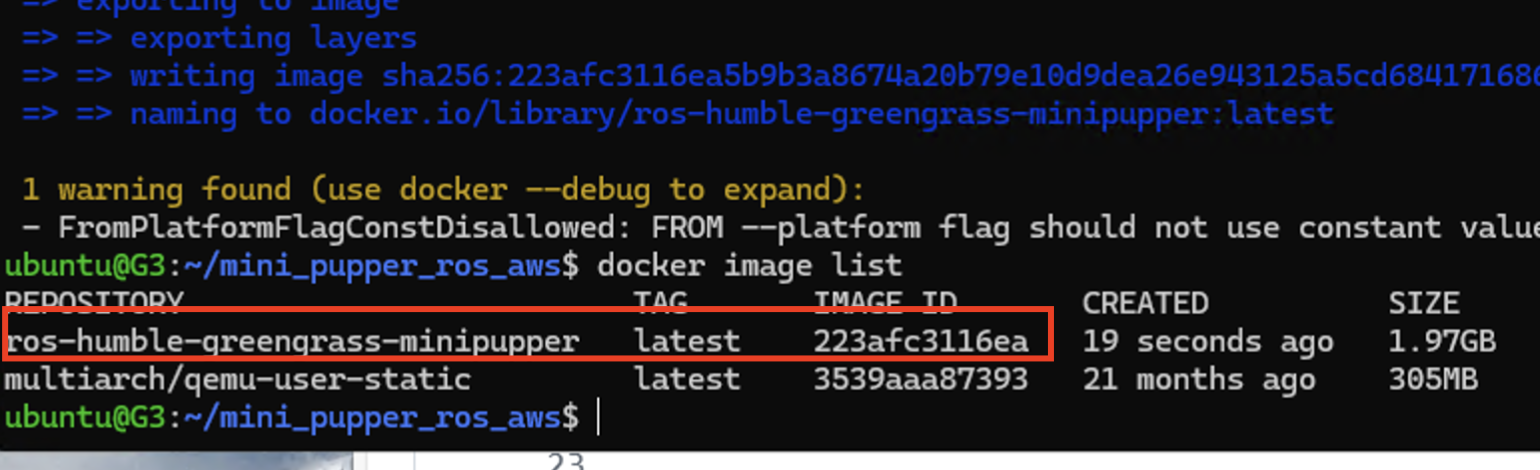
Verify the image was created:
docker image list
You should see ros-humble-greengrass-music-minipupper:latest
Alternative: Download Pre-built Image
To save time, you can download a pre-built image:
cd ~
aws s3 cp s3://ece34322024lb/music.tar music.tar --no-sign-request
docker load -i music.tar
docker image list
Step 5: Install AWS CLI
sudo apt install zip -y
curl "https://awscli.amazonaws.com/awscli-exe-linux-x86_64.zip" -o "awscliv2.zip"
unzip awscliv2.zip
sudo ./aws/install
aws --version
If you encounter SSL errors:
pip install urllib3==1.26.5
Part 2: AWS Credentials Setup
On AWS Academy
- Log into AWS Academy
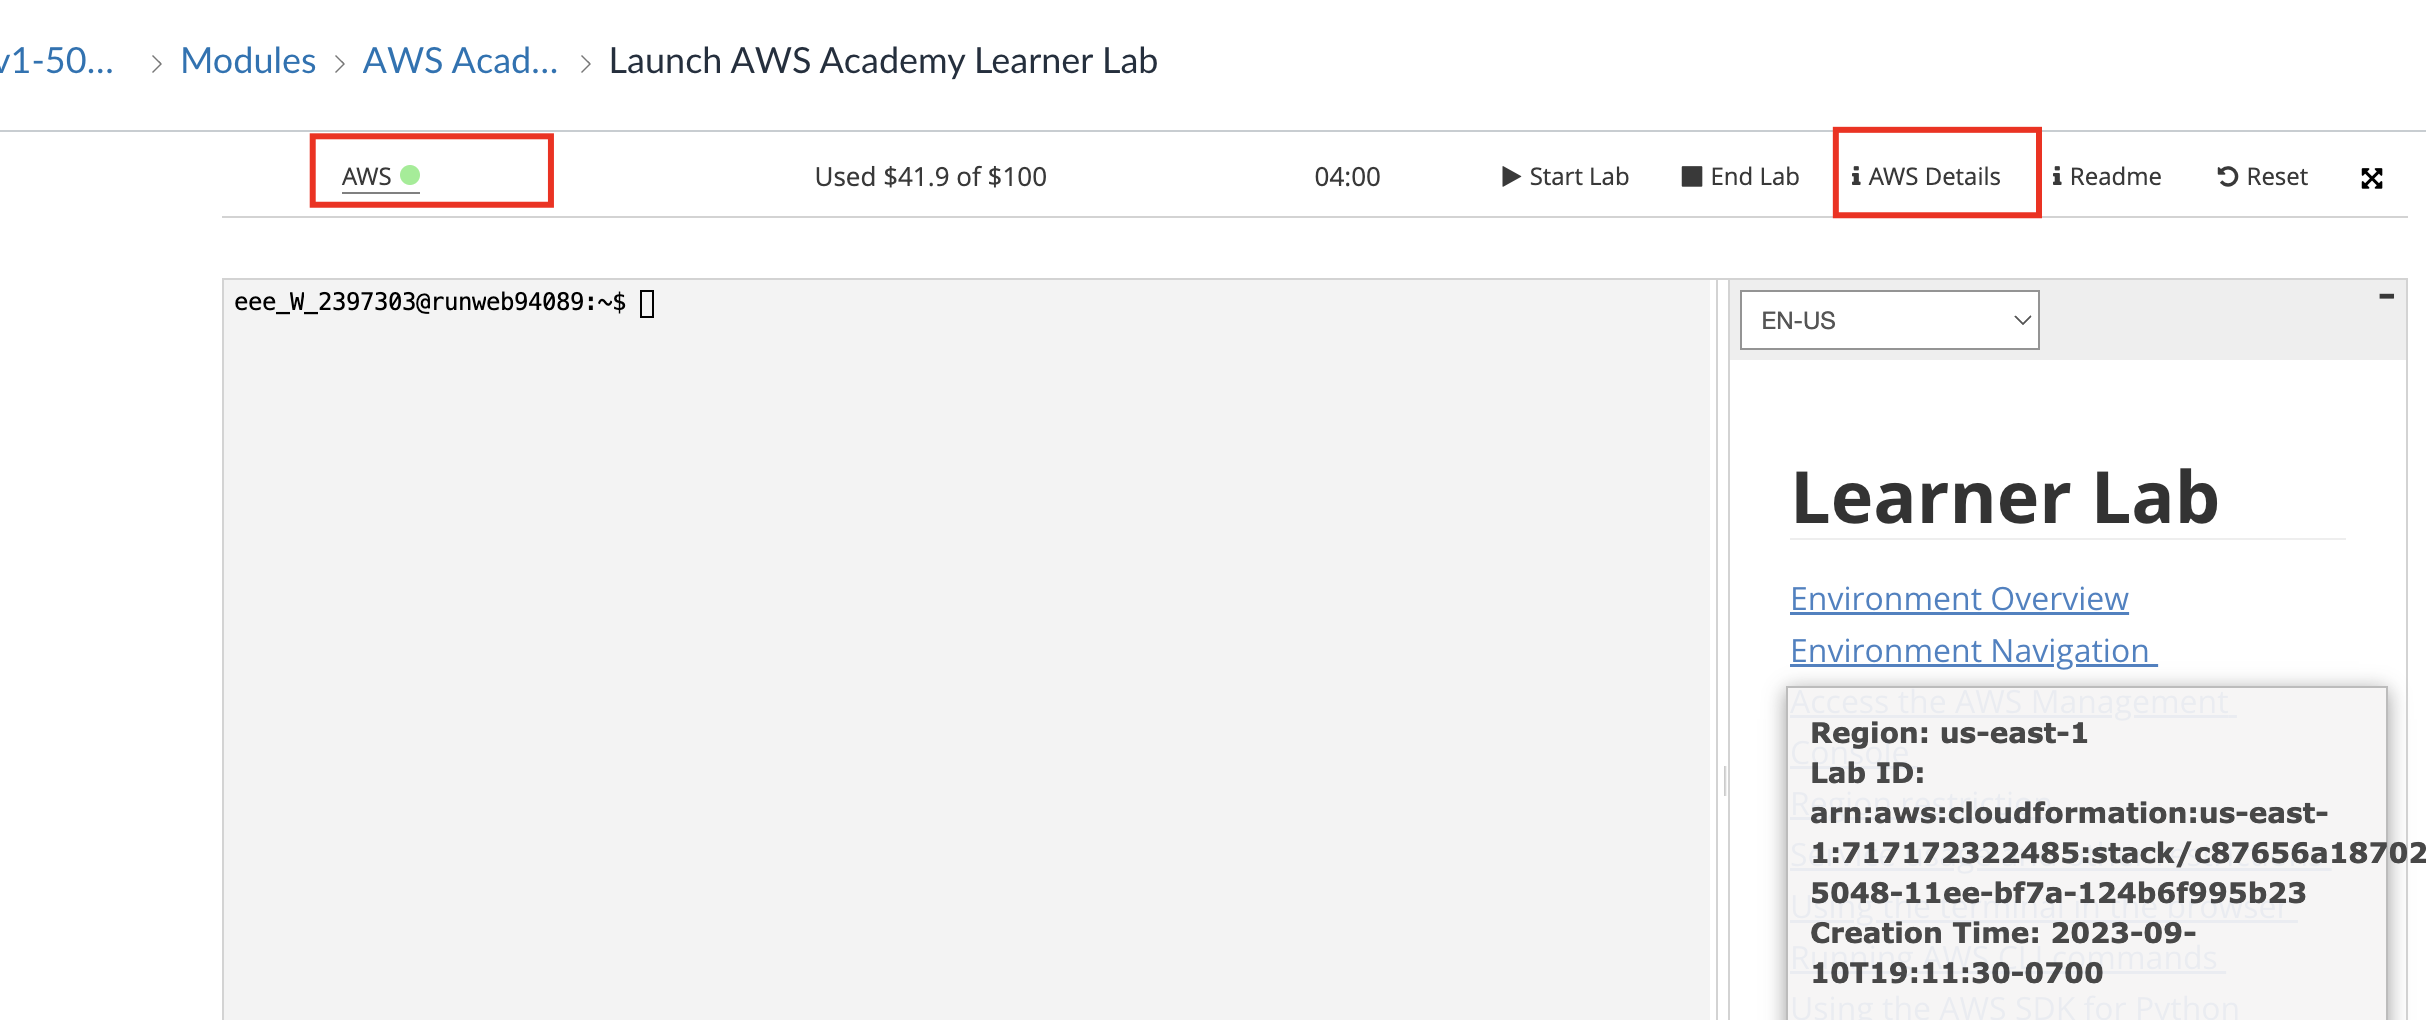
- Click on “AWS Details”
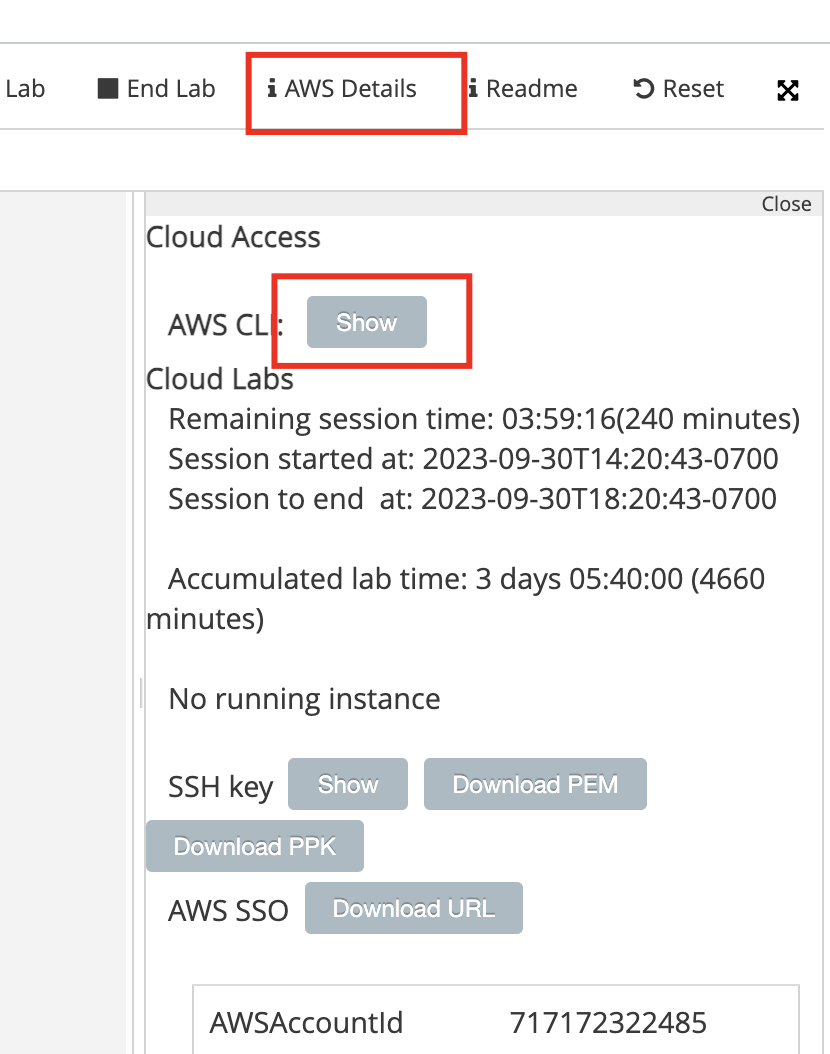
- Find and copy the login credentials
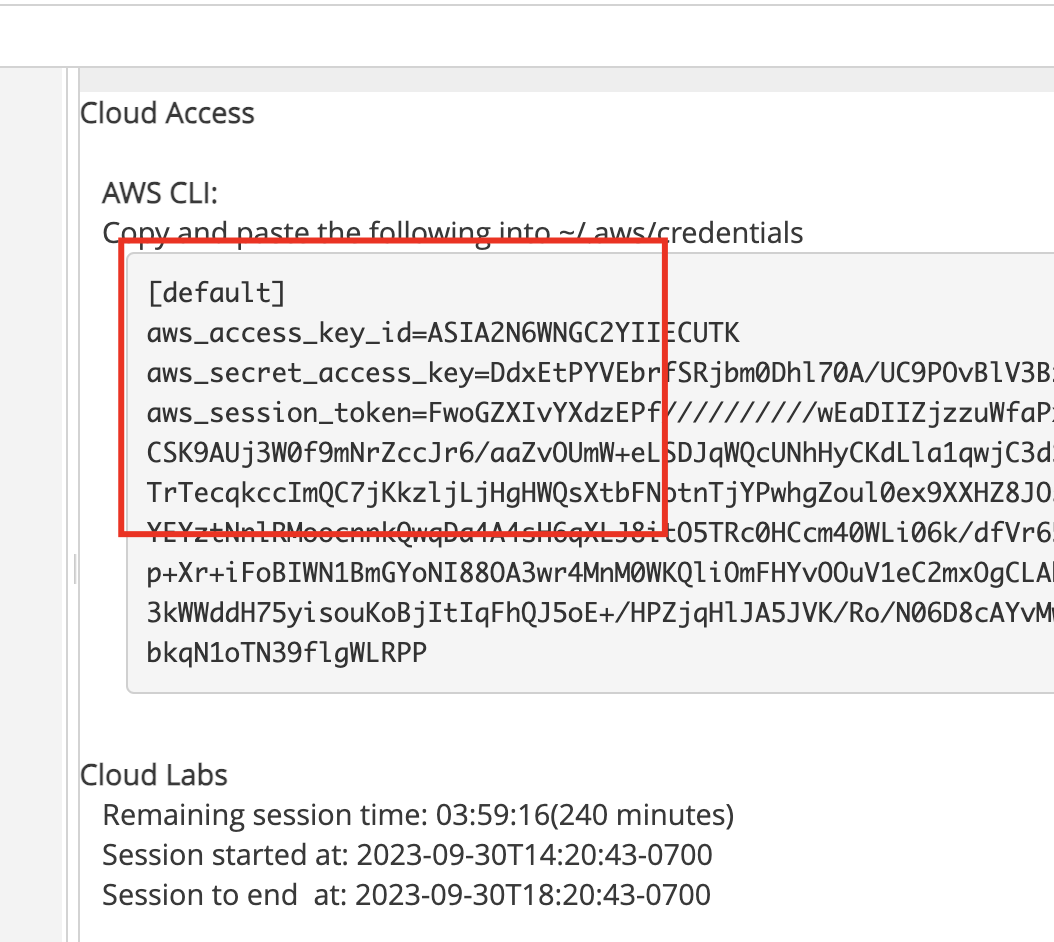
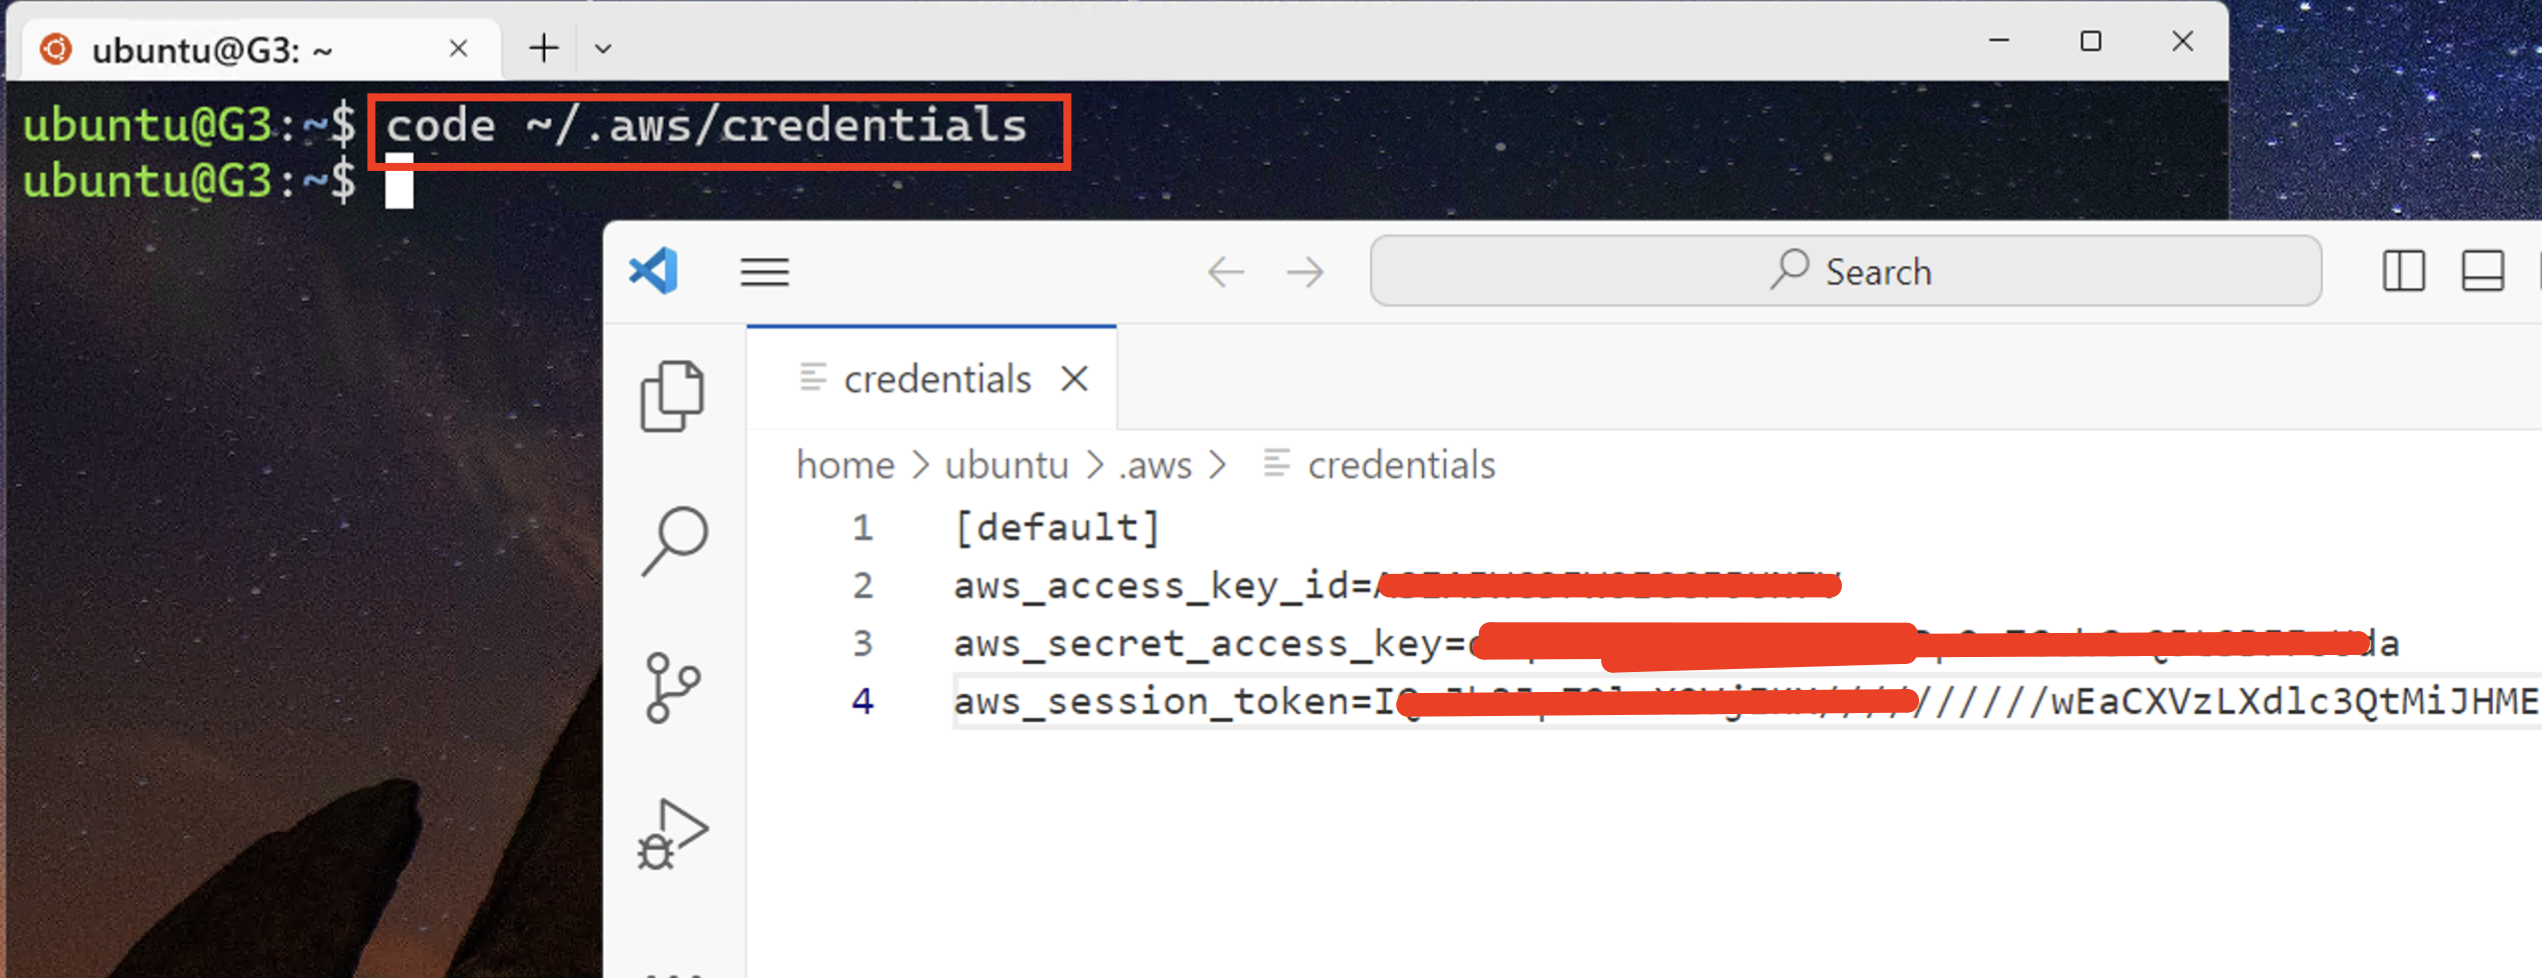
On WSL
Create the credentials file:
mkdir -p ~/.aws
touch ~/.aws/credentials
Paste the credentials from AWS Academy into the file using VS Code or nano.
On Mini Pupper
In Jupyter Lab, add the AWS credentials when prompted in the notebook cells.
Part 3: S3 Bucket Setup
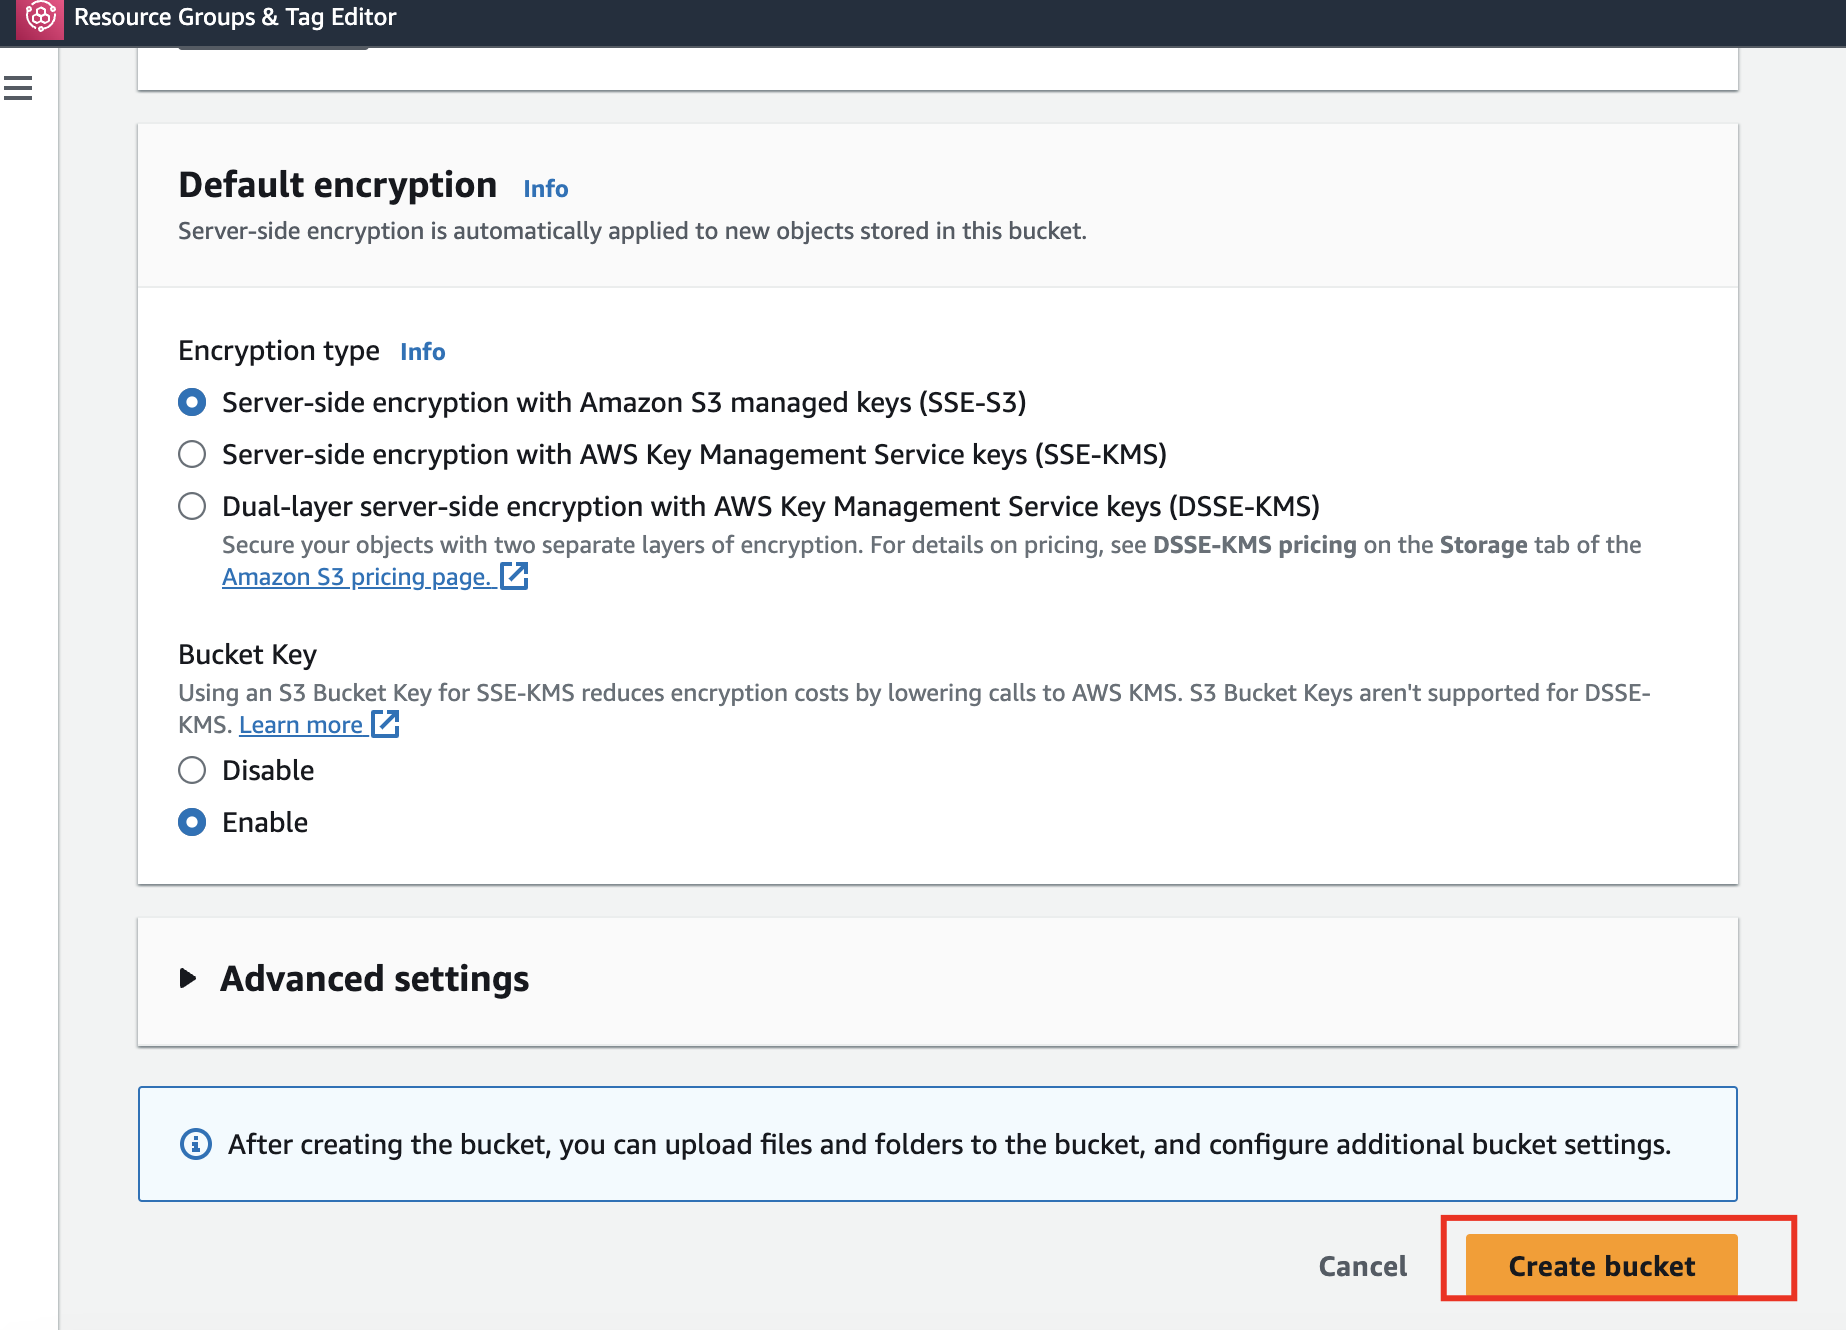
Step 1: Create S3 Bucket
- Go to AWS Console → S3
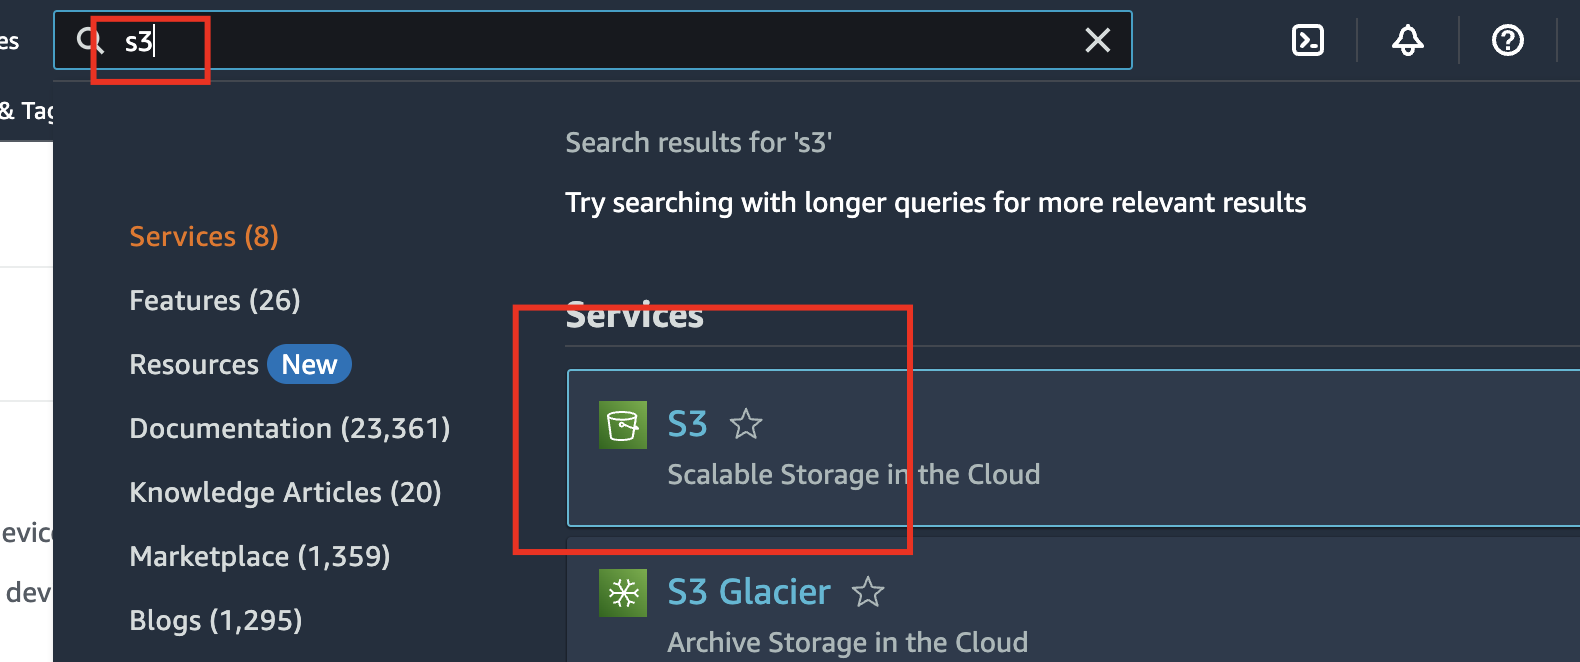
- Click “Create bucket”
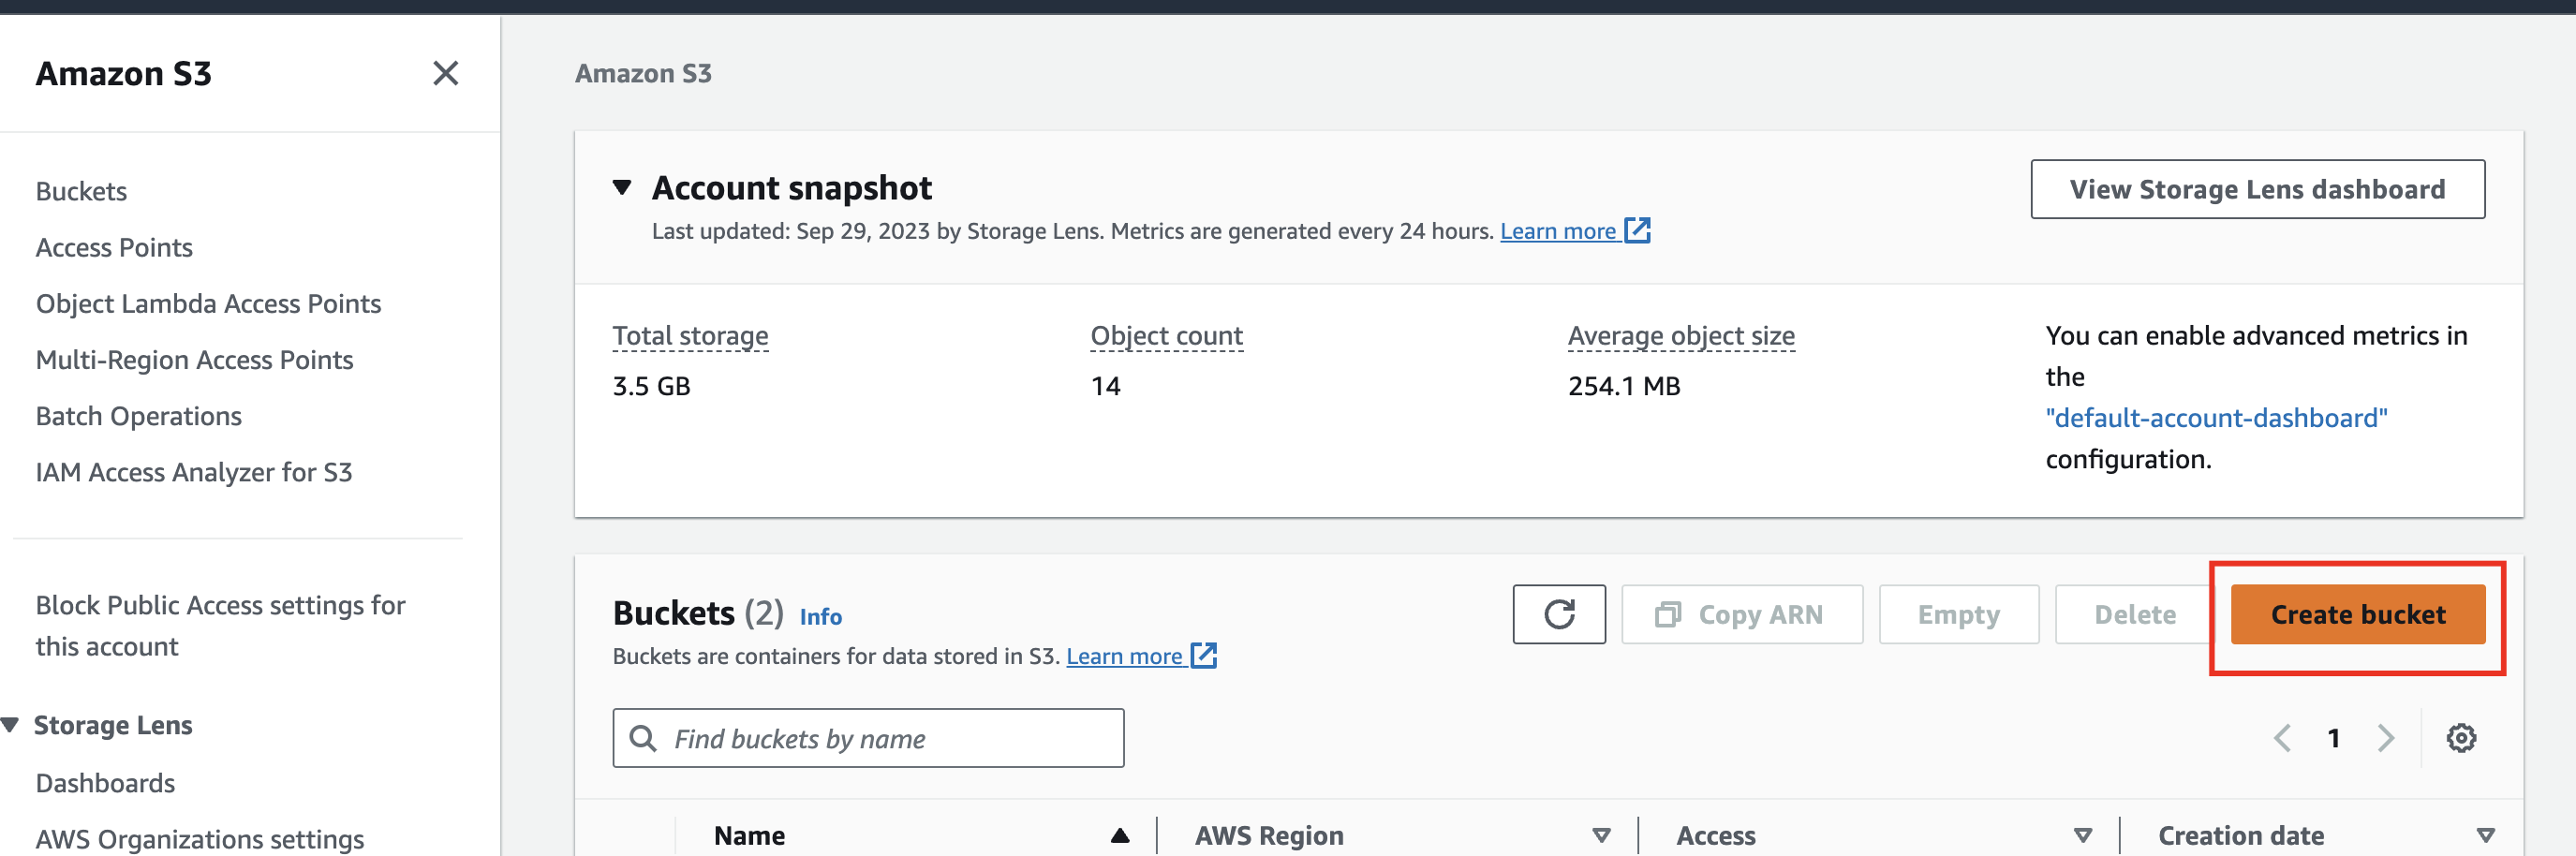
- Enter a unique bucket name (use your initials and date, e.g.,
lb-minipupper-2024)
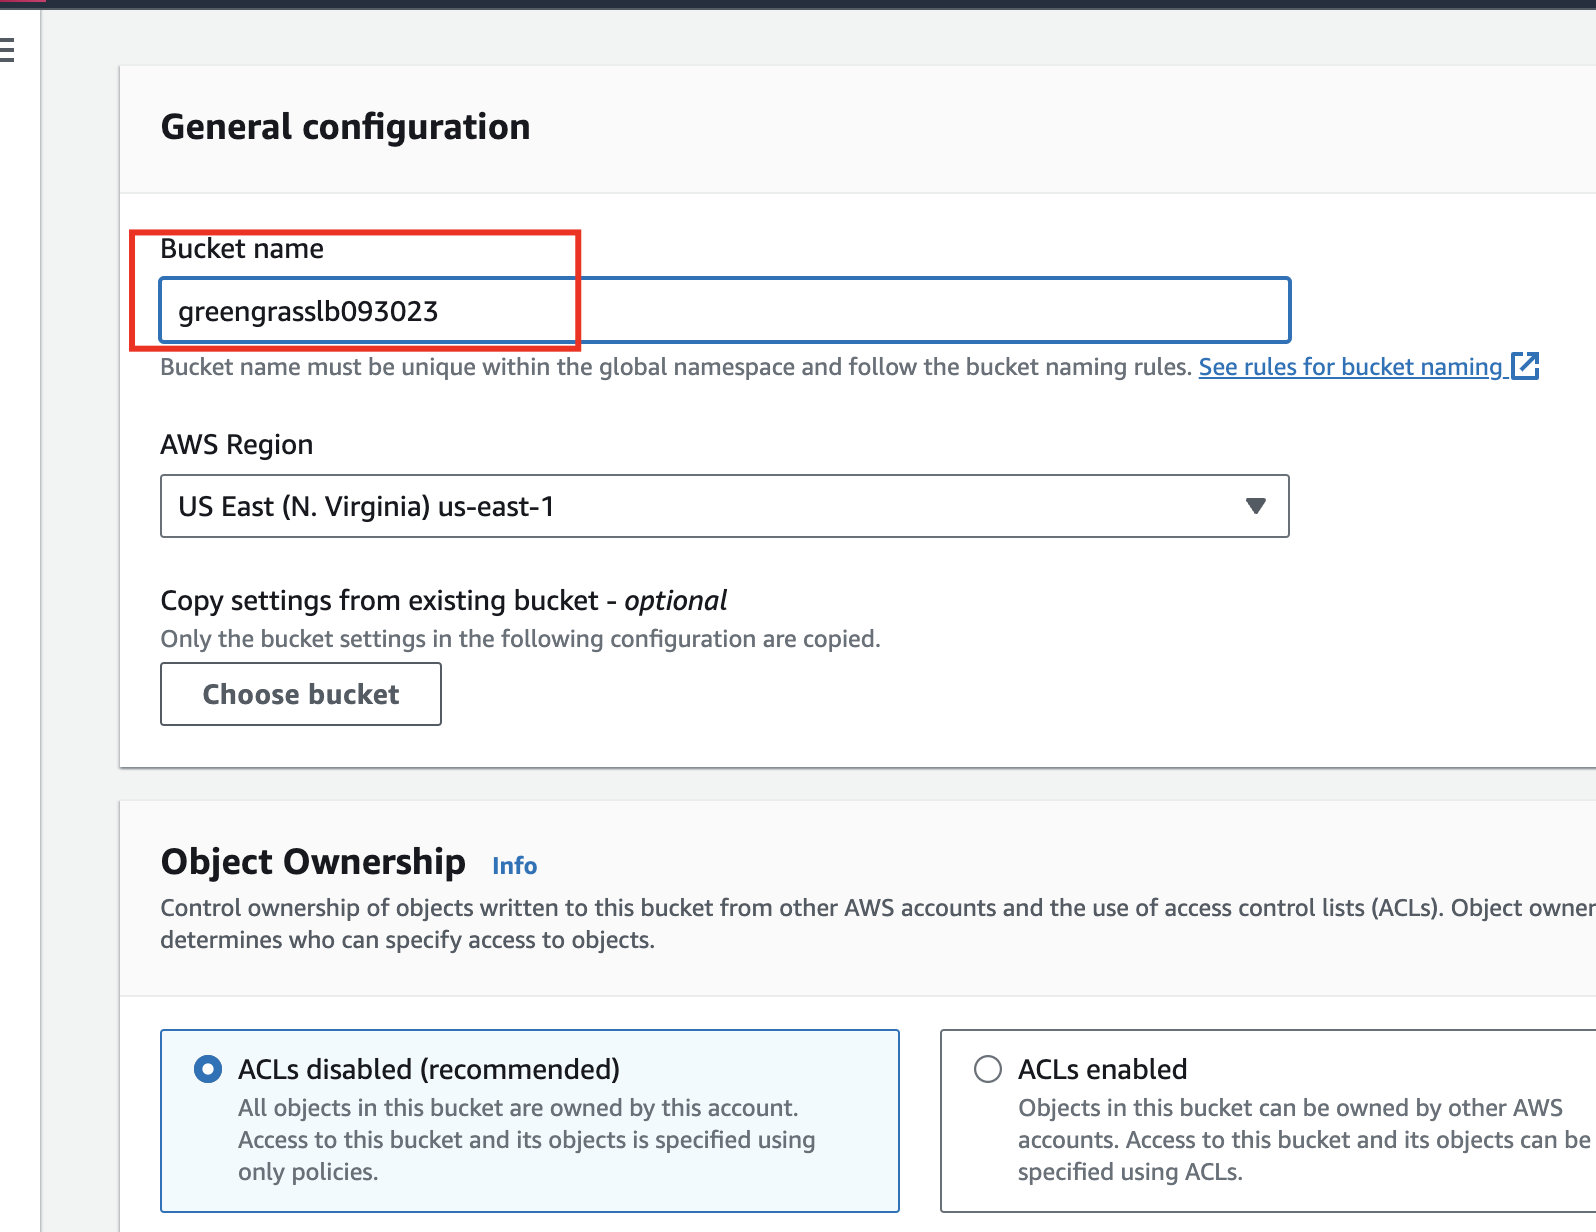
- Uncheck “Block all public access” (for this lab only)
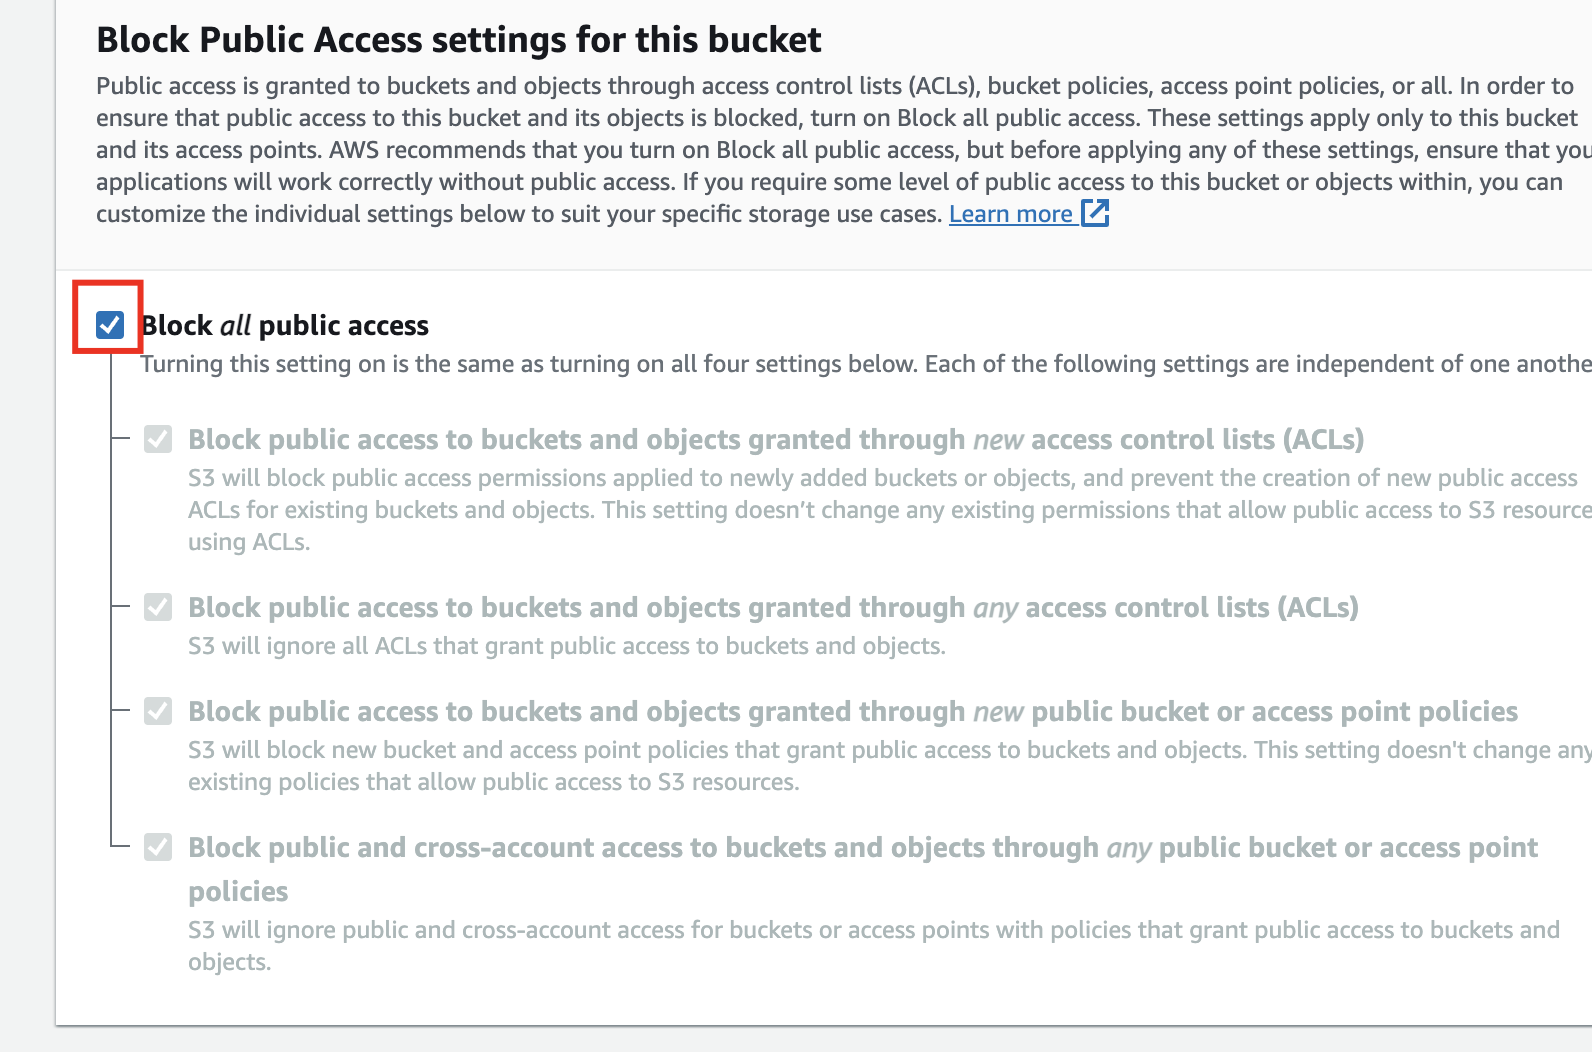
- Acknowledge the warning
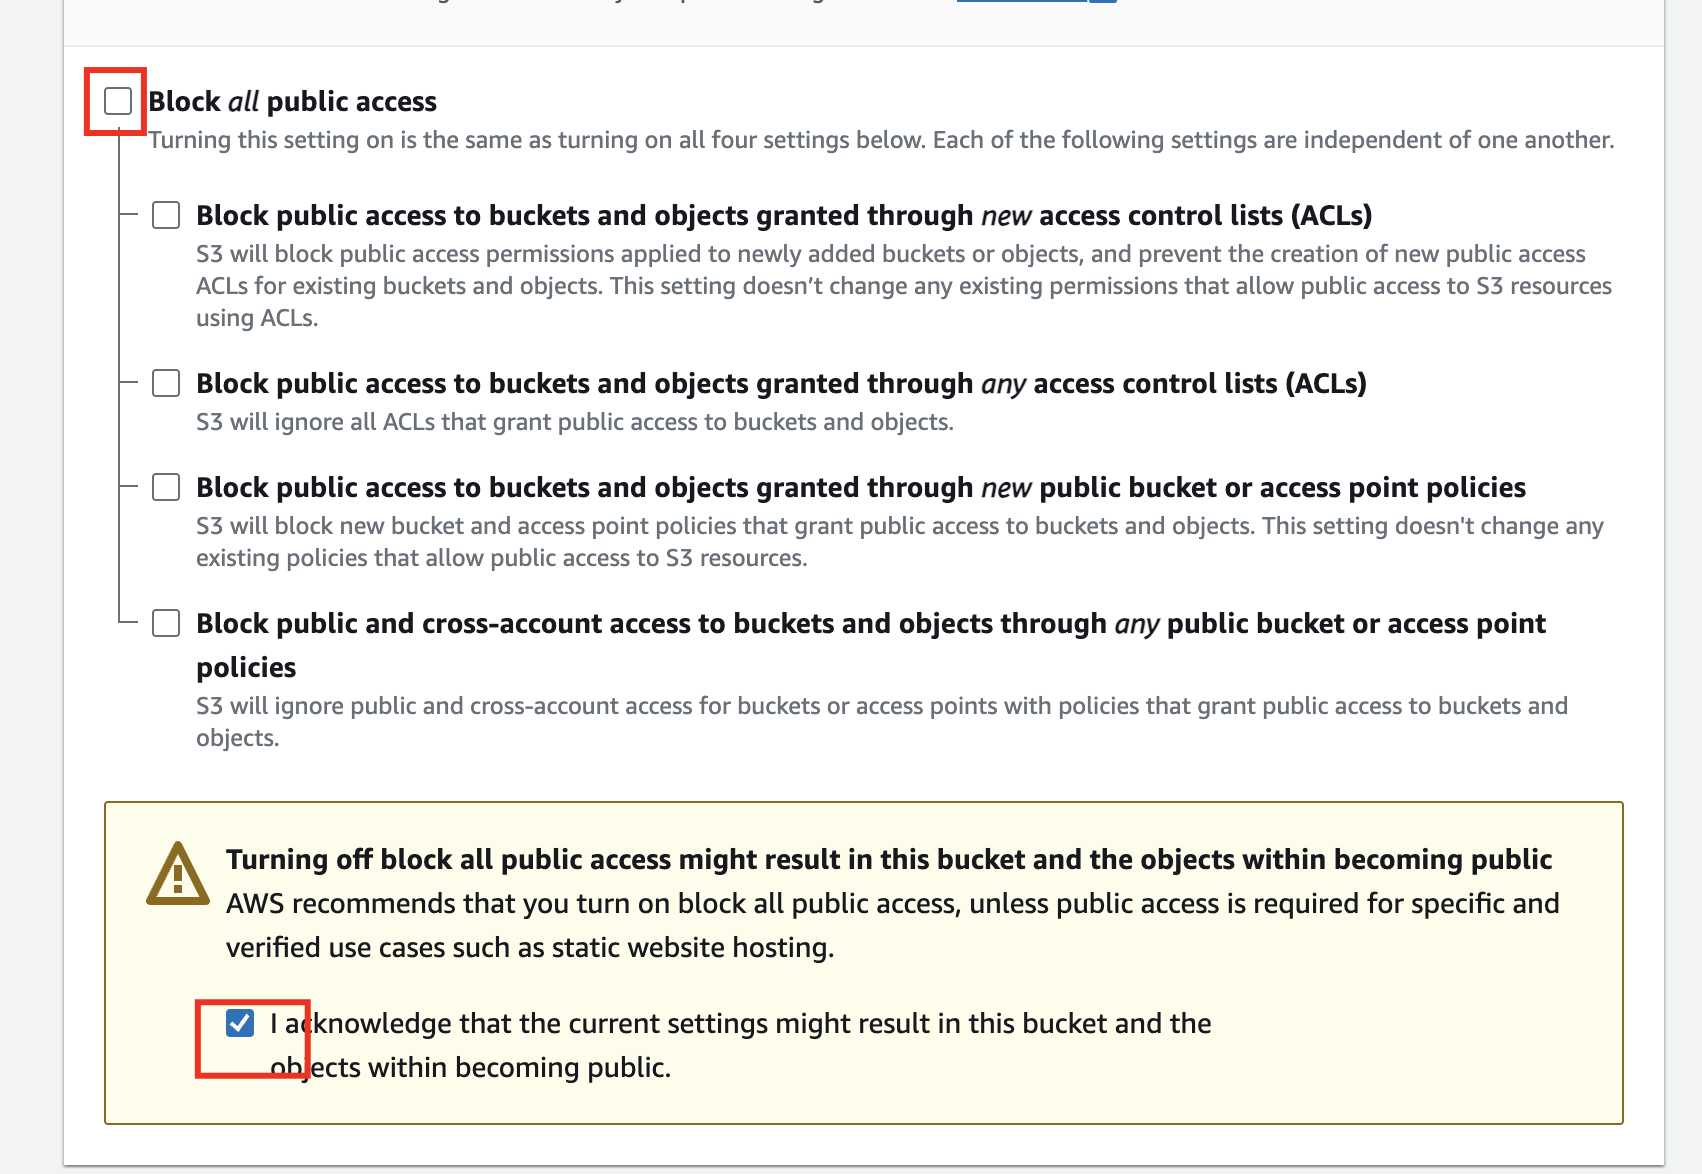
- Click “Create bucket”
Part 4: ECR Setup
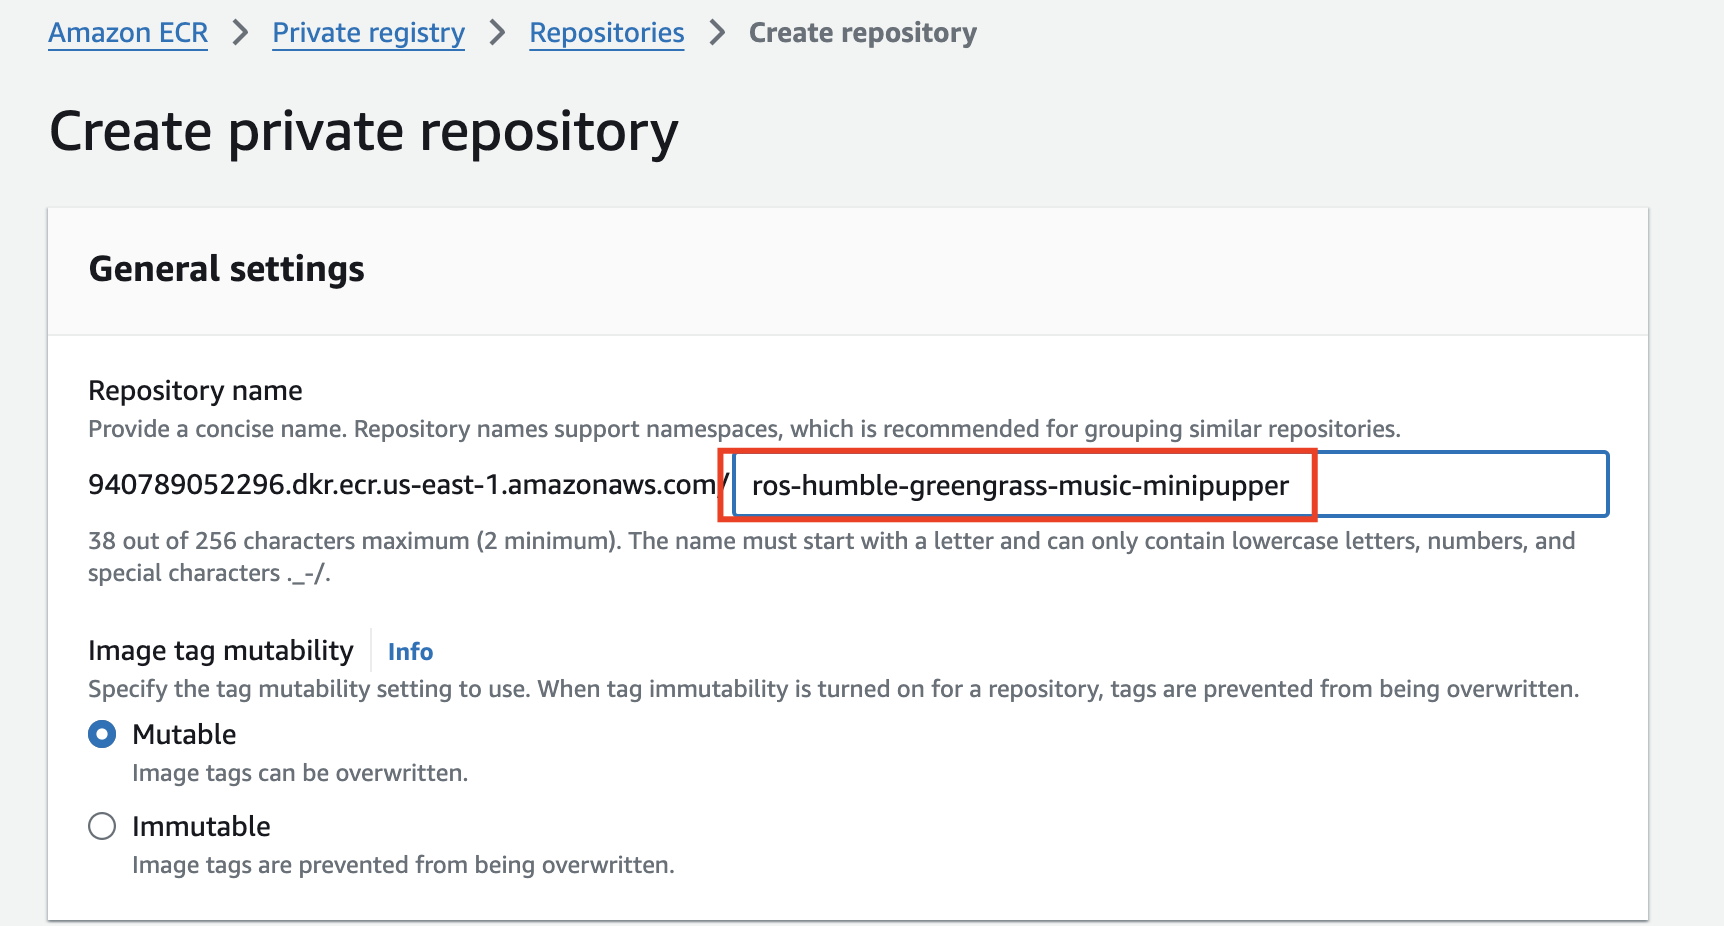
Step 1: Create ECR Repository
- Go to AWS Console → ECR
- Create a repository named:
ros-humble-greengrass-music-minipupper
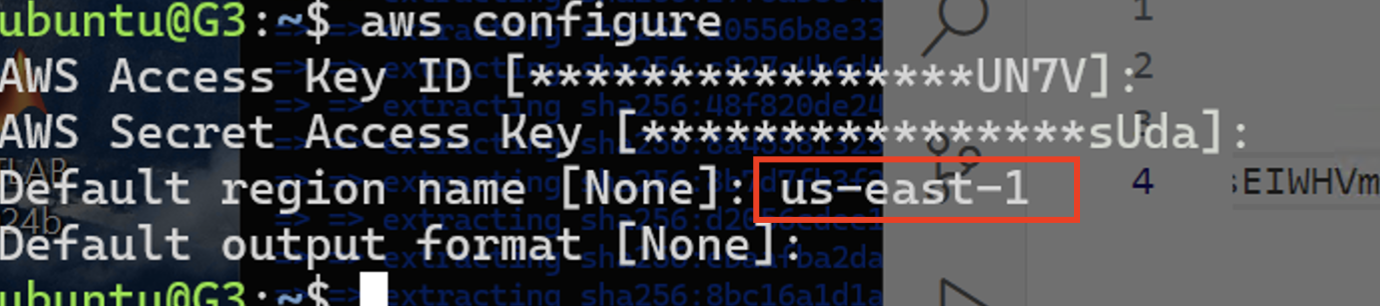
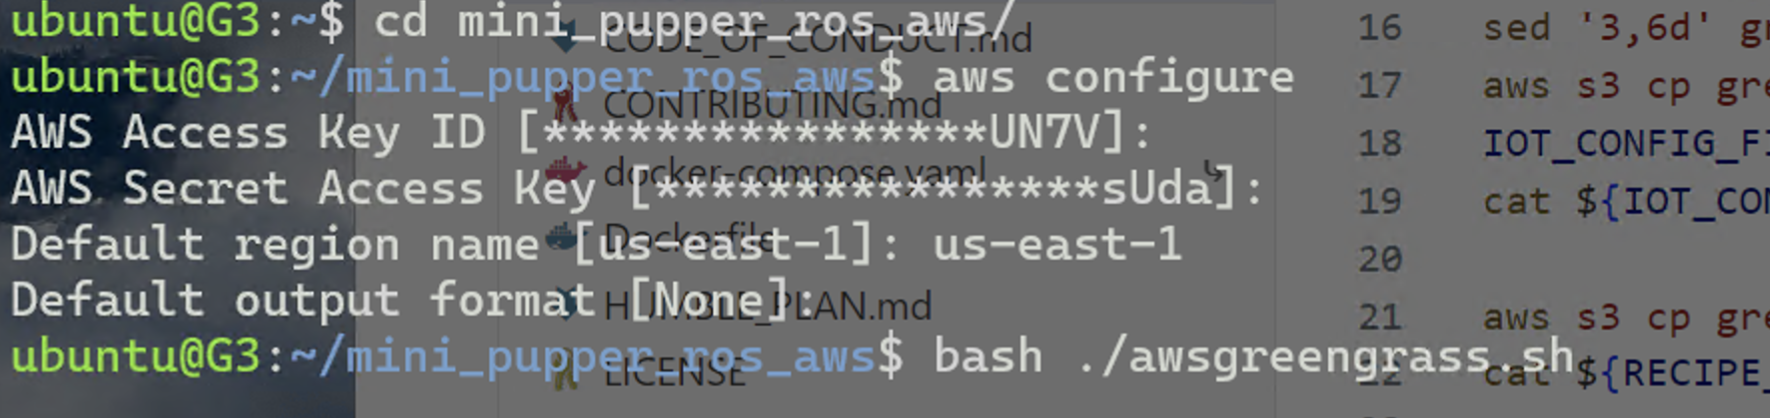
Step 2: Configure AWS CLI
aws configure
Enter your Access Key ID, Secret Access Key, and region.
Step 3: Push Image to ECR
Get the push commands from ECR console:
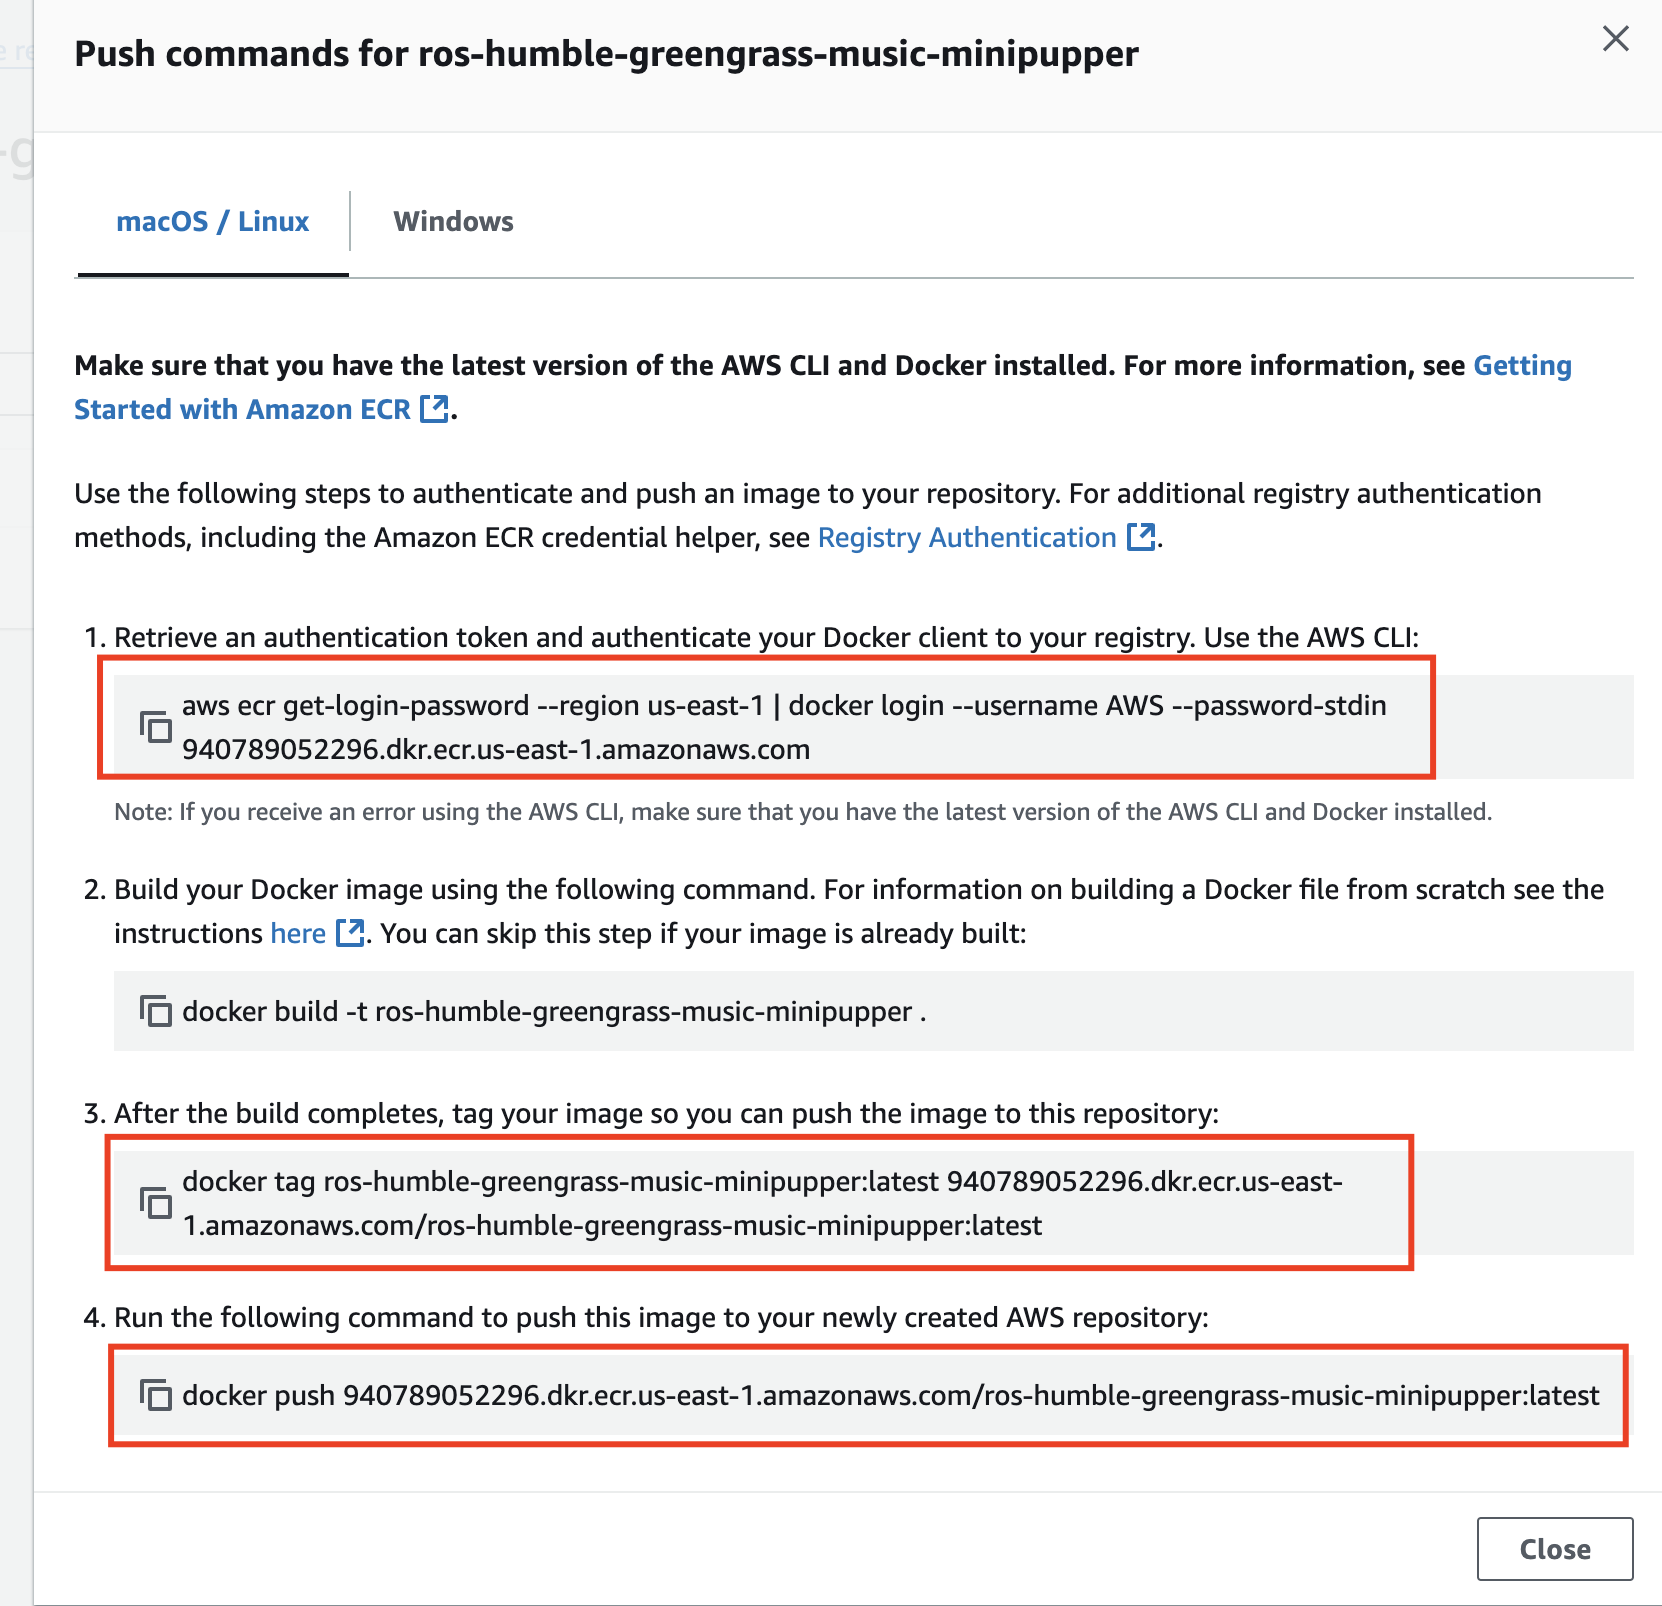
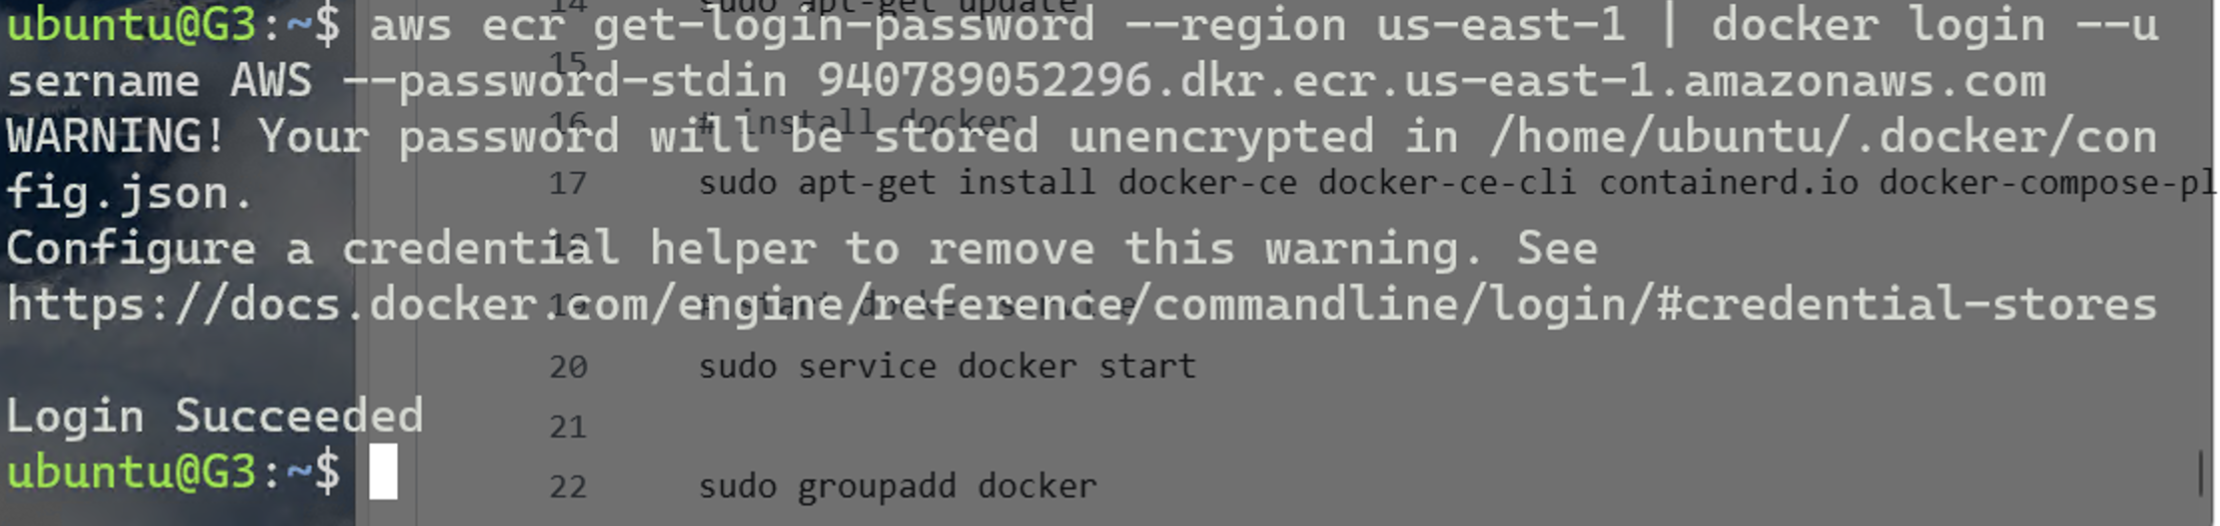
Run them:
# Login to ECR (get command from ECR console)
aws ecr get-login-password --region us-east-1 | docker login --username AWS --password-stdin <account-id>.dkr.ecr.us-east-1.amazonaws.com
# Tag the image
docker tag ros-humble-greengrass-music-minipupper:latest <account-id>.dkr.ecr.us-east-1.amazonaws.com/ros-humble-greengrass-music-minipupper:latest
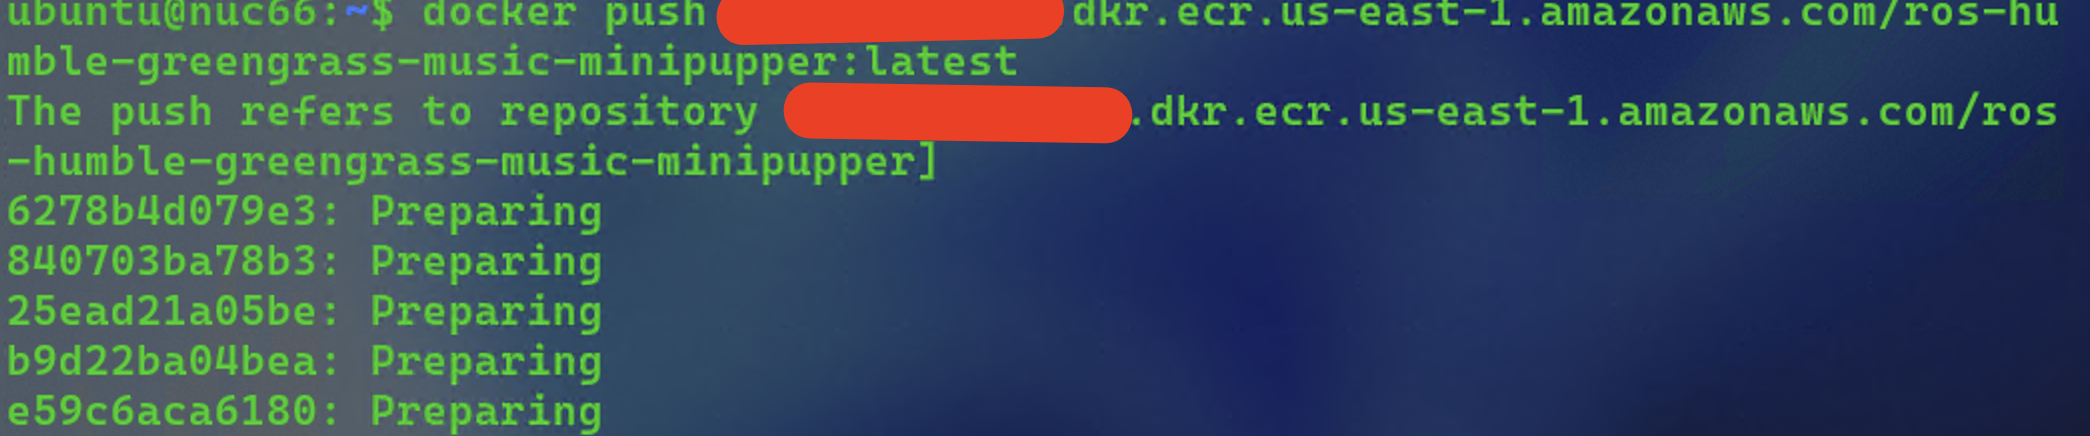
# Push to ECR
docker push <account-id>.dkr.ecr.us-east-1.amazonaws.com/ros-humble-greengrass-music-minipupper:latest
Tag the image:

Push to ECR:
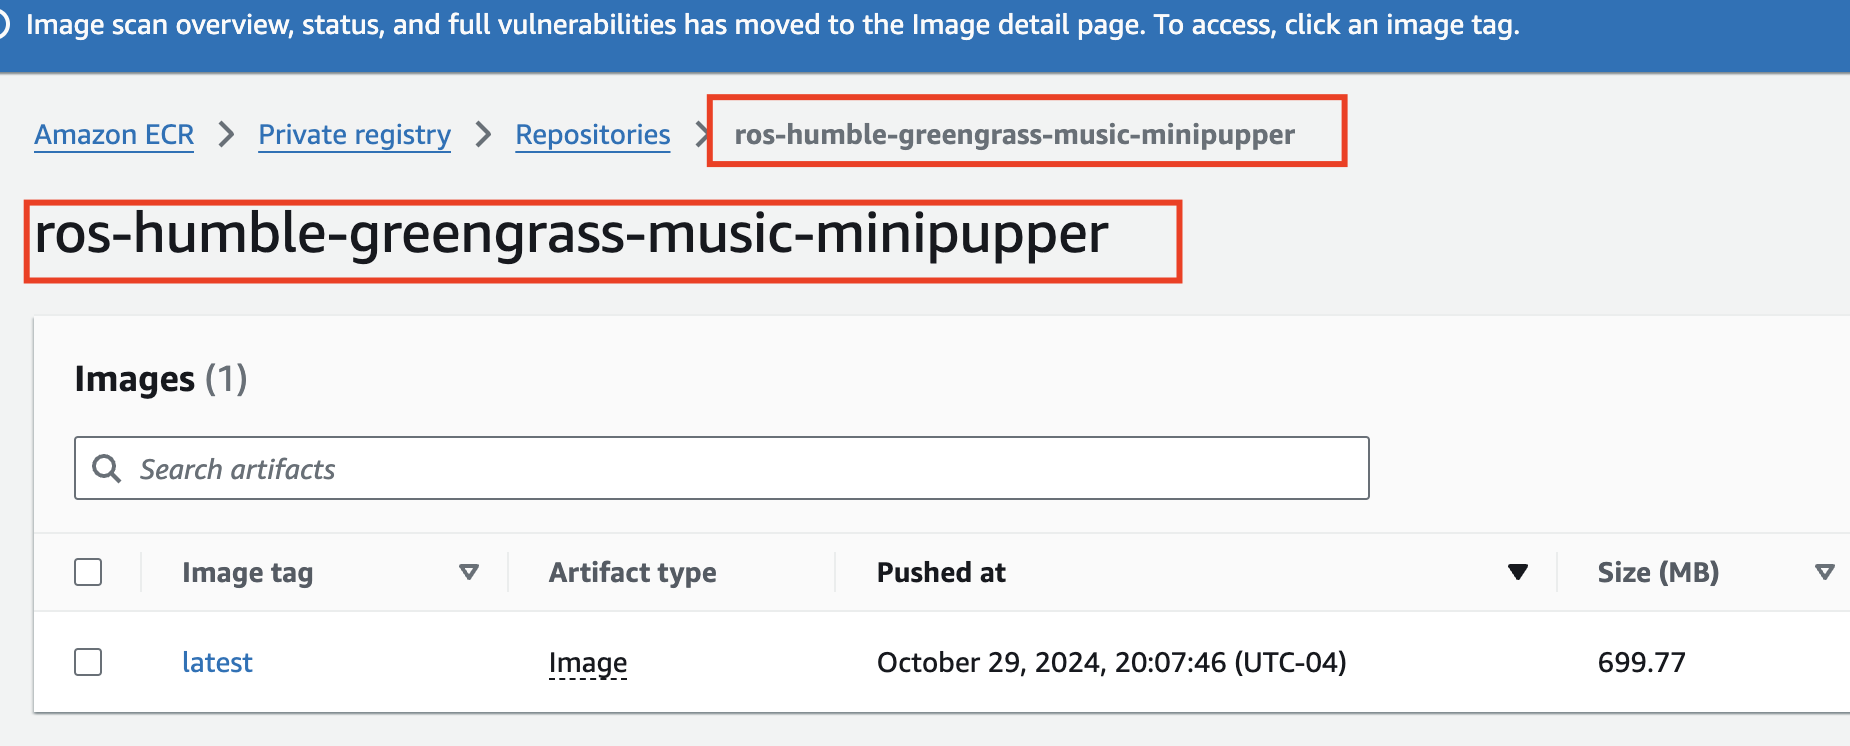
Verify image is uploaded to ECR:
Part 5: Mini Pupper Greengrass Setup
Step 1: Open Jupyter Lab
Open Jupyter Lab on Mini Pupper and clone the mangdang repository:
git clone http://github.com/lbaitemple/mangdang

Step 2: Open the Notebook
Navigate to mangdang/minipupper.ipynb and open it.
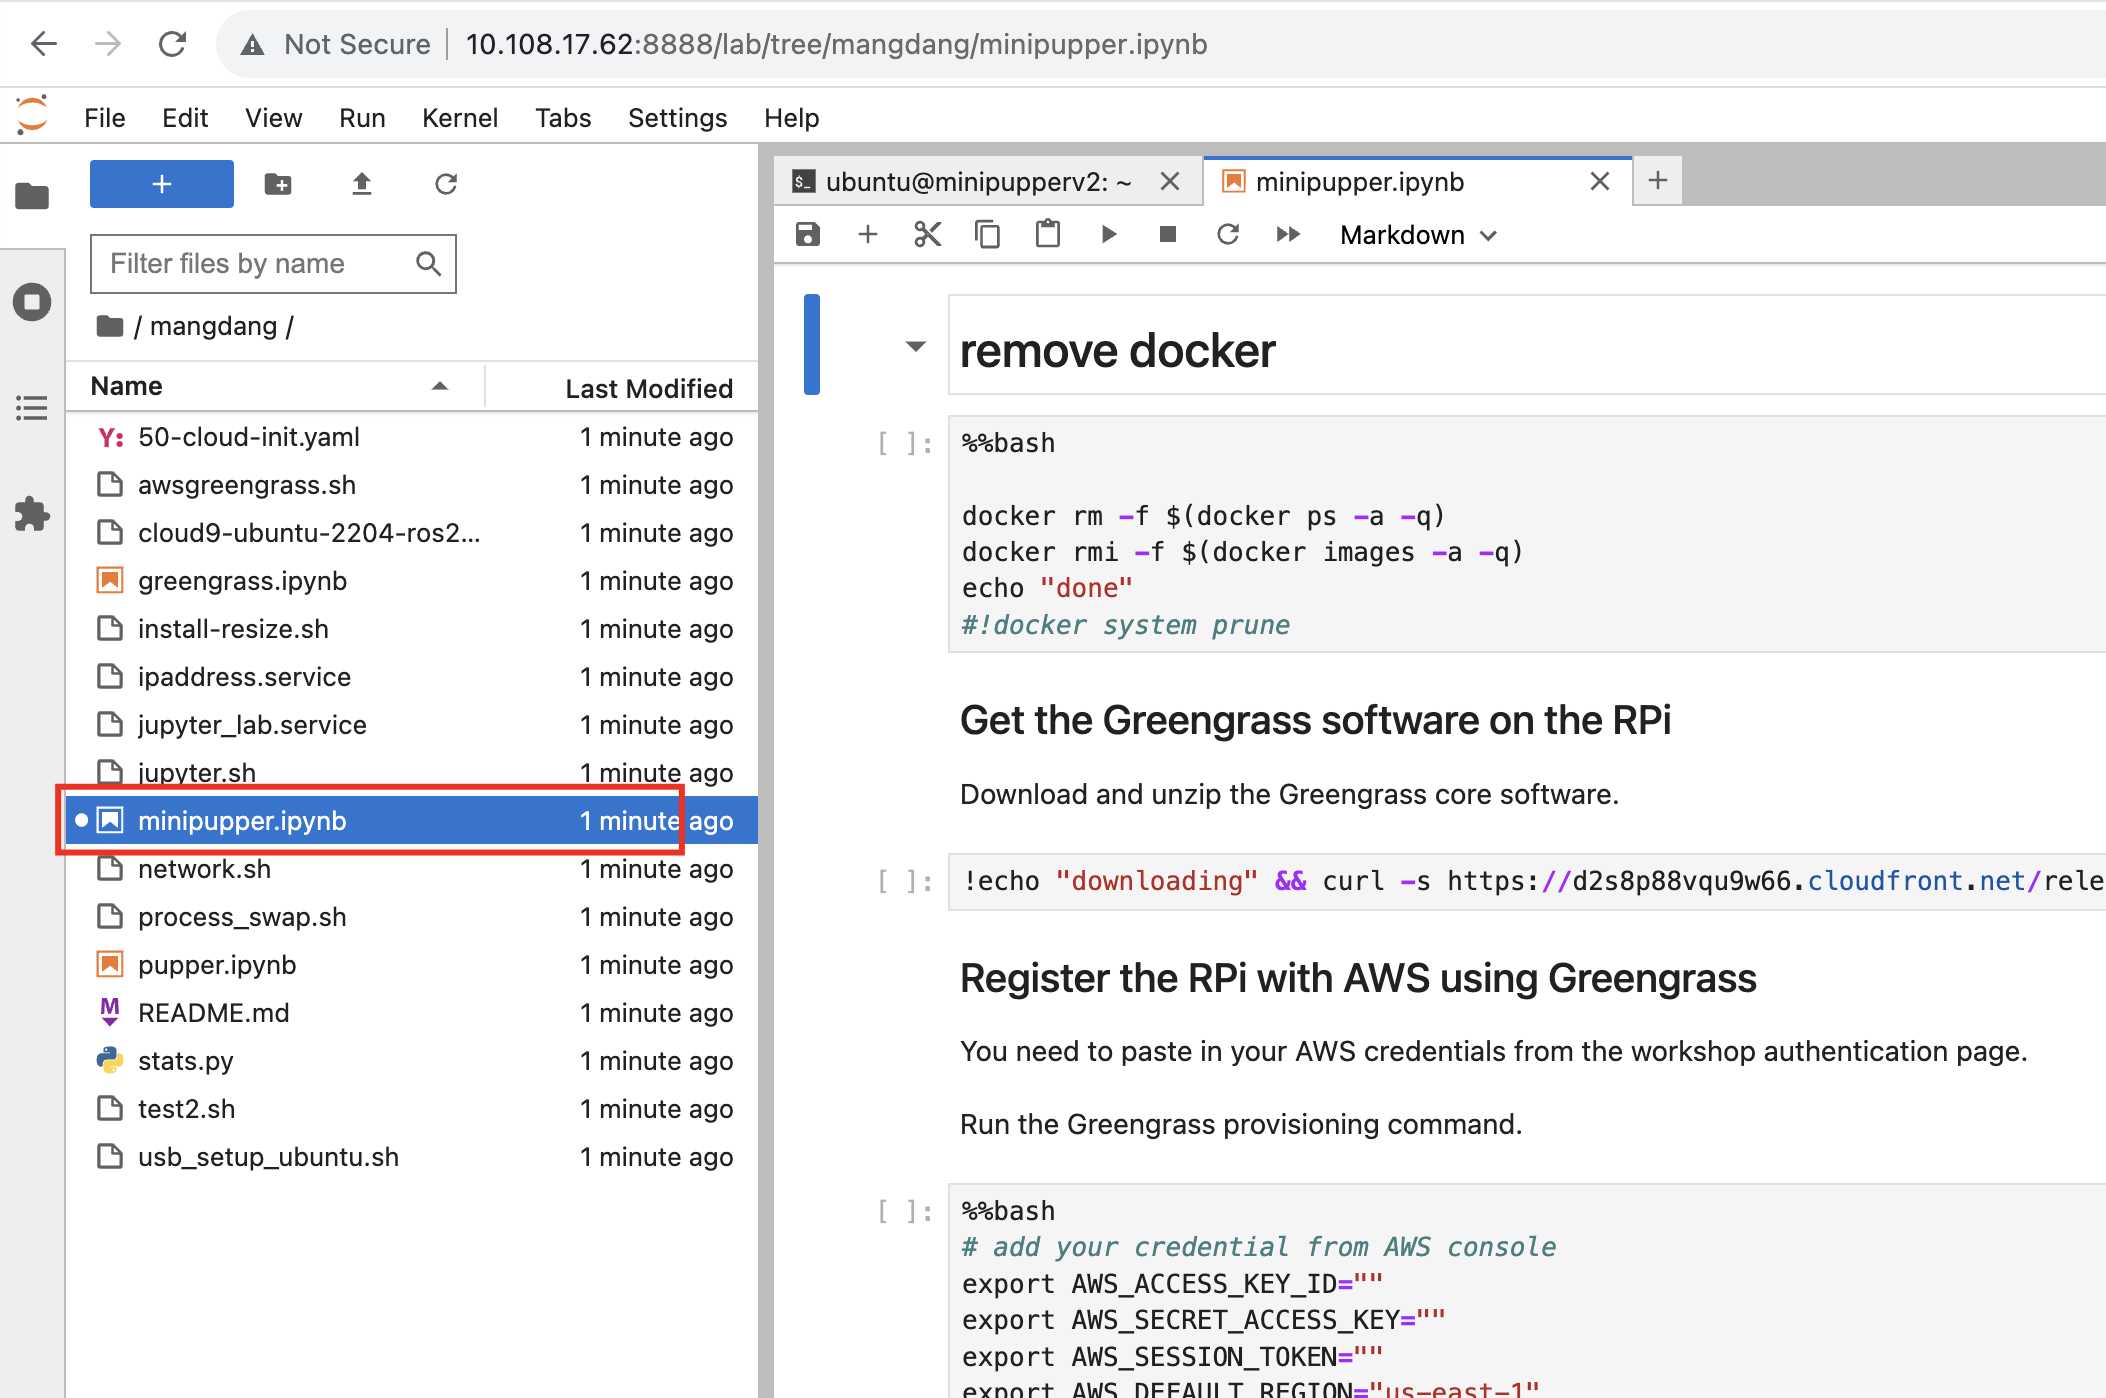
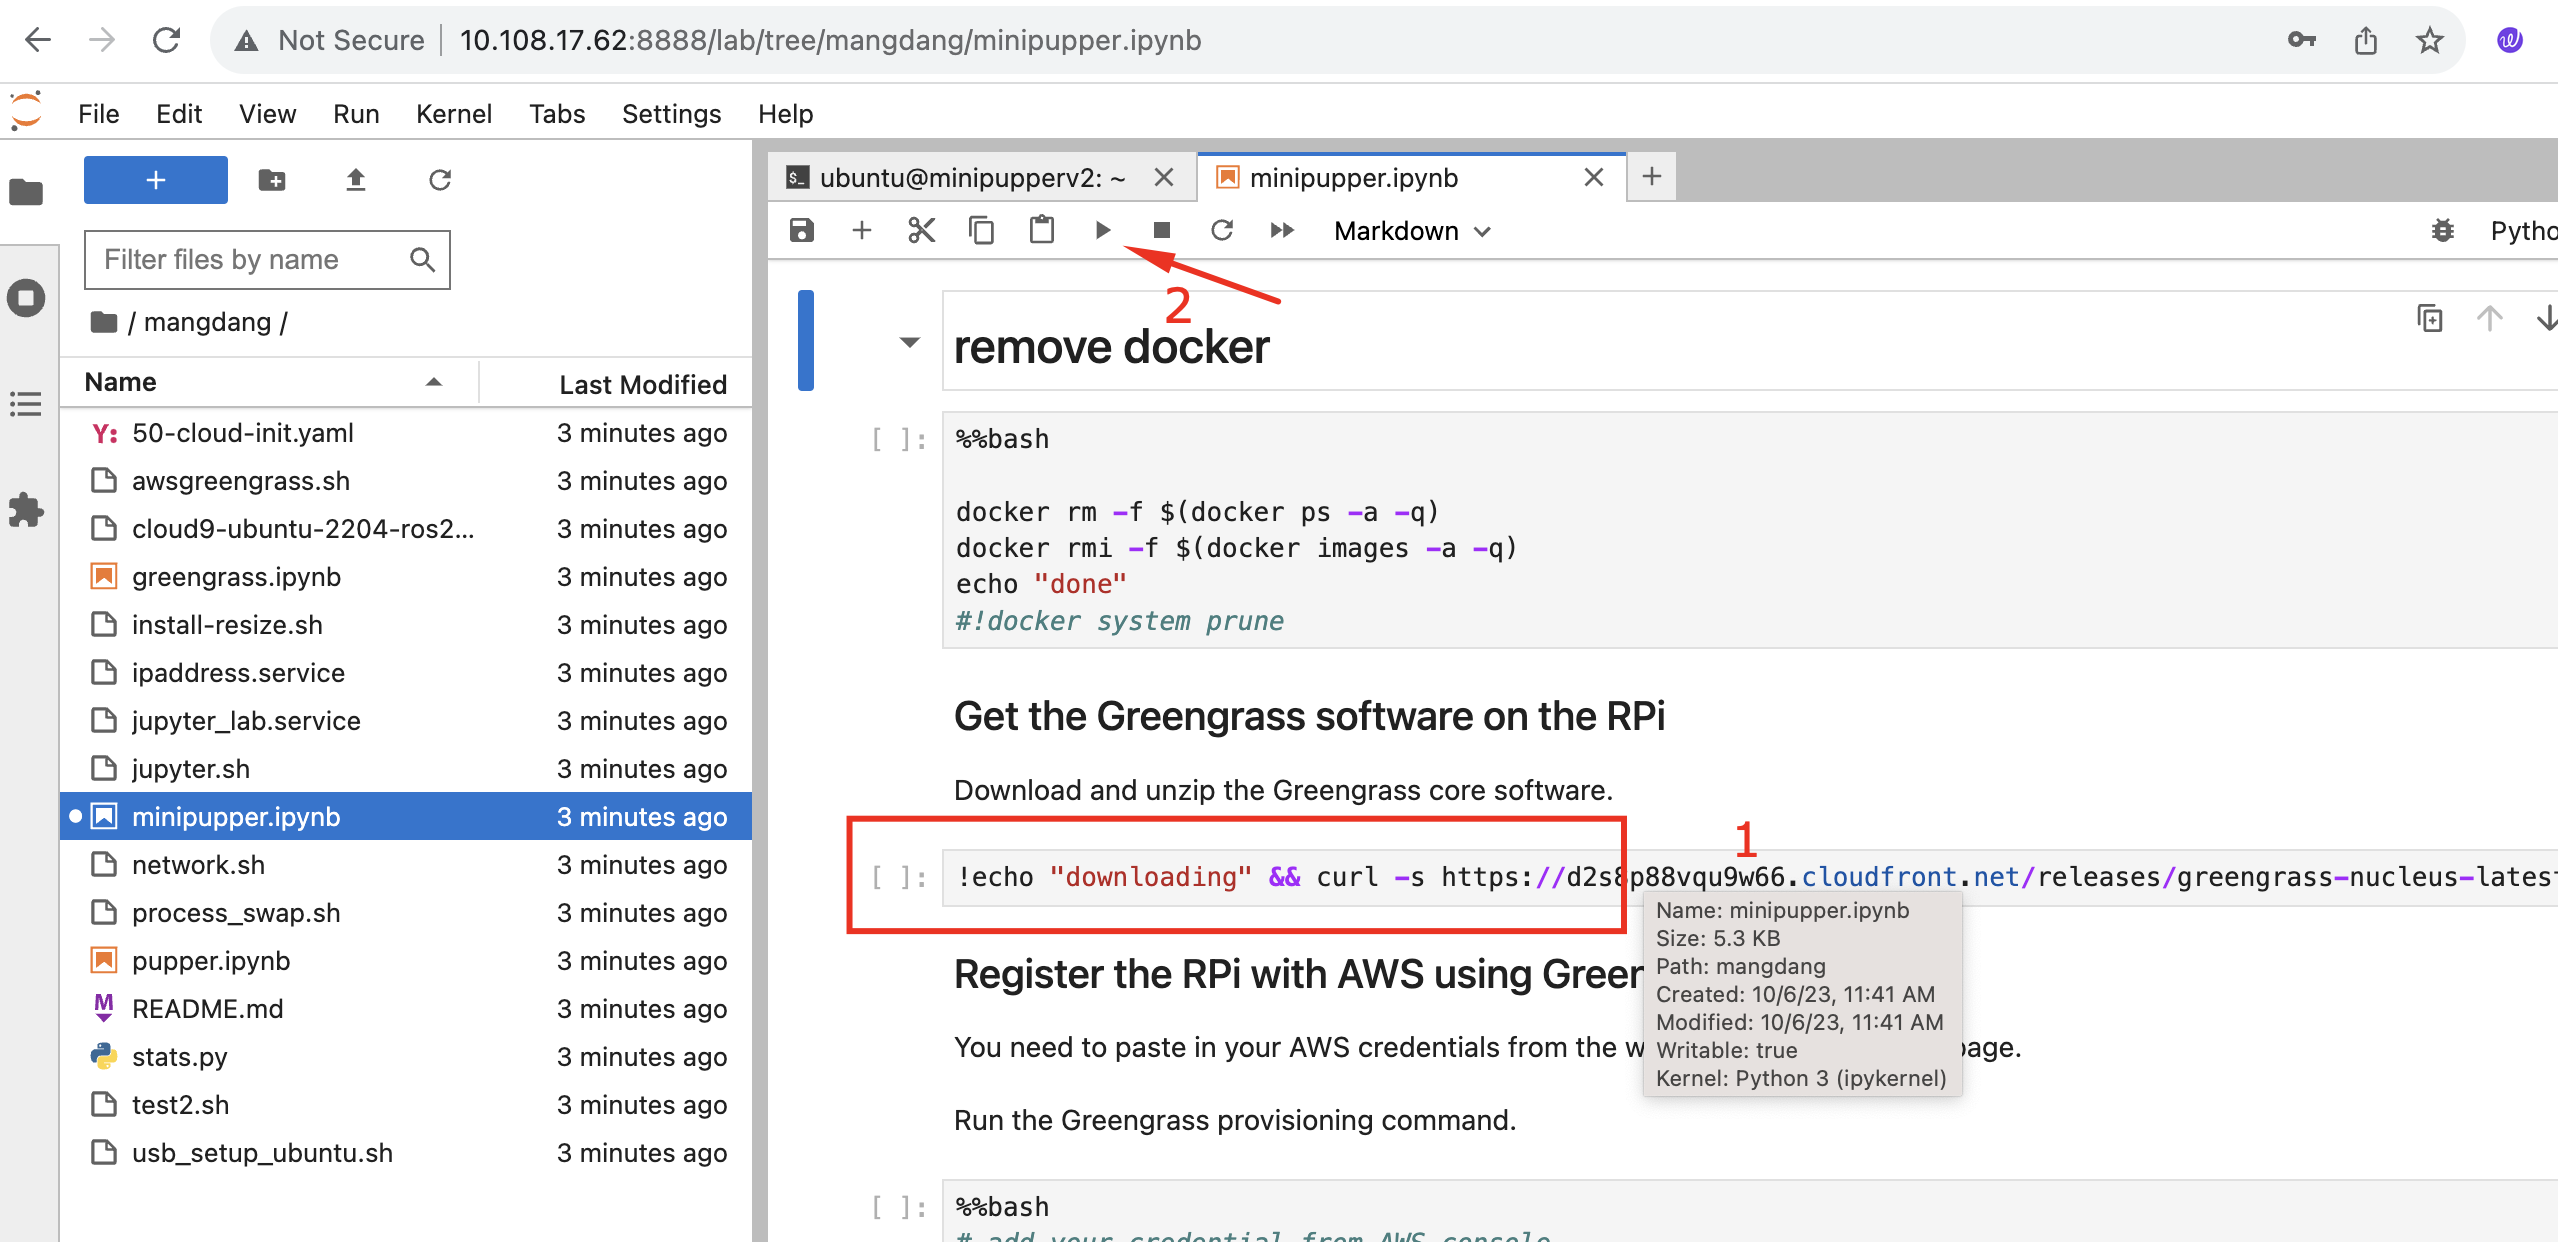
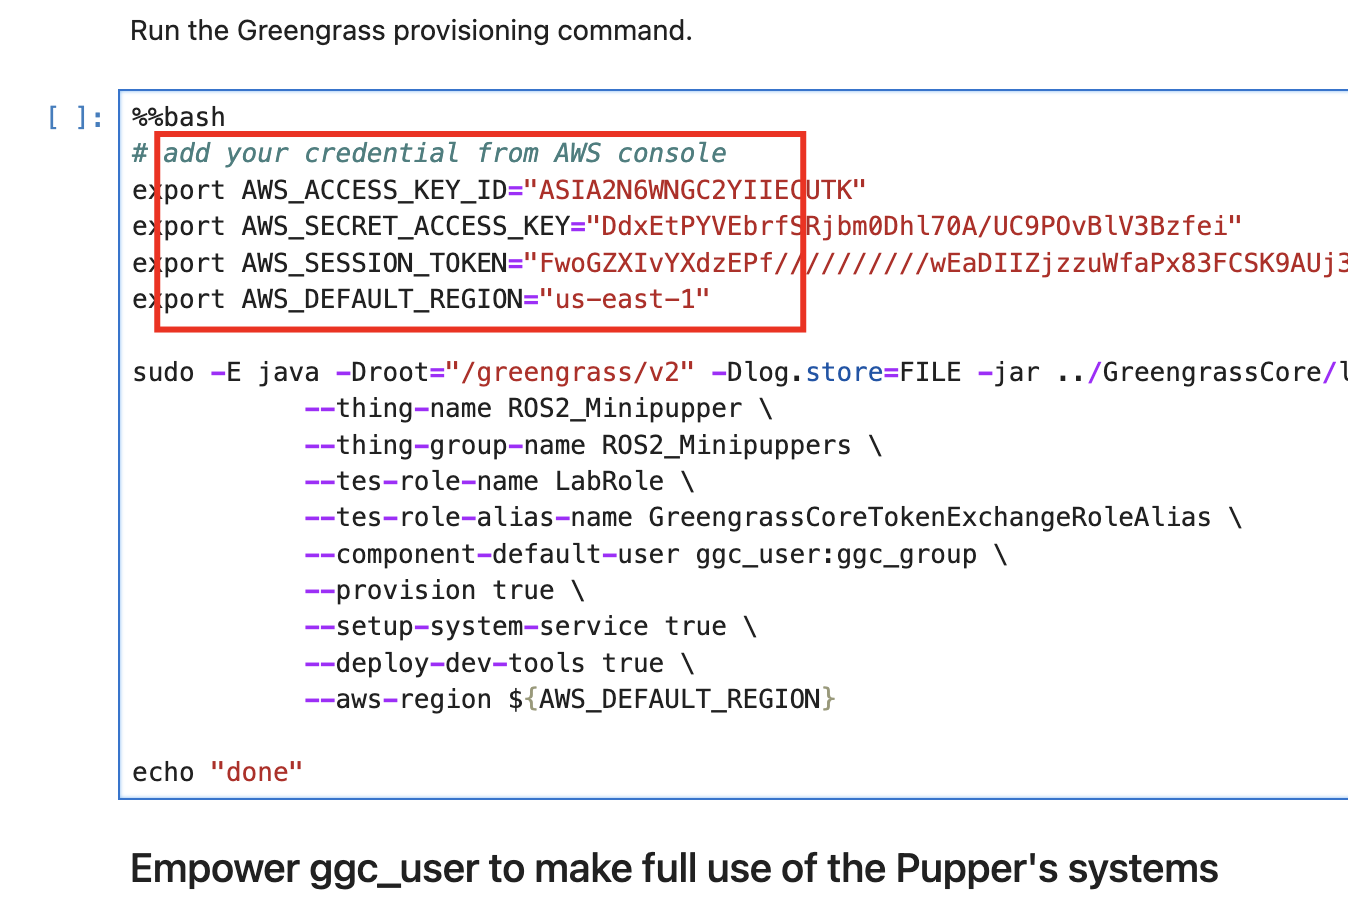
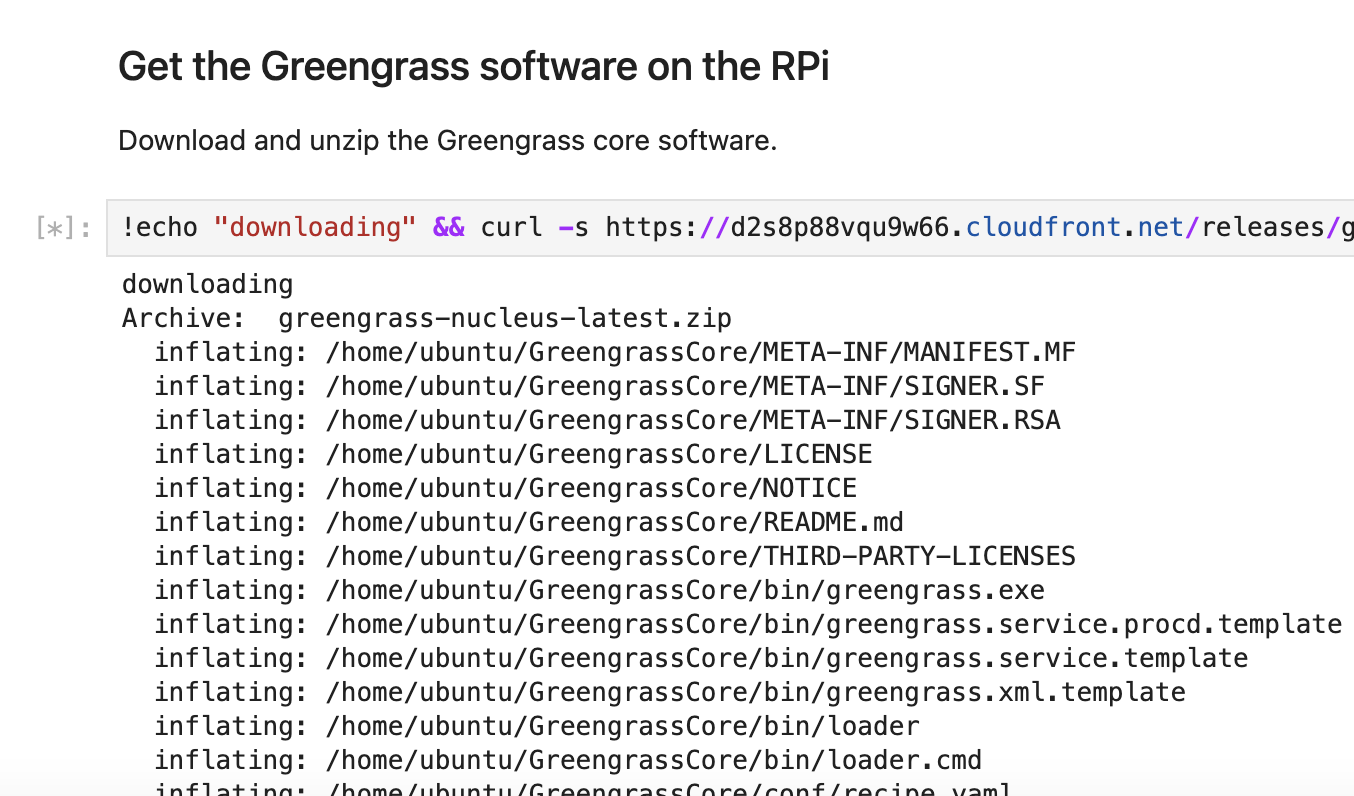
Step 3: Install Greengrass Core
Run the second cell to install Greengrass Core on Mini Pupper.
Step 4: Create IoT Thing
- Revise the thing name and thing group in the notebook
- Run the cell to create the IoT thing
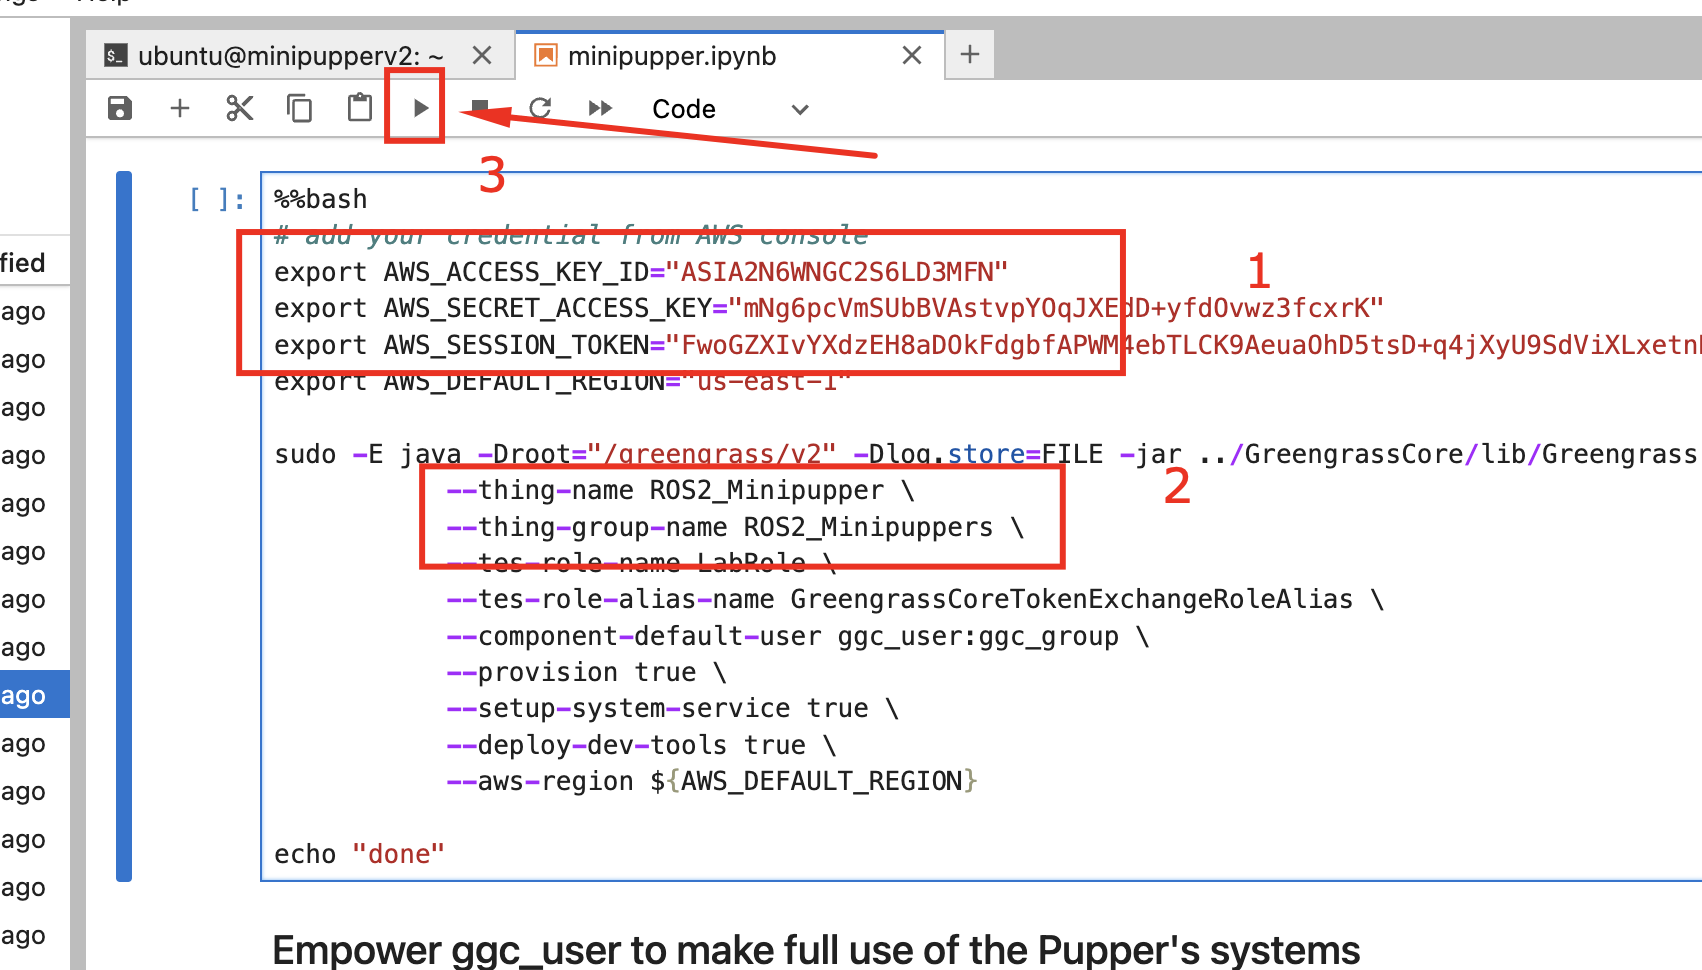
This will:
- Create a Thing in AWS IoT
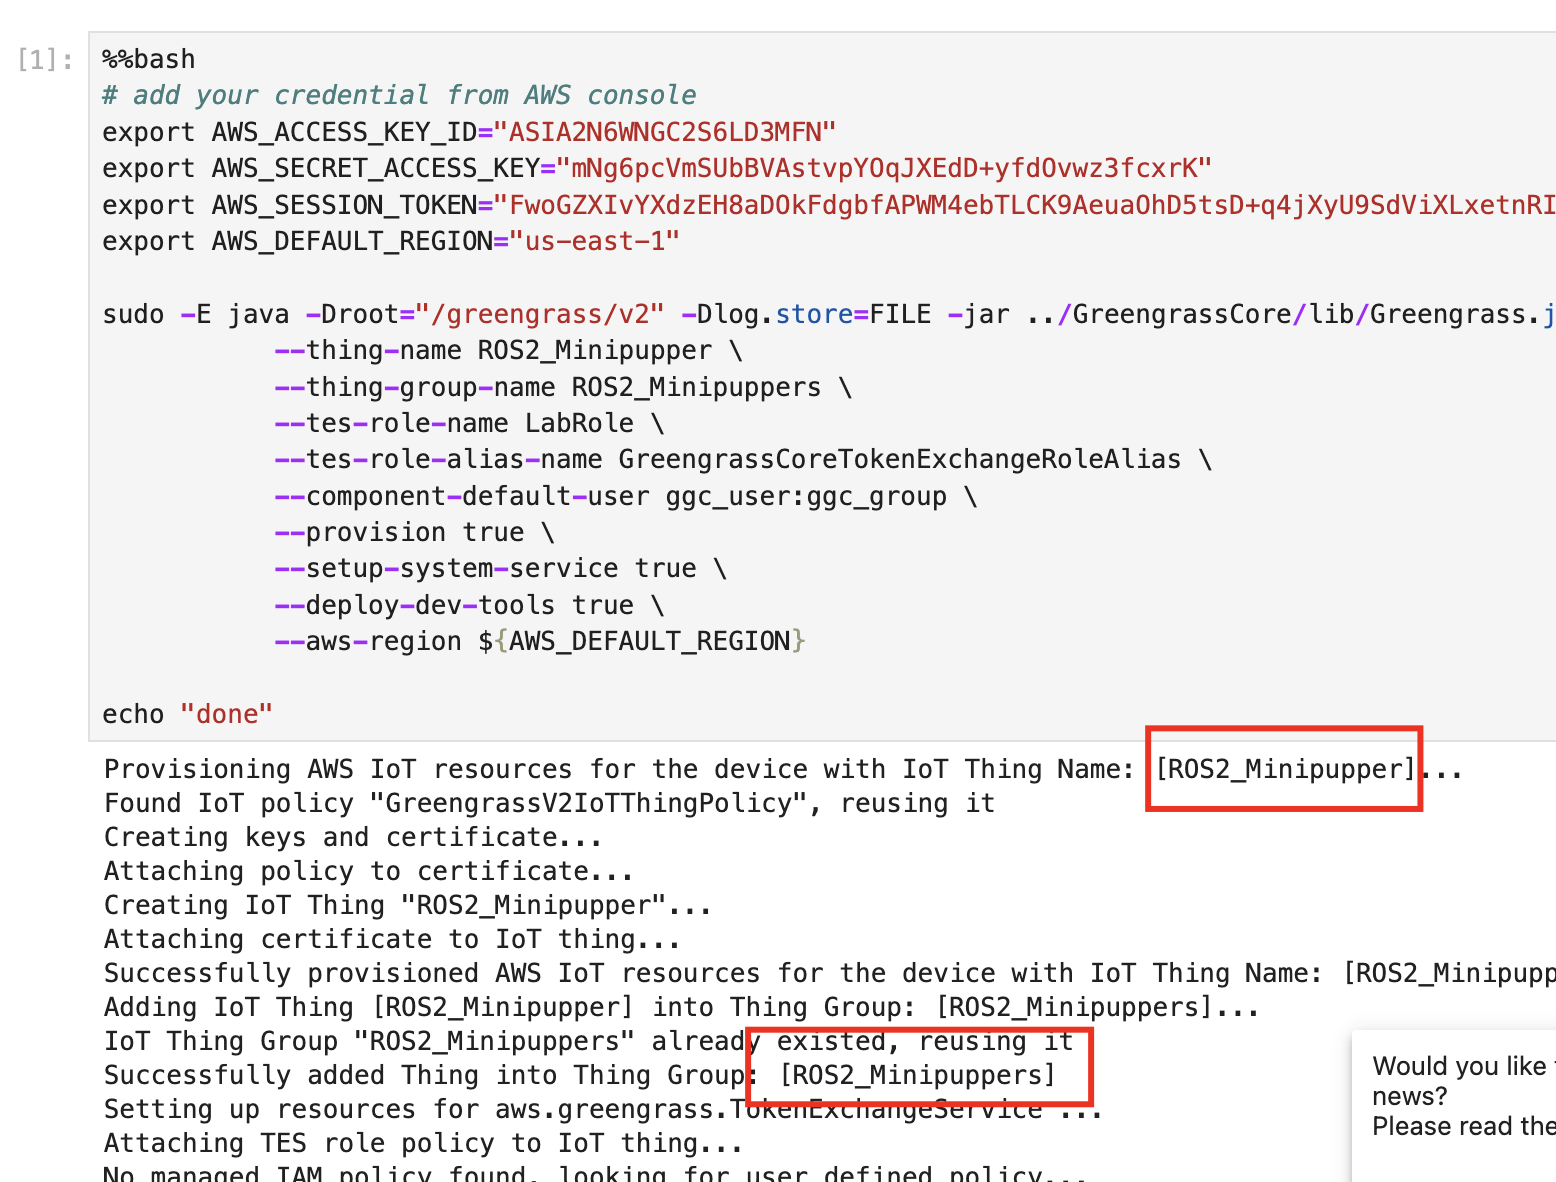
- Add it to a Thing Group
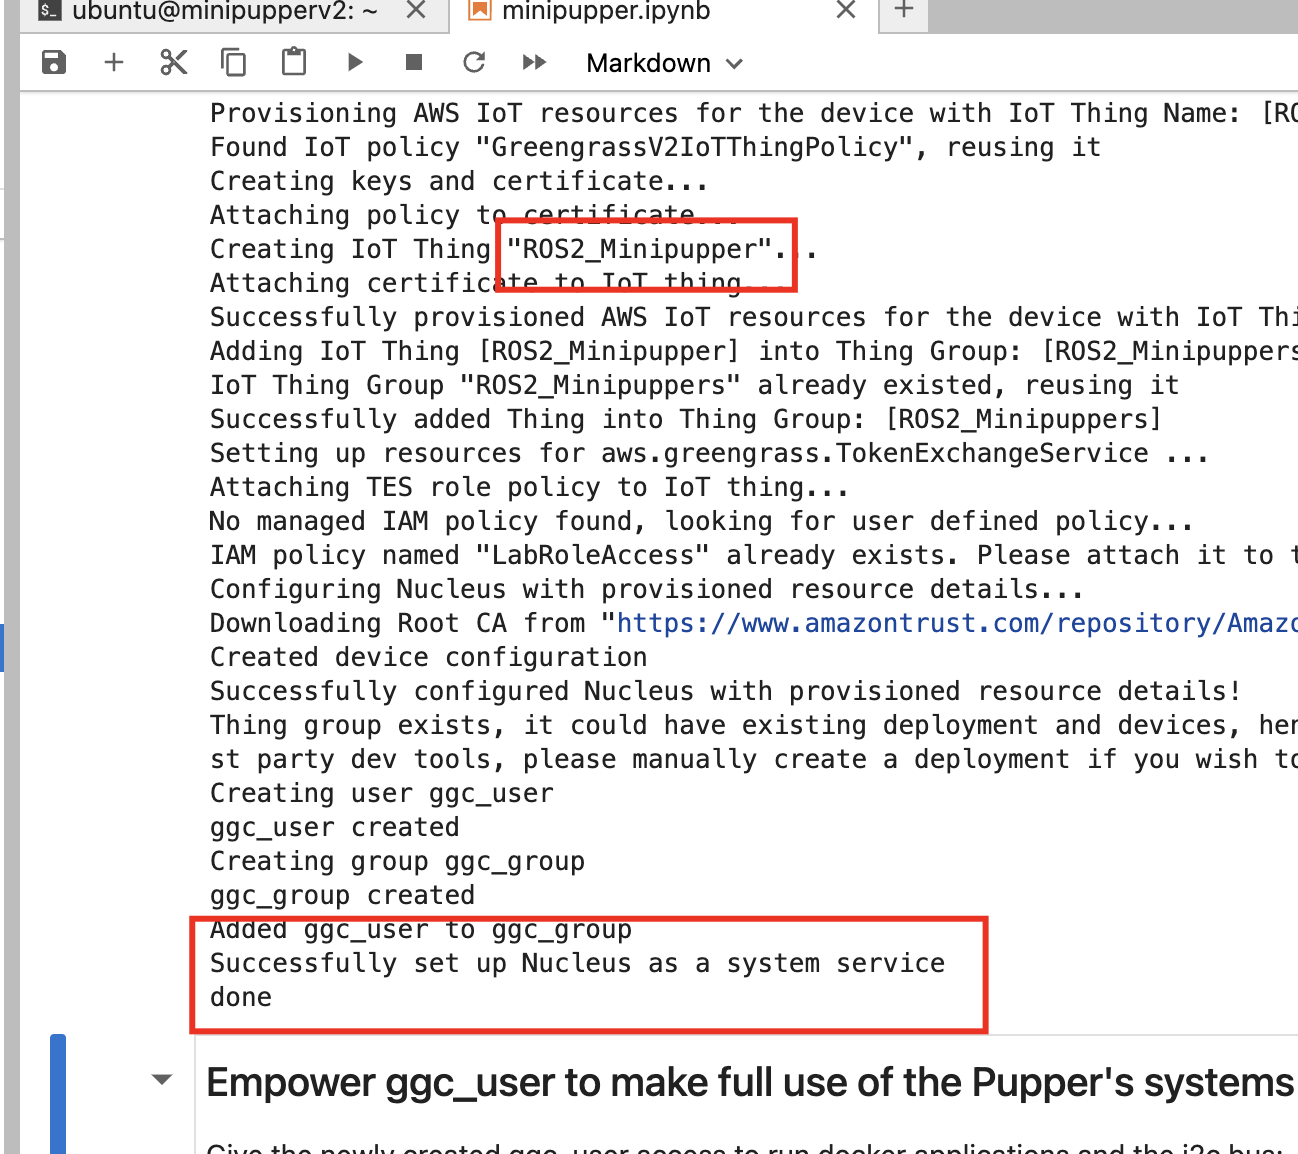
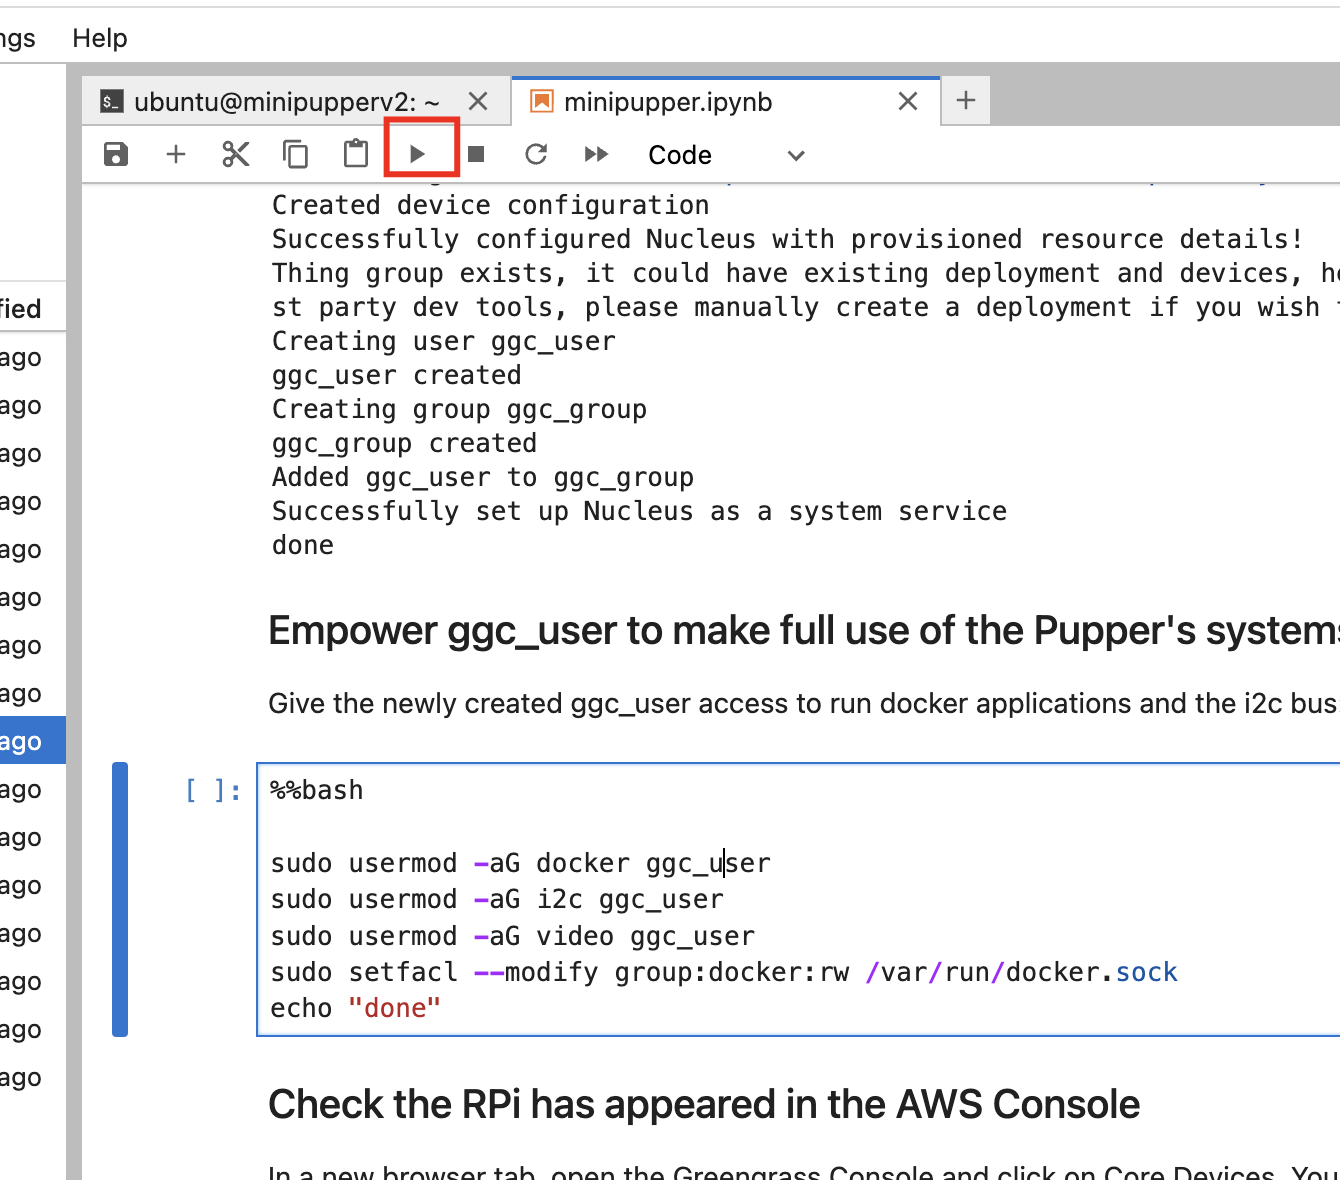
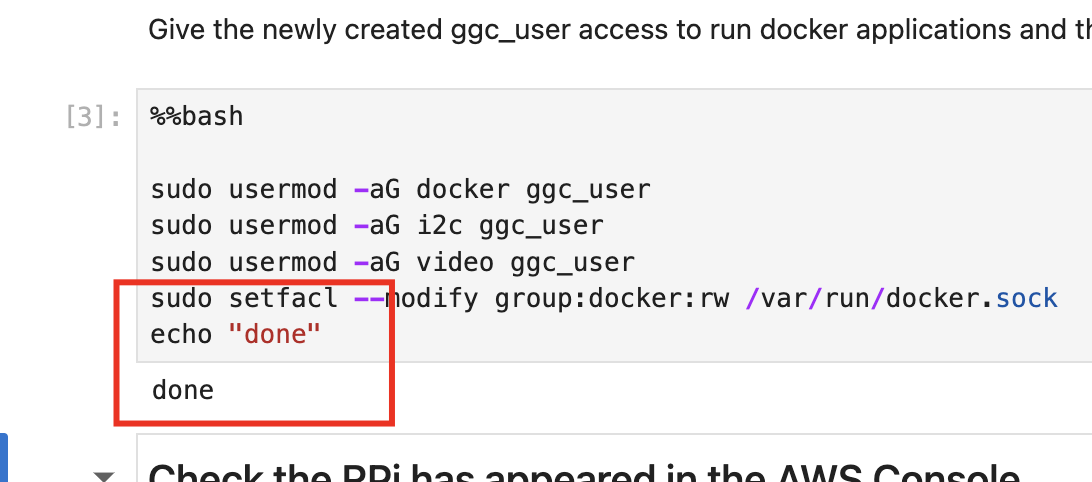
- Set up Greengrass user permissions
Part 6: Deploy to IoT Core
On WSL
- Open
awsgreengrass.sh - Revise line 4 with your S3 repository name
- Revise line 6 with your ECR name (if needed)
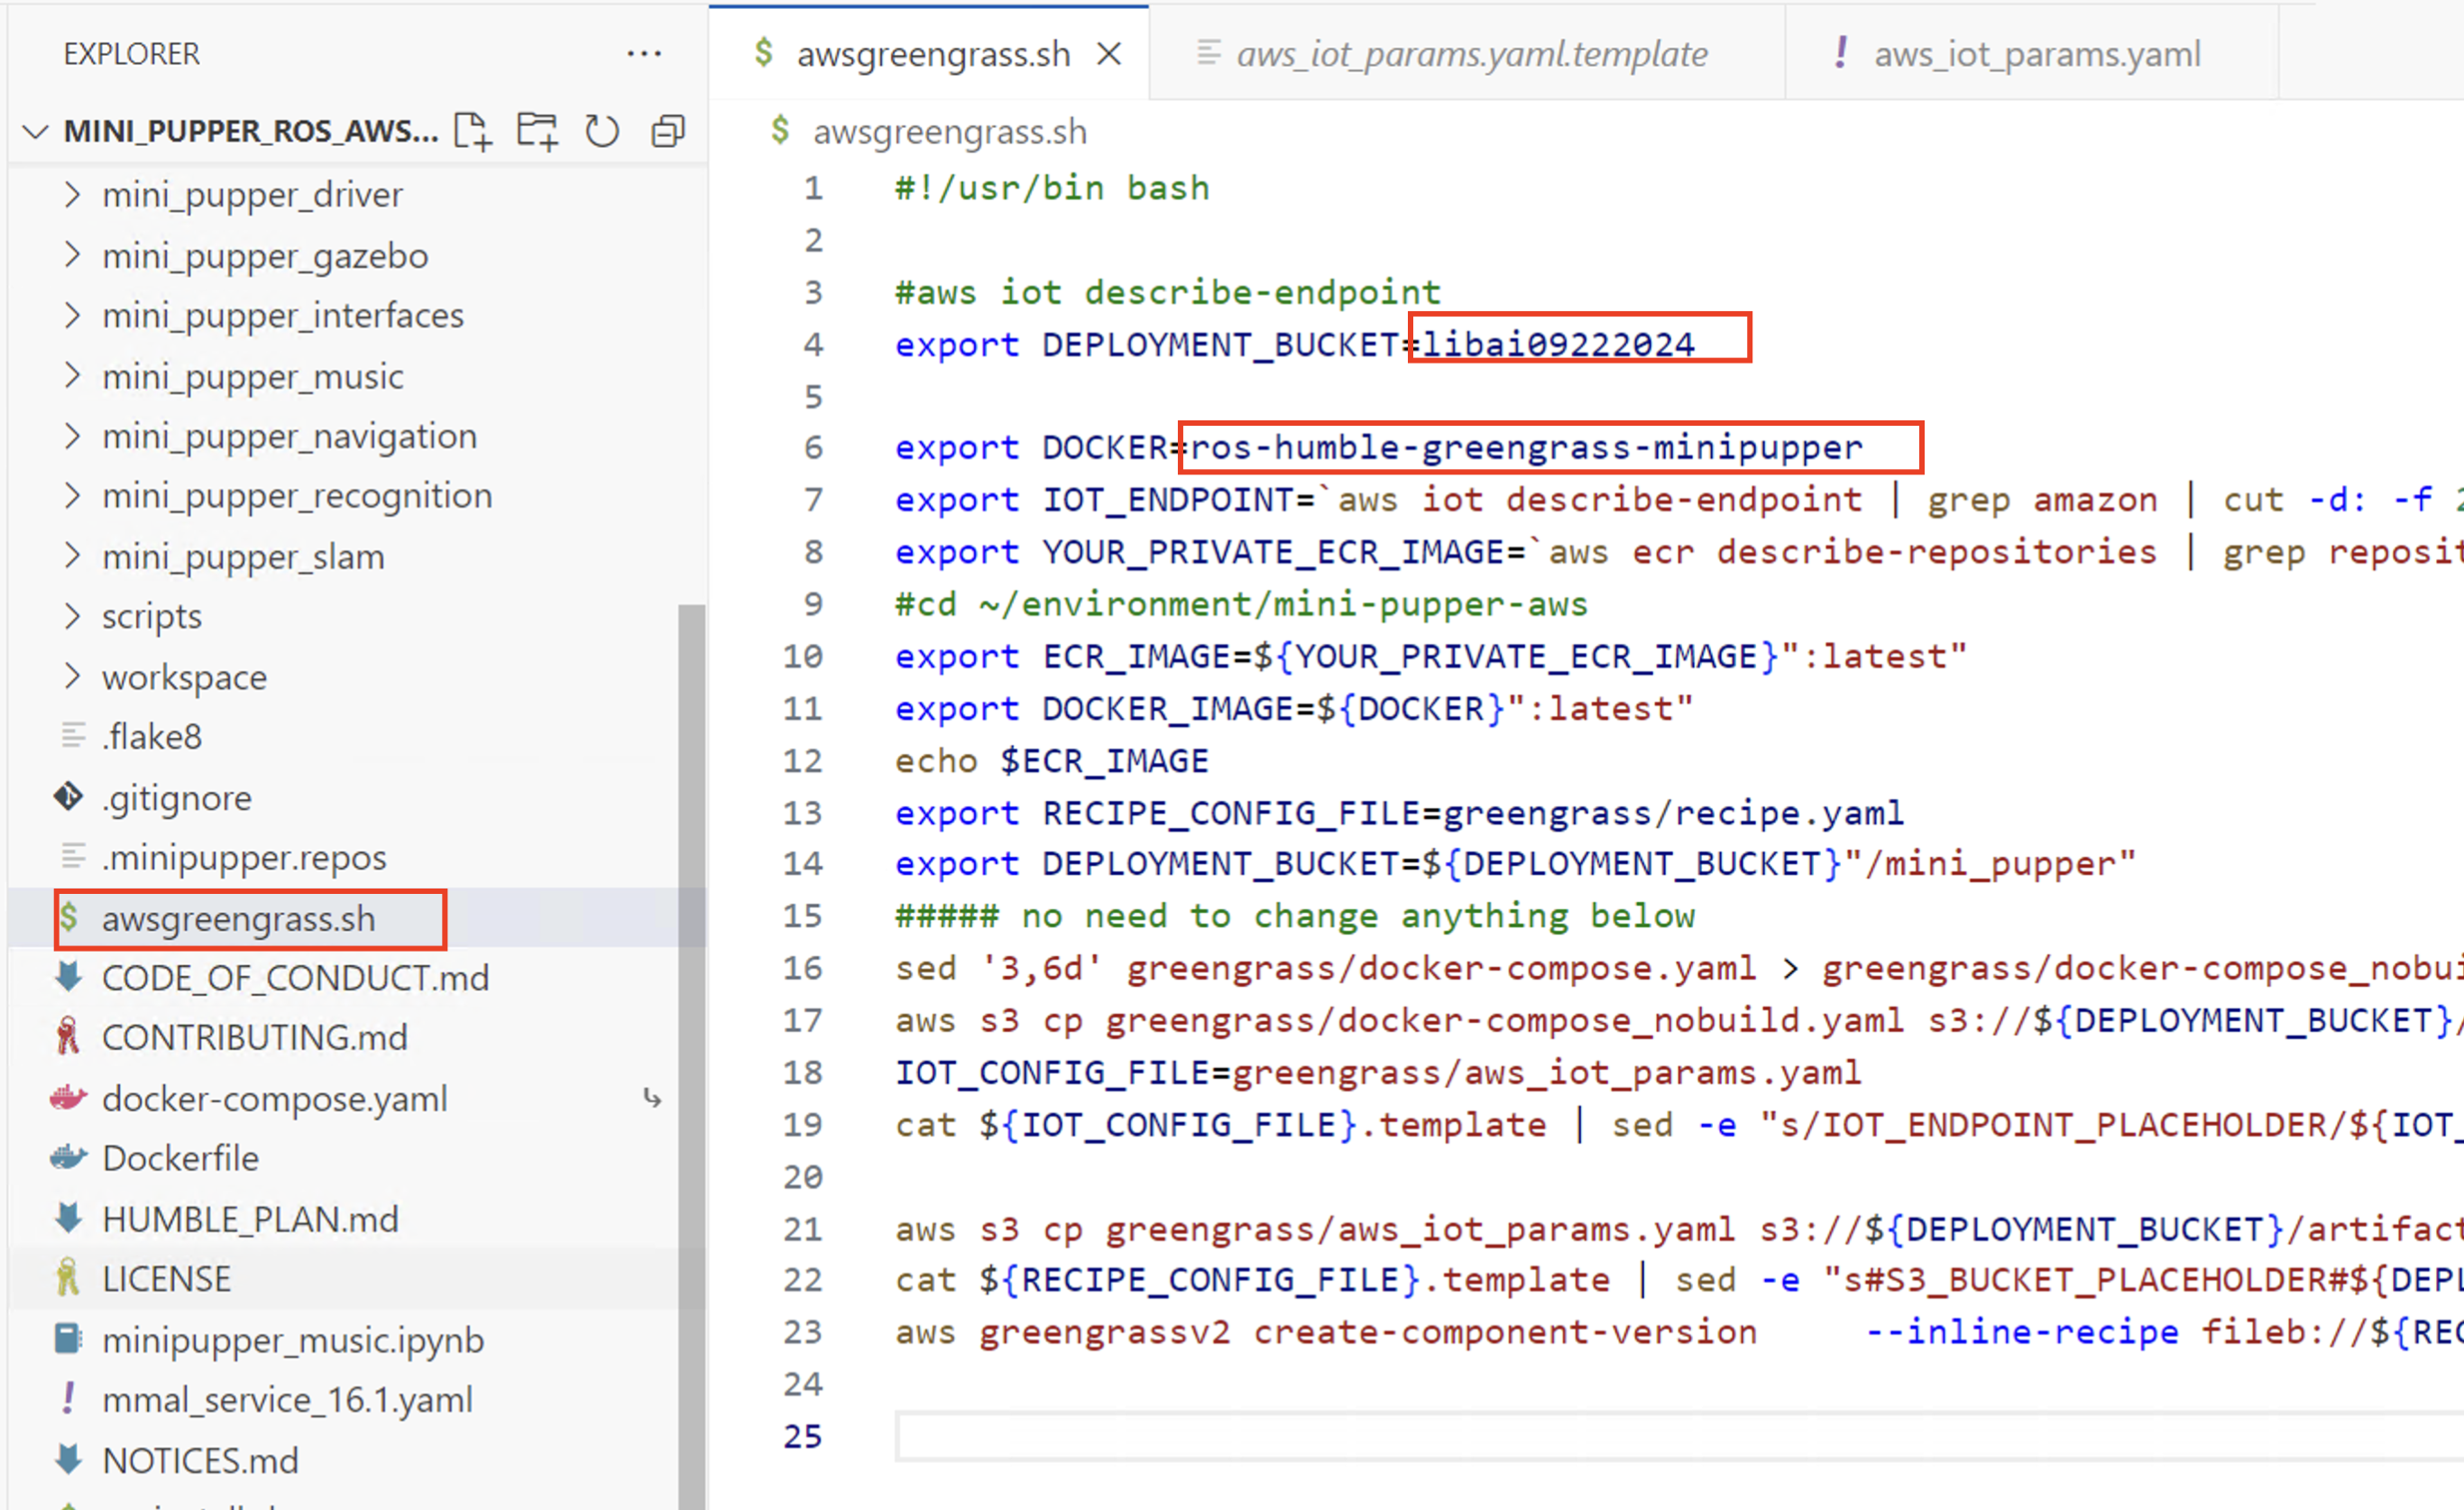
- Check your docker image list:

- Run the script:
bash ./awsgreengrass.sh
This will:
- Push the receipt to S3
- Push docker-compose.yaml to S3
- Create an IoT component
Part 7: Greengrass Deployment
Create Deployment on AWS Console
- Go to AWS IoT → Greengrass → Deployments
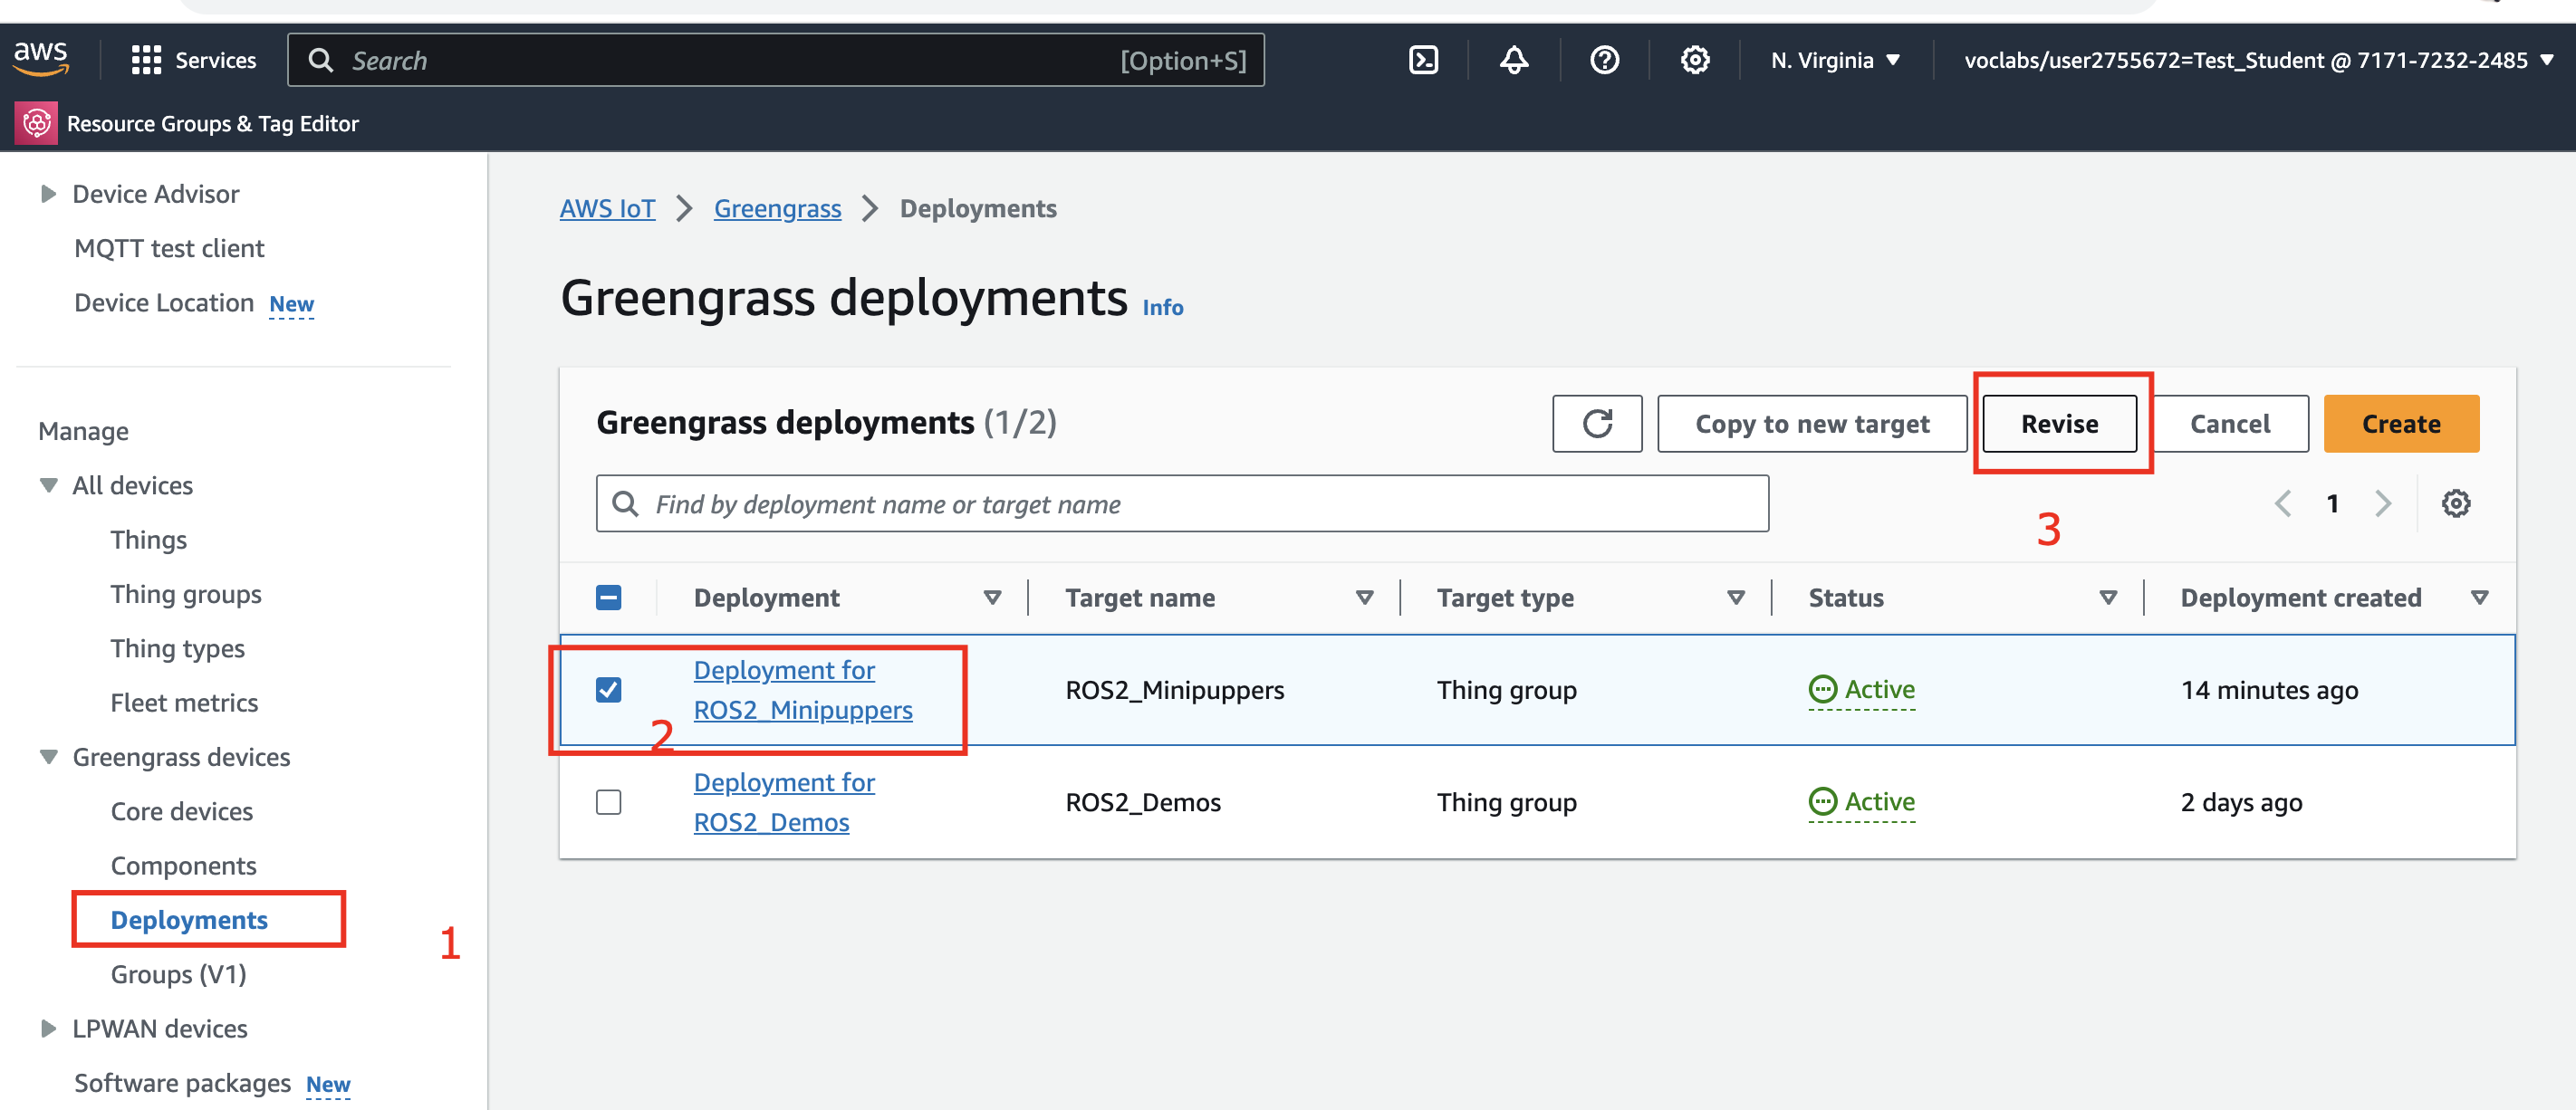
- Create a new deployment

- Select your Thing Group
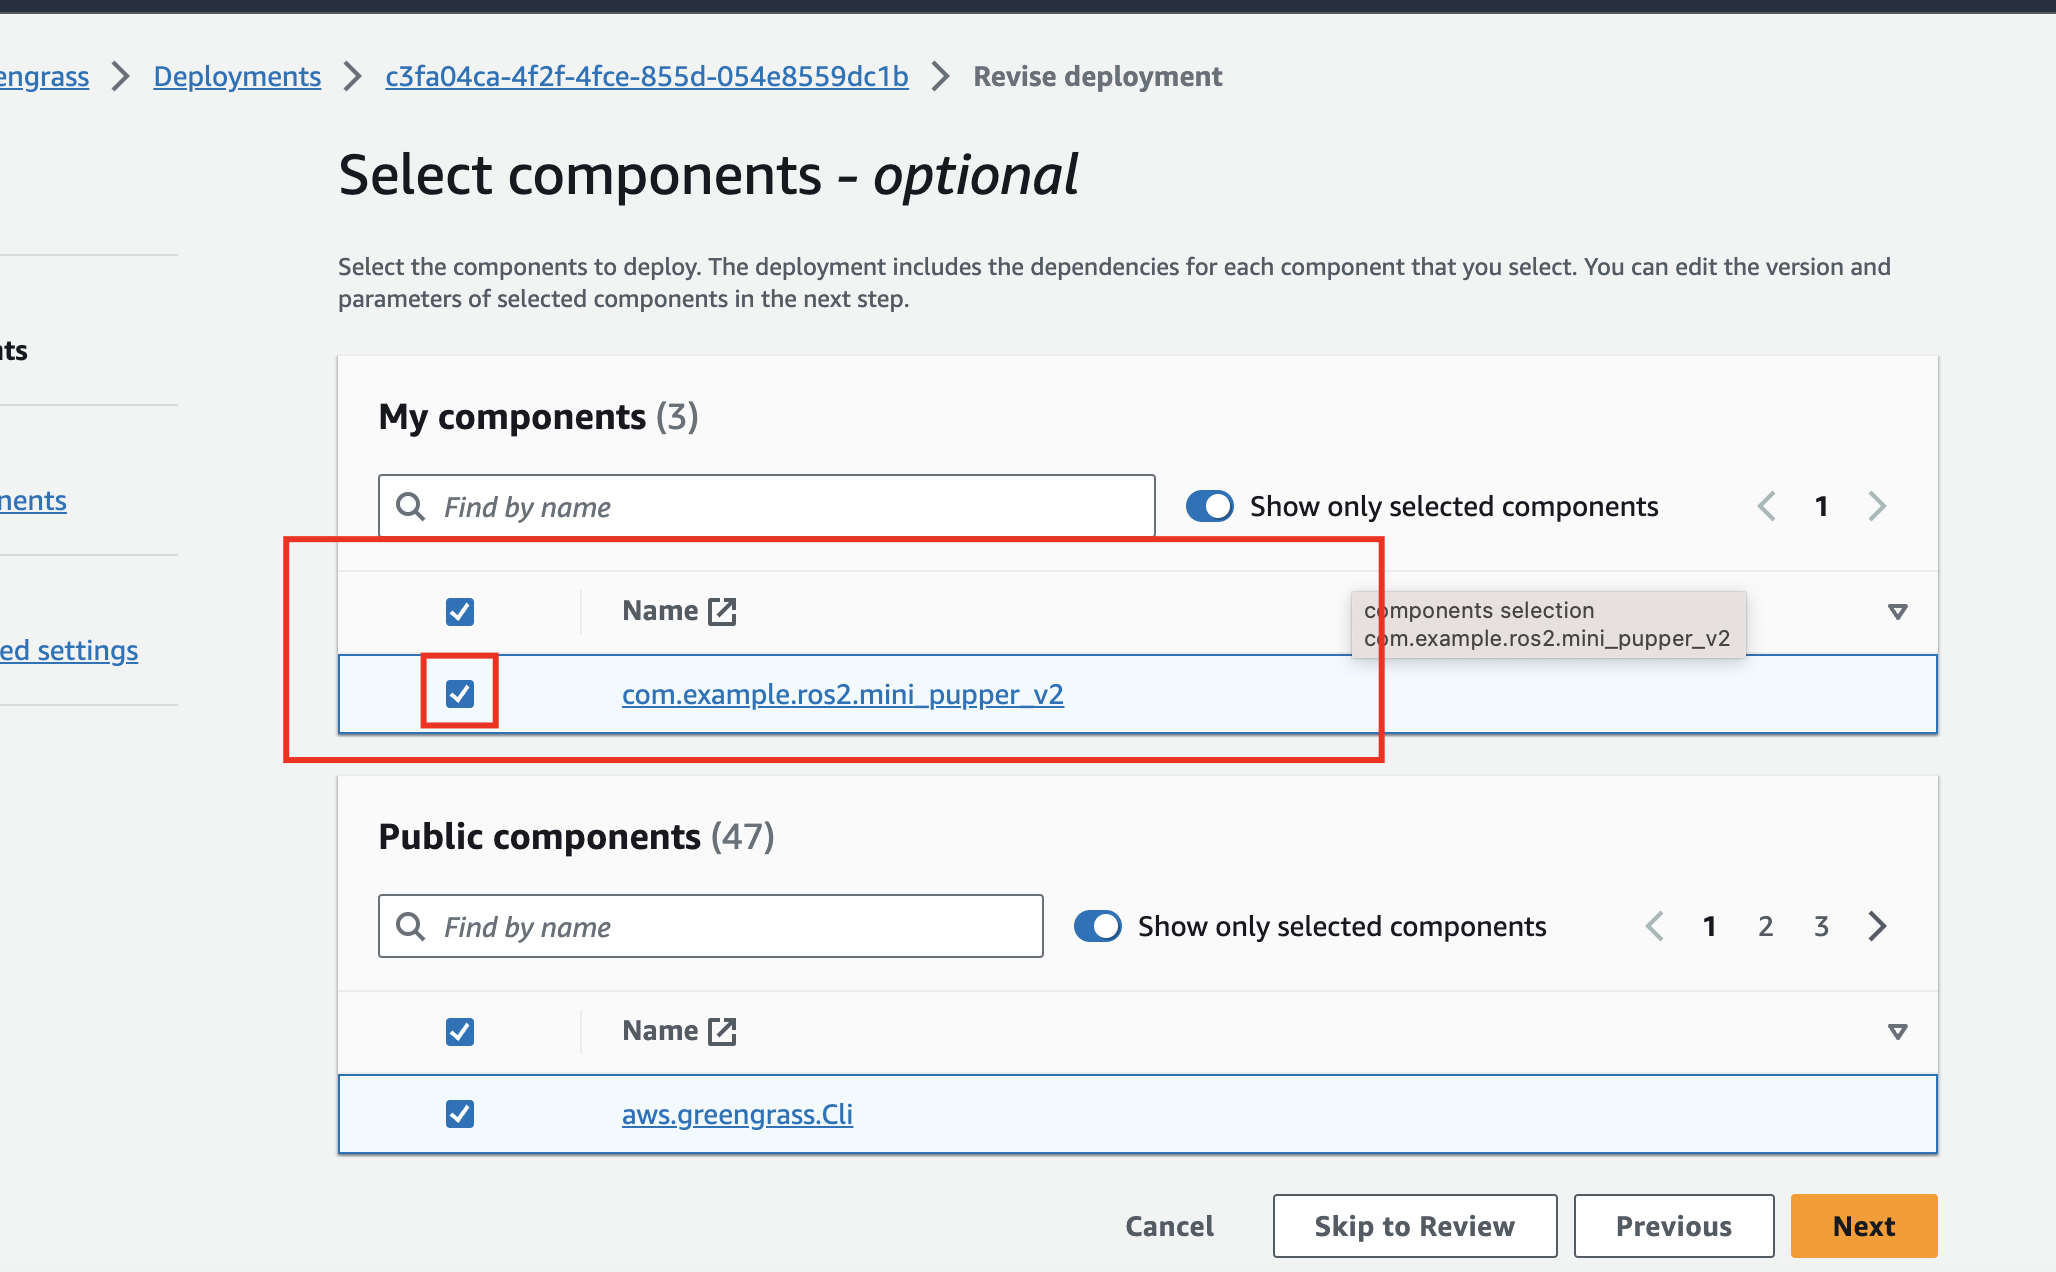
- Add the component you created
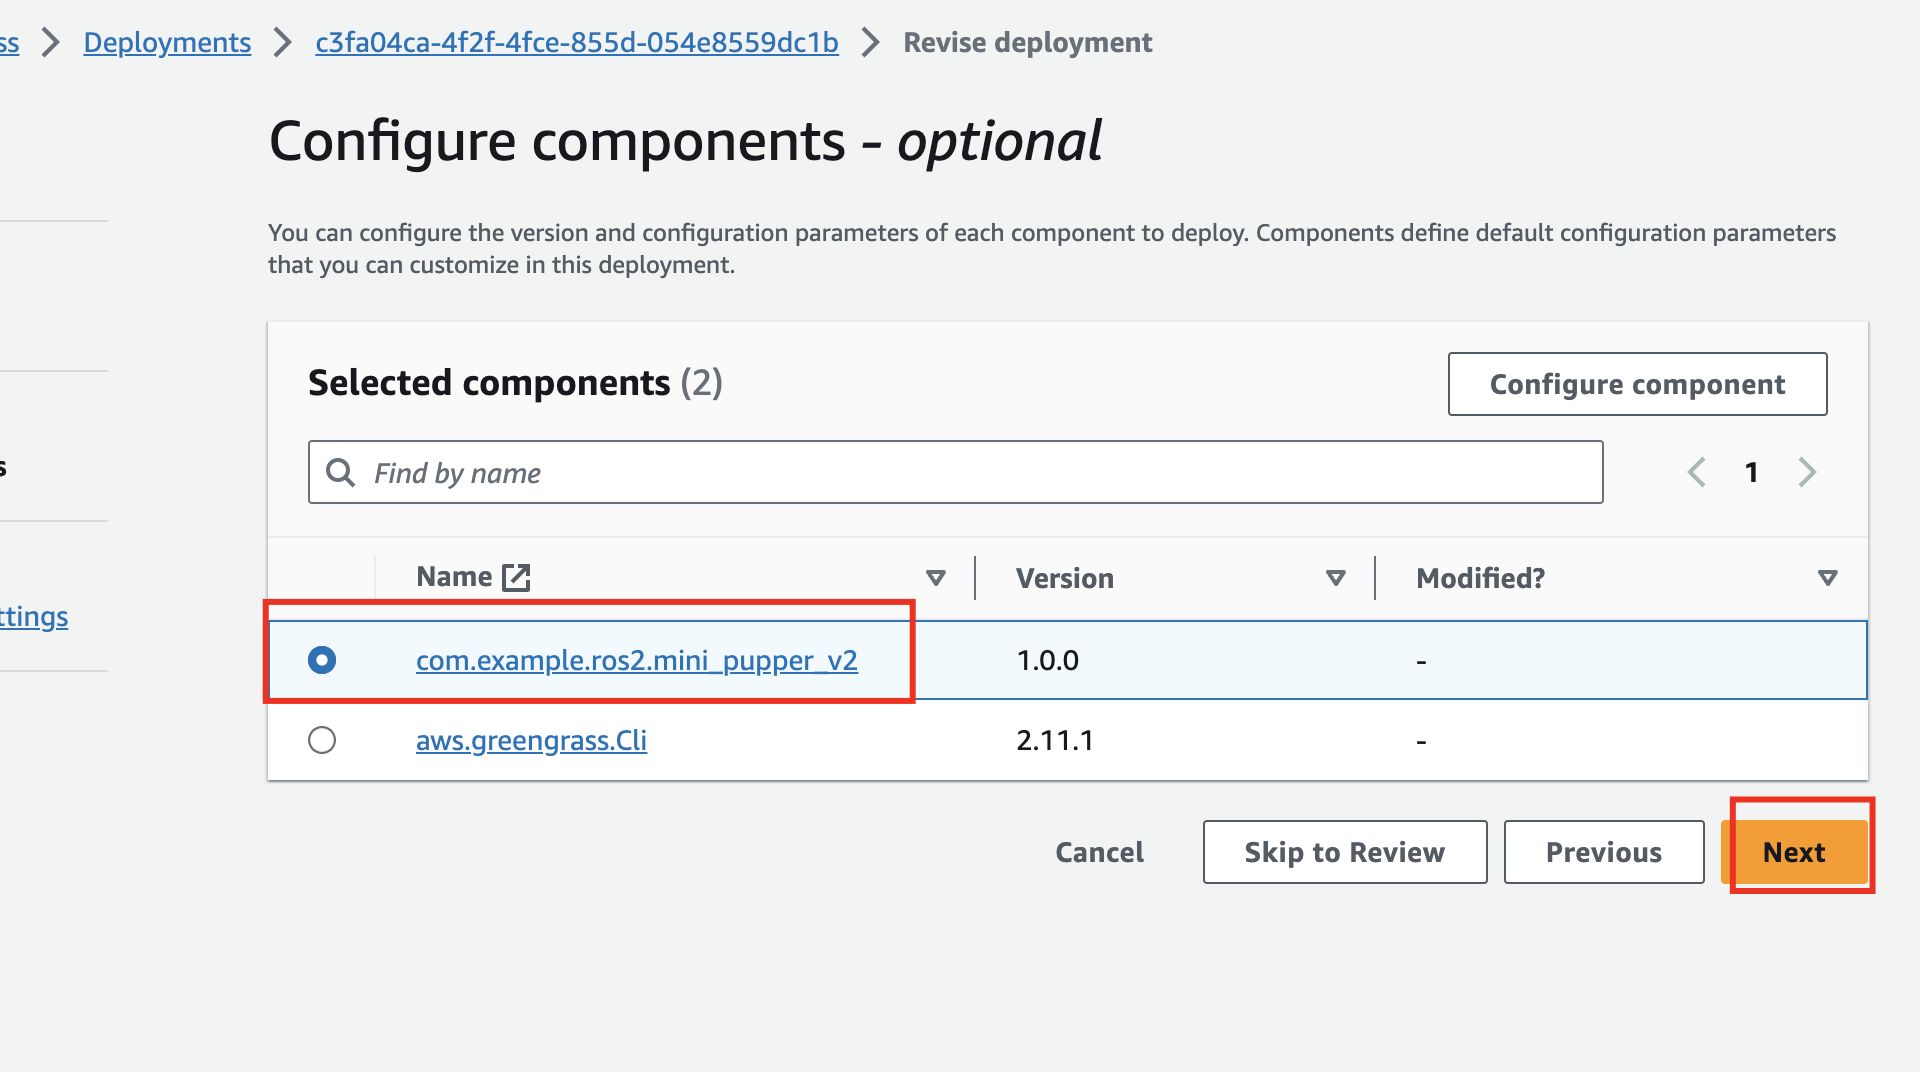
- Deploy
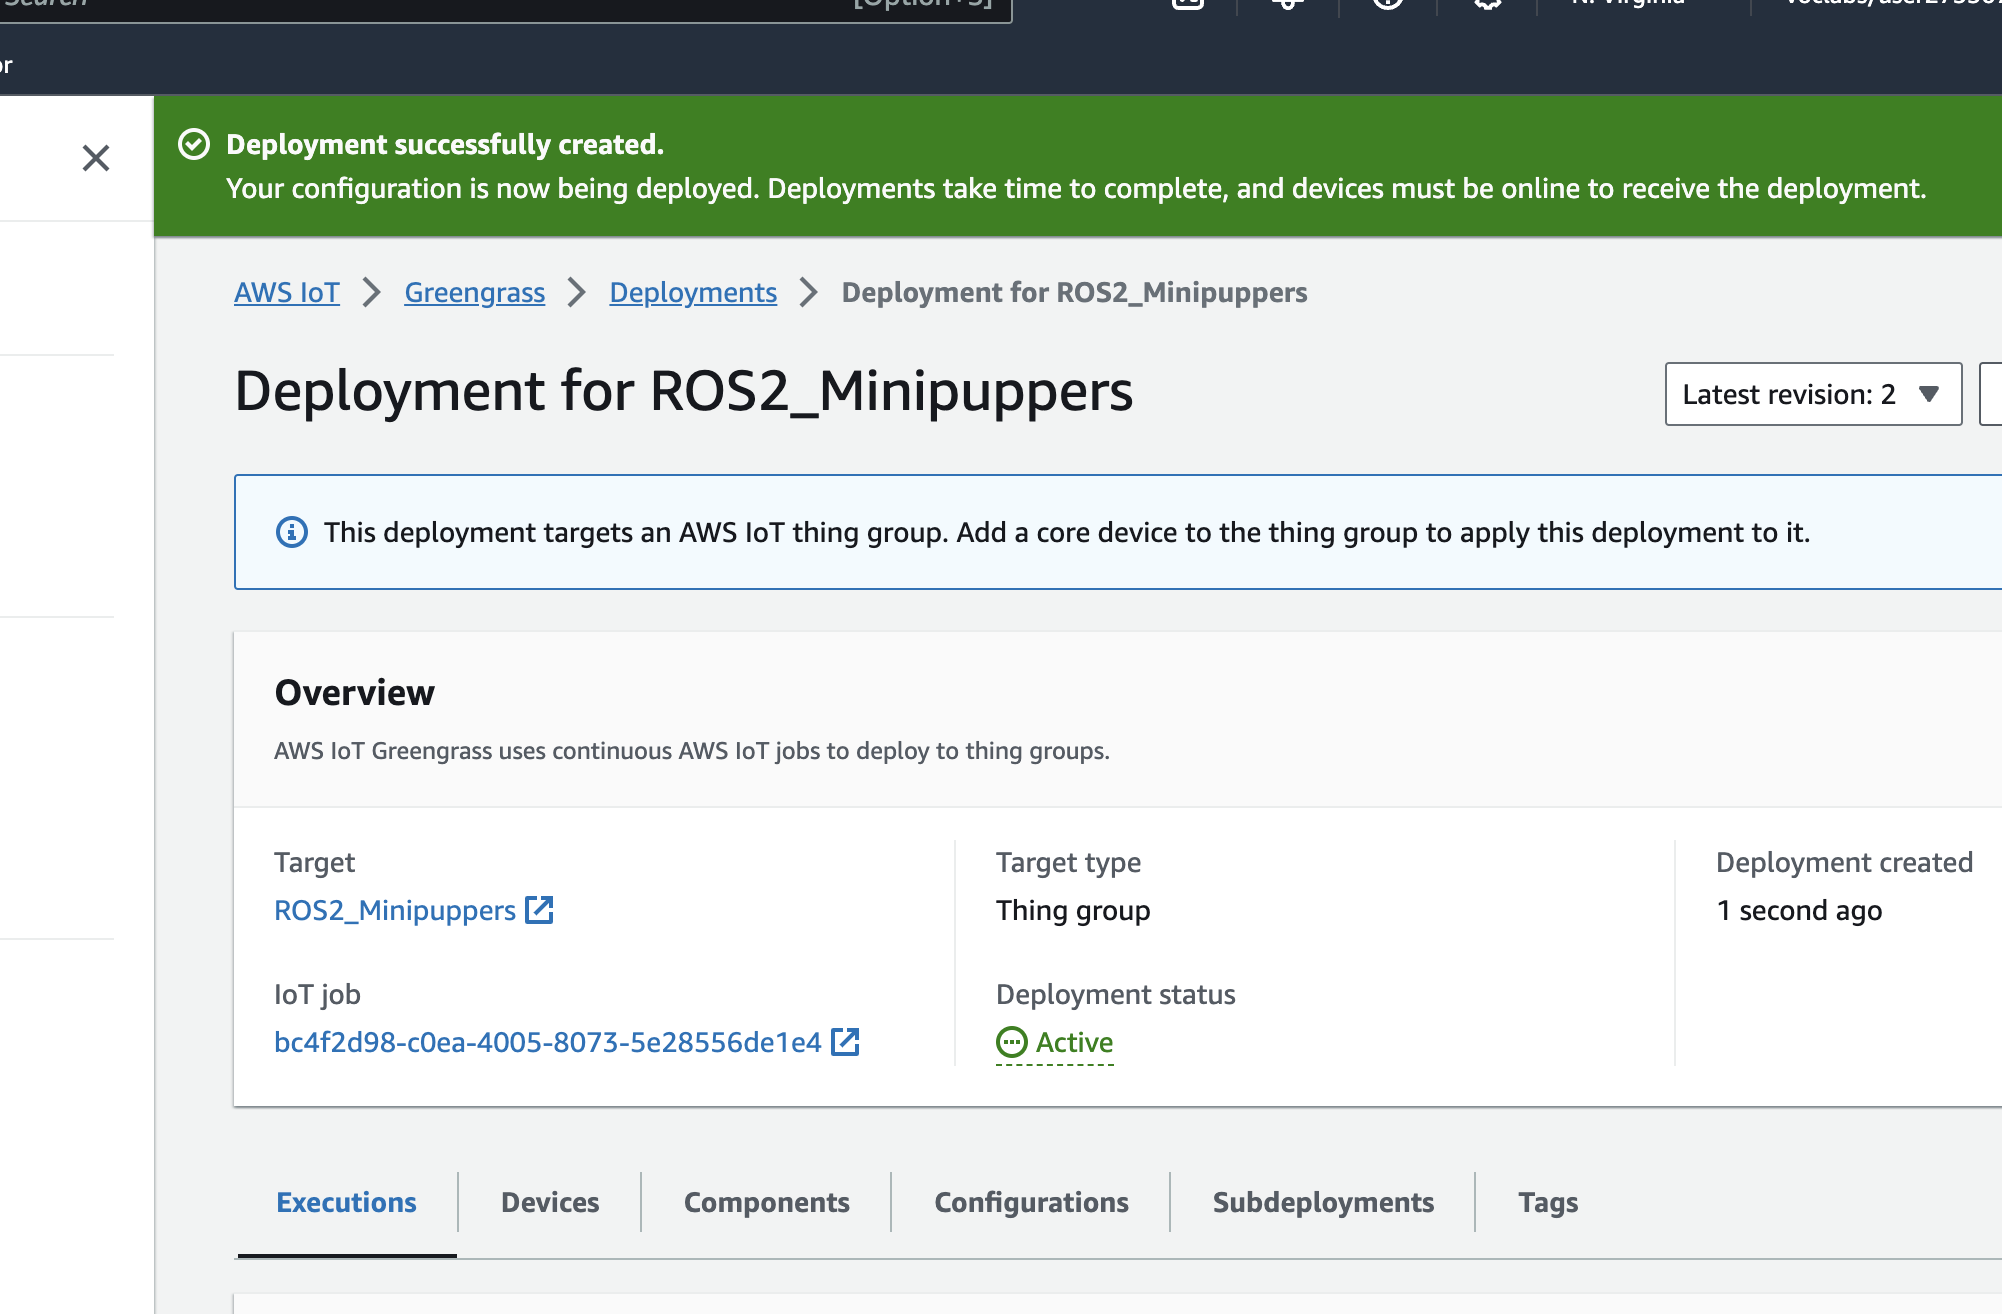
Verify Deployment on Mini Pupper
Check the deployment status:
# Check if docker is running
ps -aux | grep docker
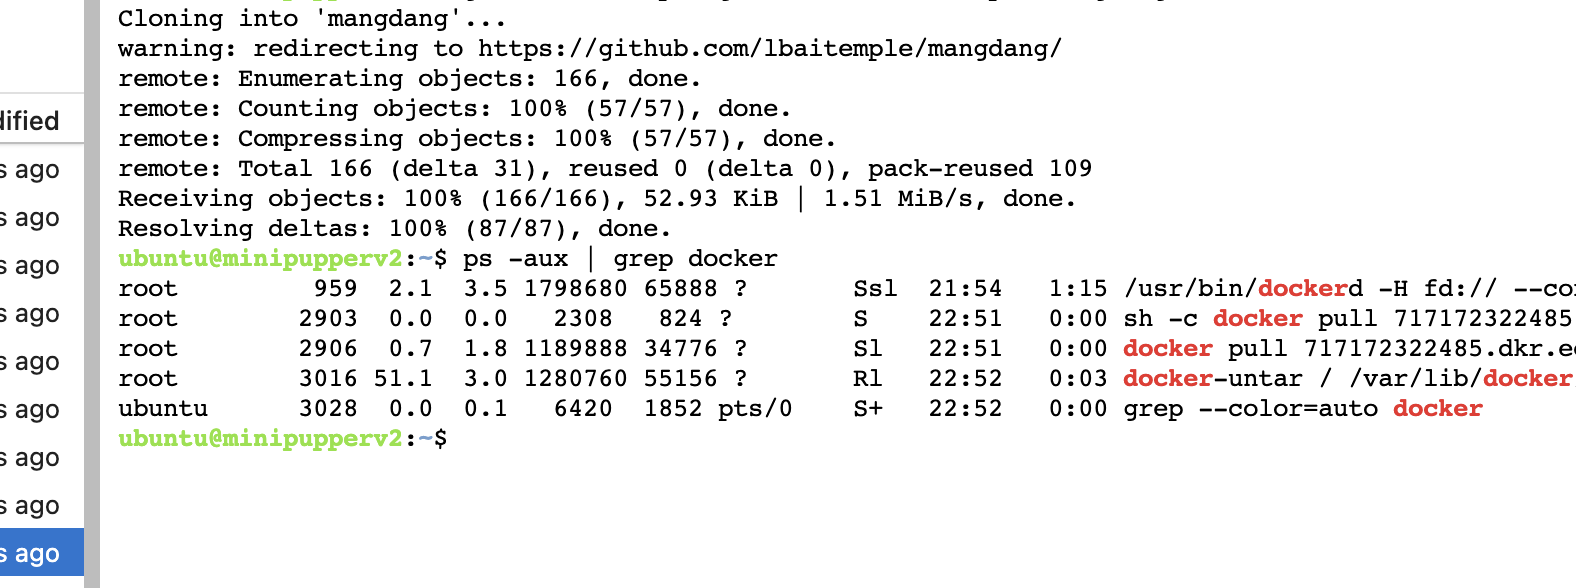
# Check available docker images
docker image list

# Check running docker processes
docker ps -a

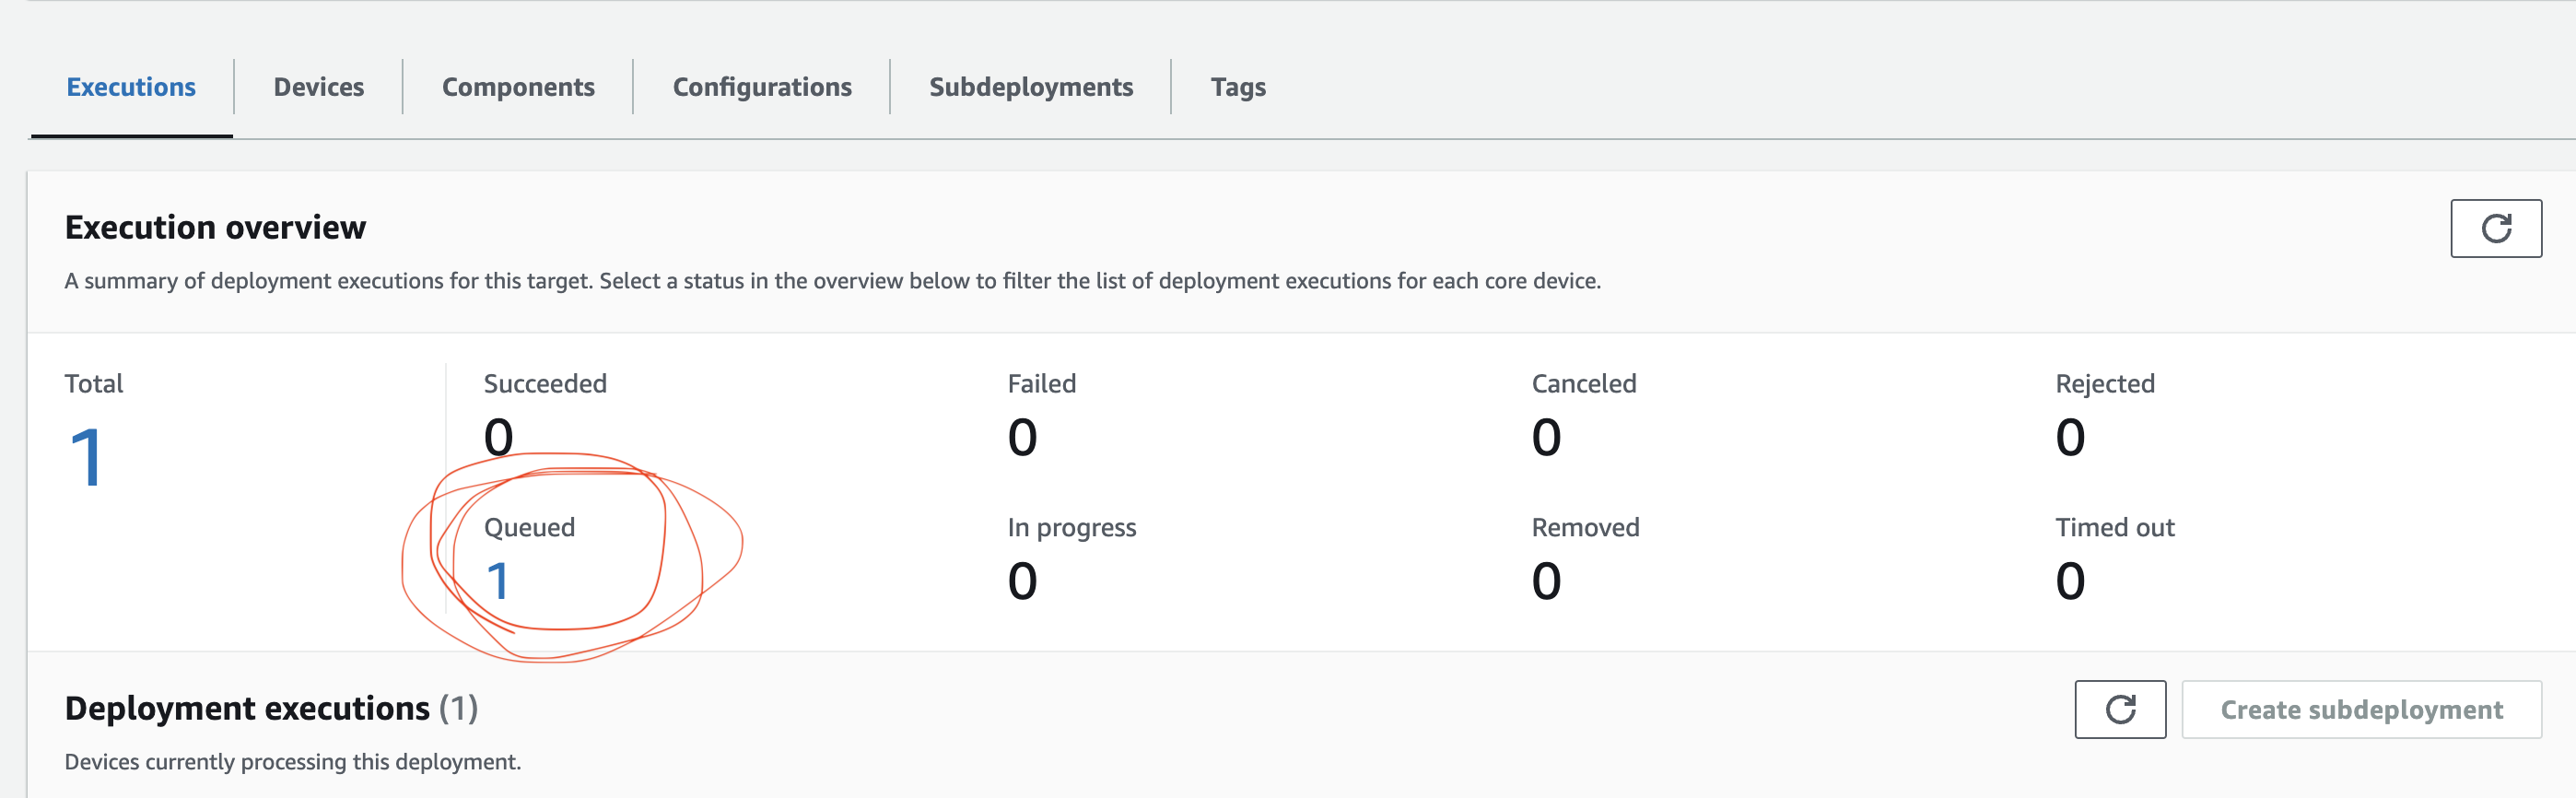
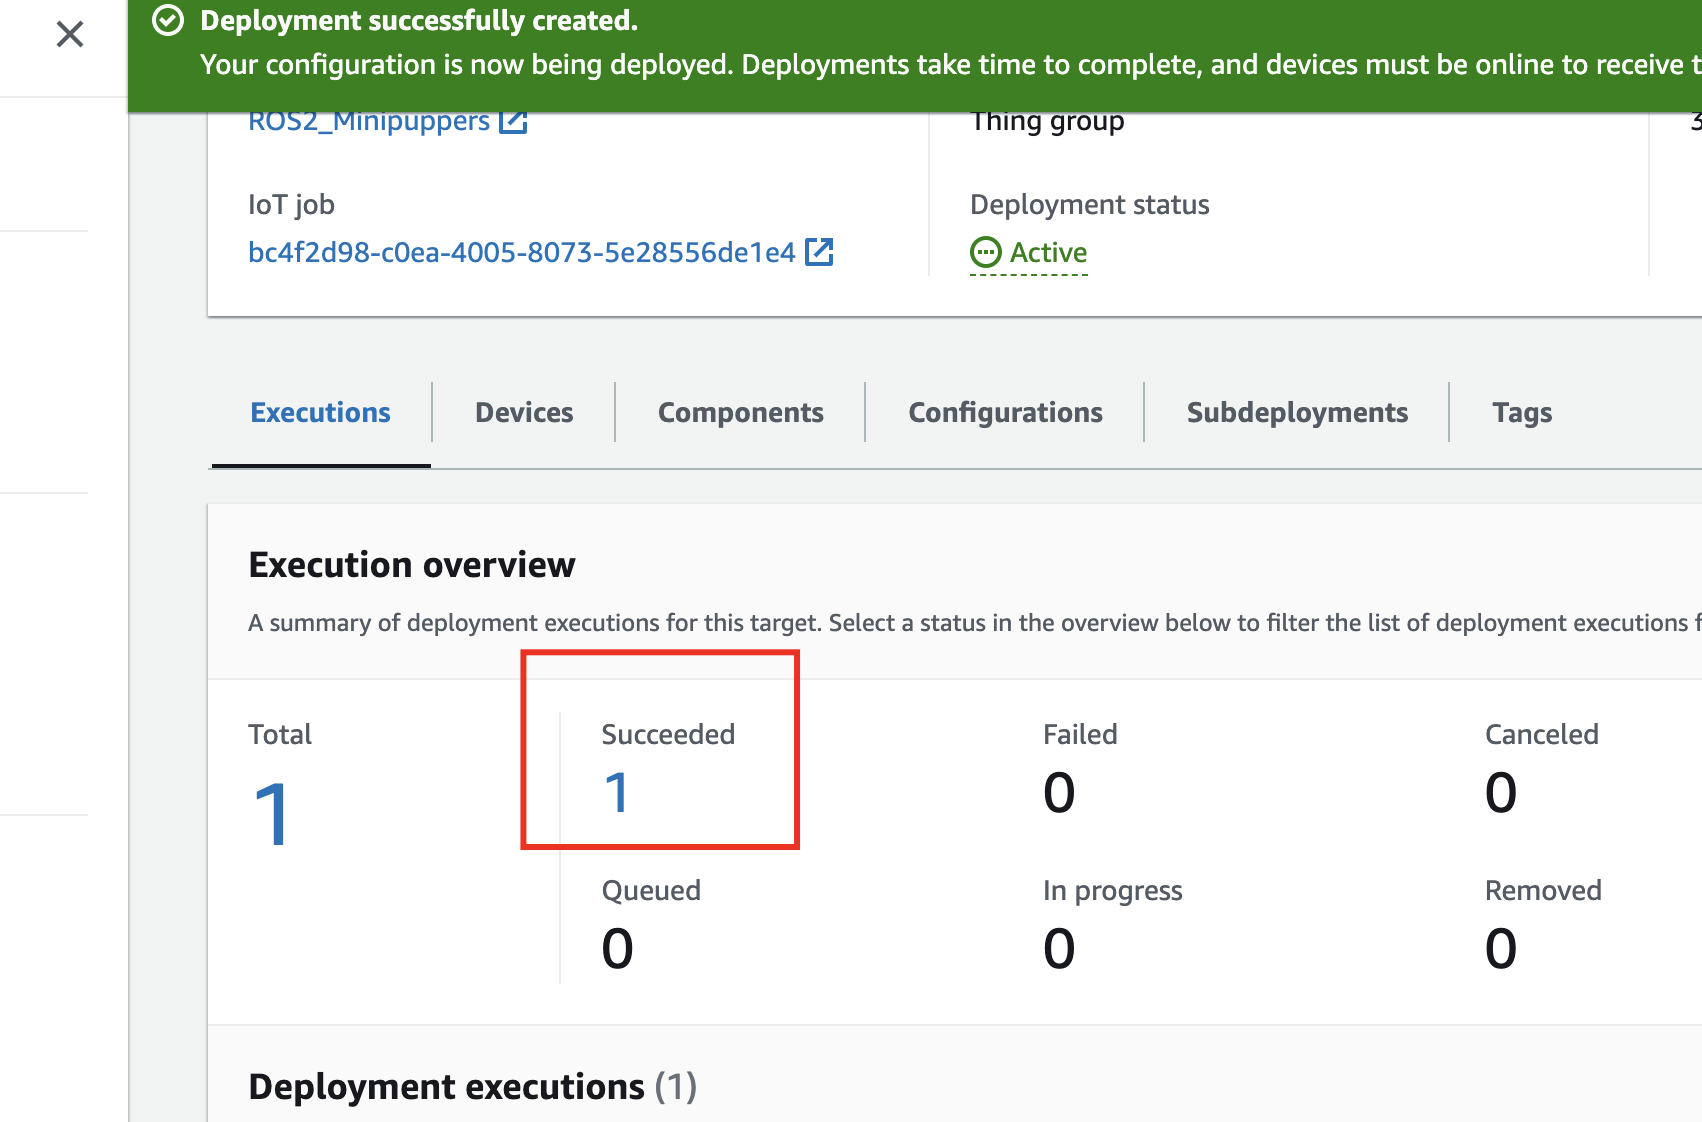
Deployment status on AWS:
- In queue:
- In progress:
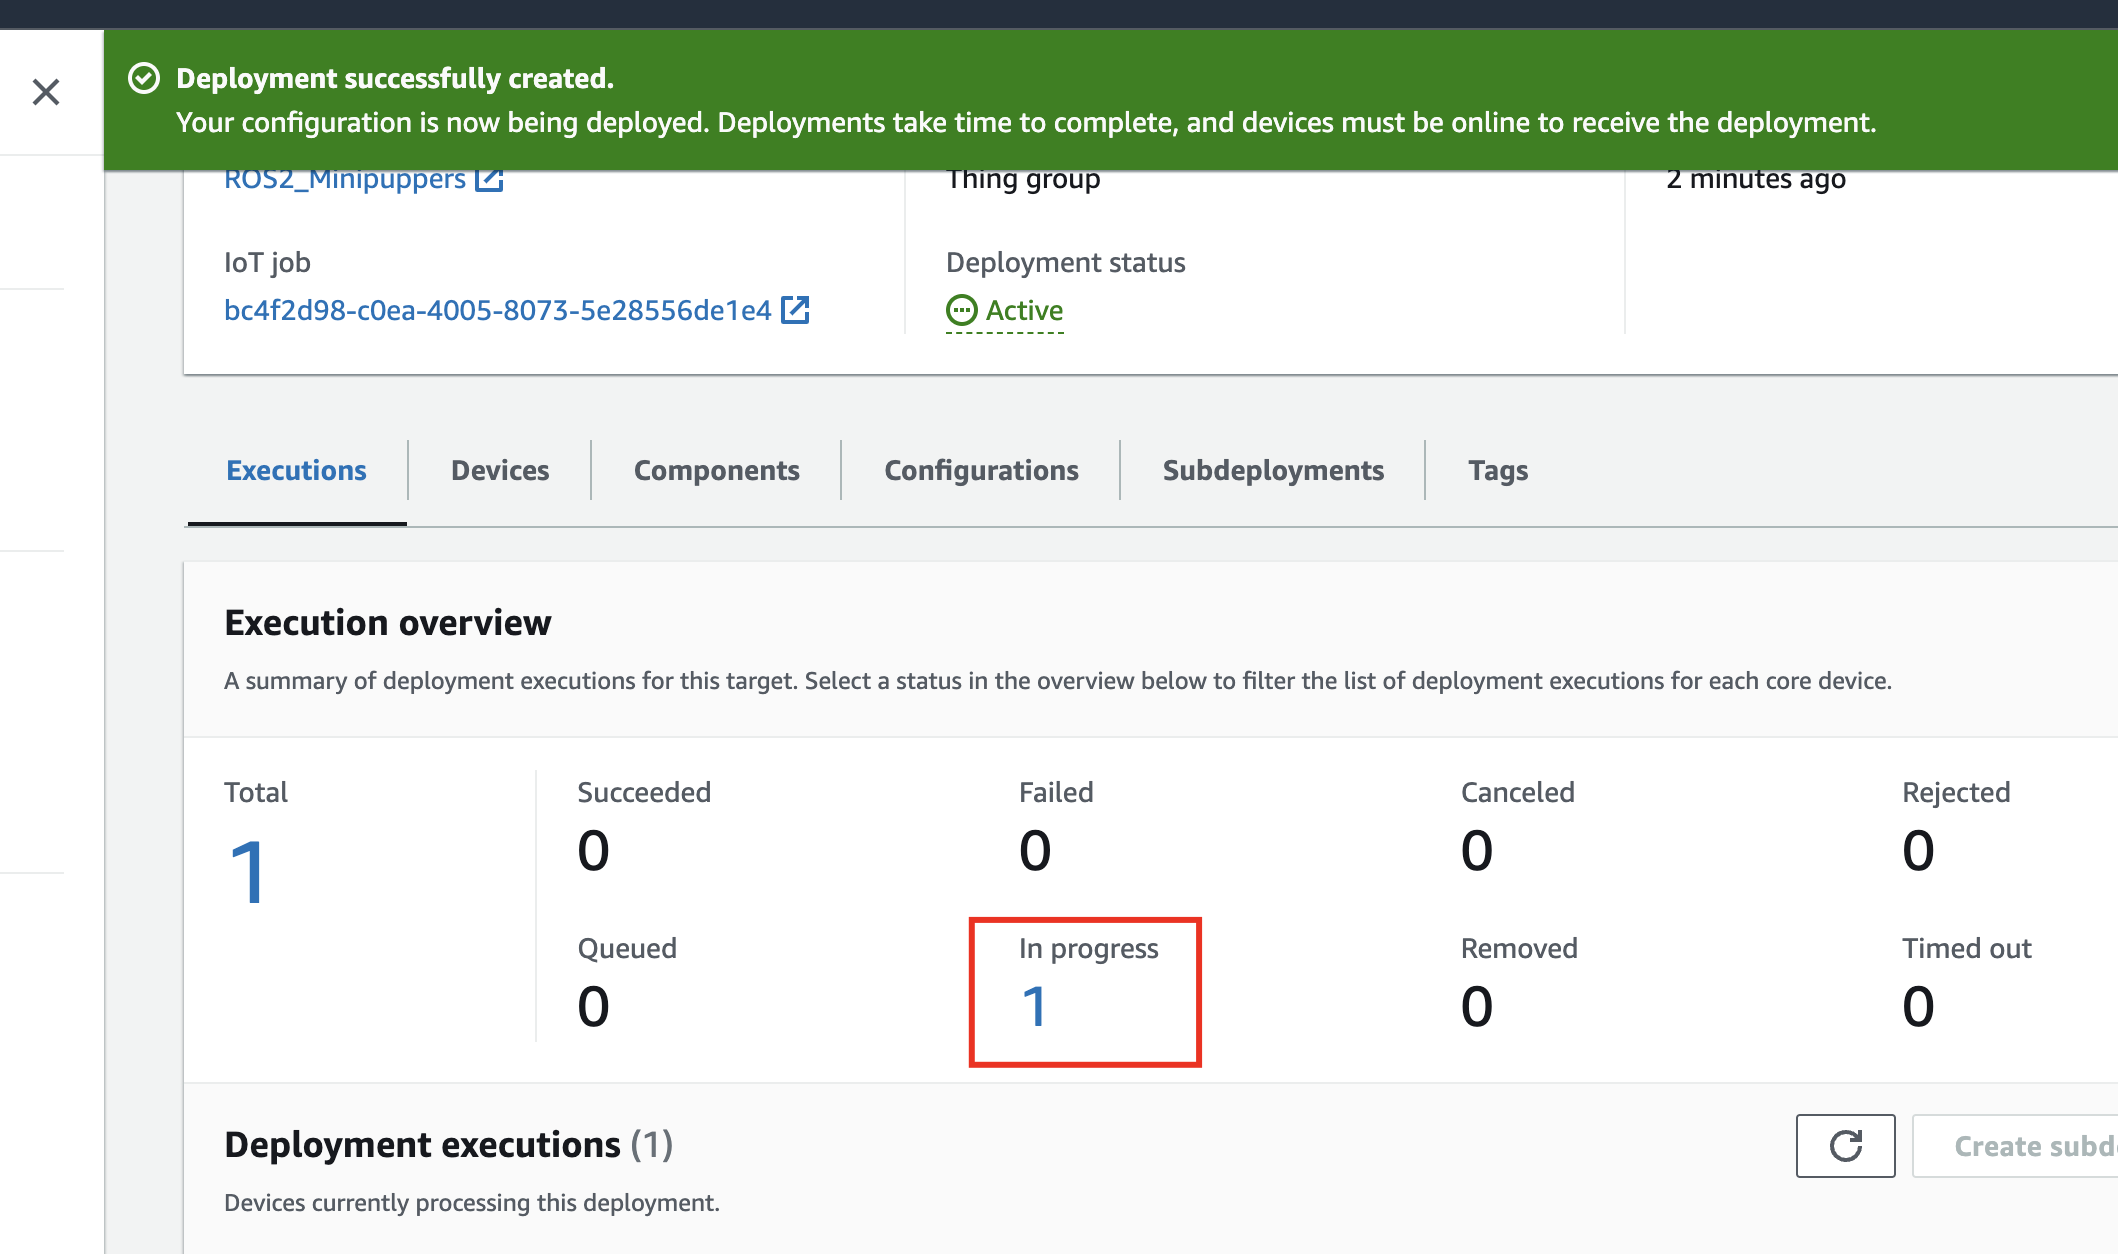
- Successfully deployed:
Check docker-compose log:

Enter the Container
docker exec -it <container_name_or_id> /bin/bash -c "/robot-entrypoint.sh"
Part 8: Control via MQTT
Once deployed, you can control Mini Pupper through AWS IoT MQTT topics.
Using AWS IoT Test Client
- Go to AWS IoT → Test → MQTT test client
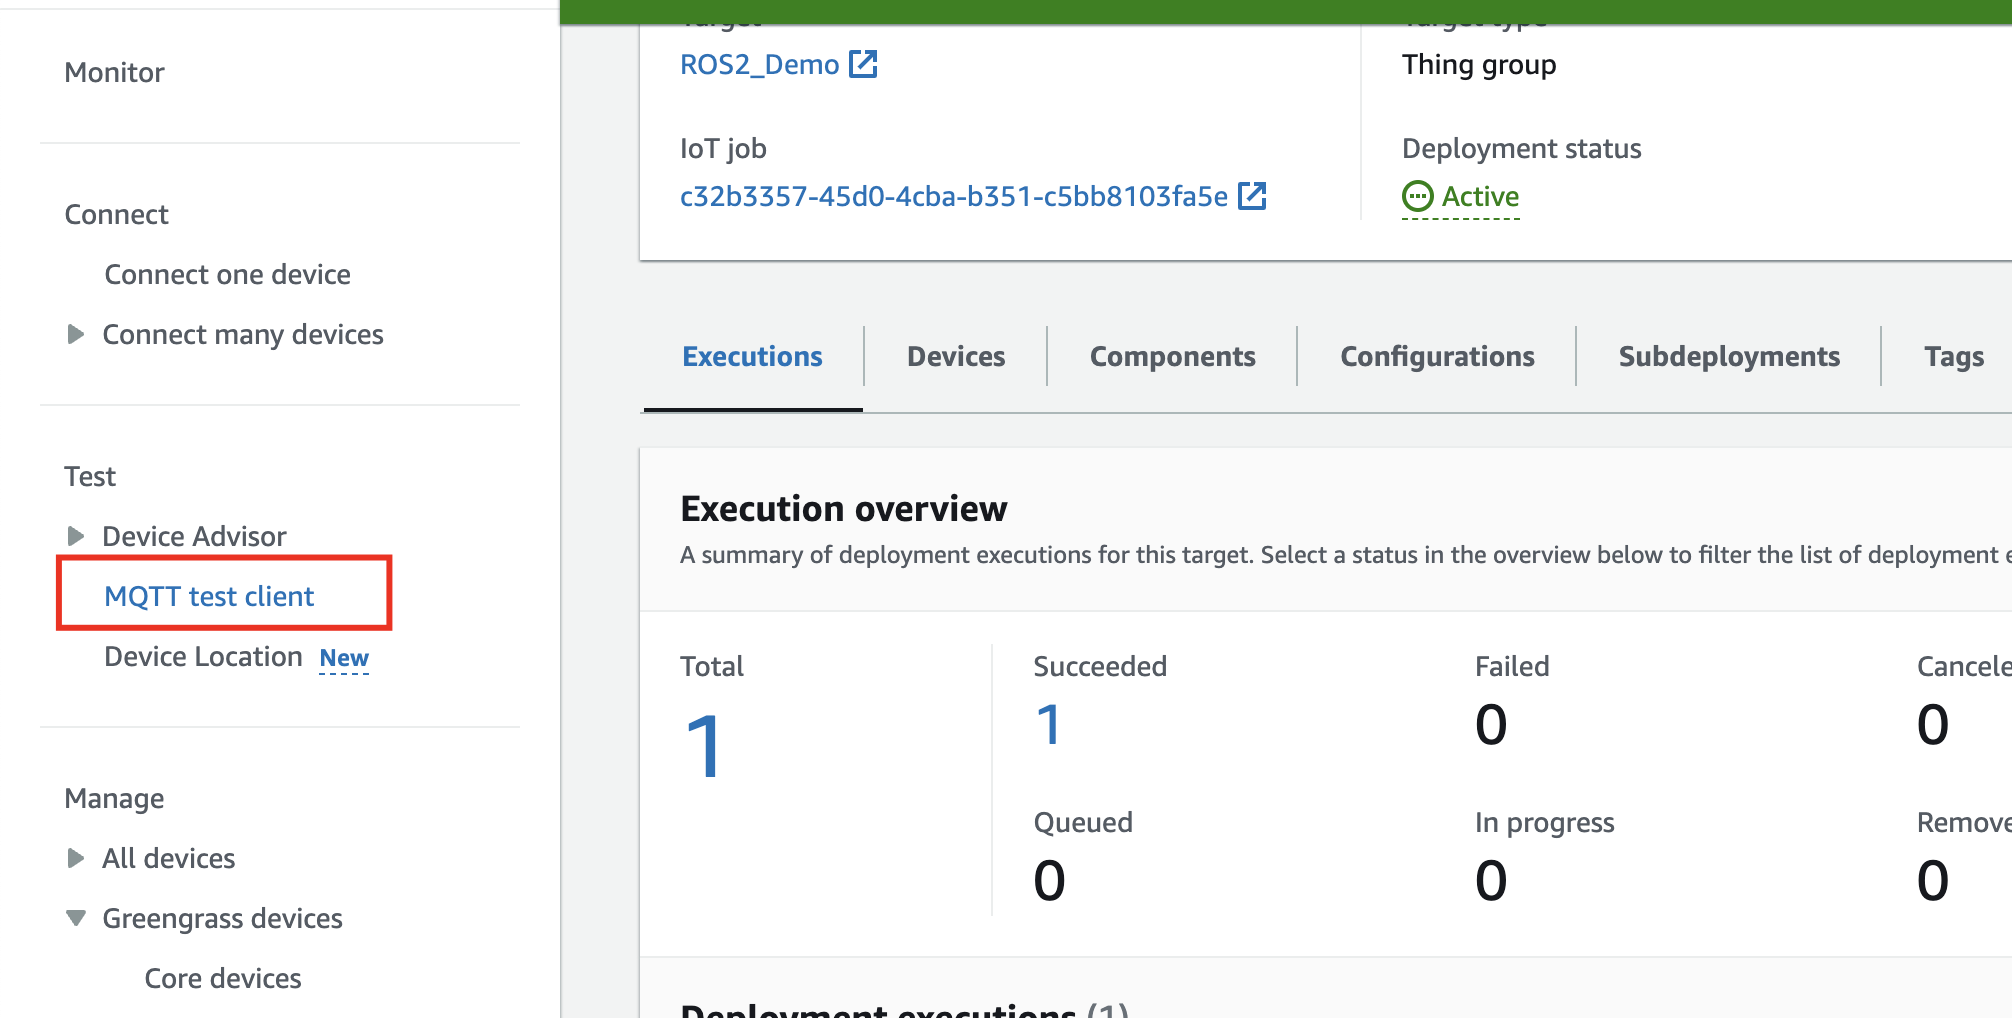
- Subscribe to topics or publish messages
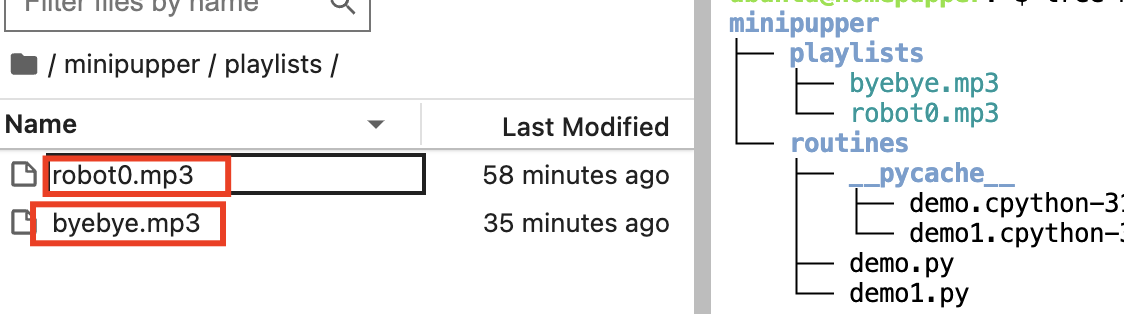
File Structure
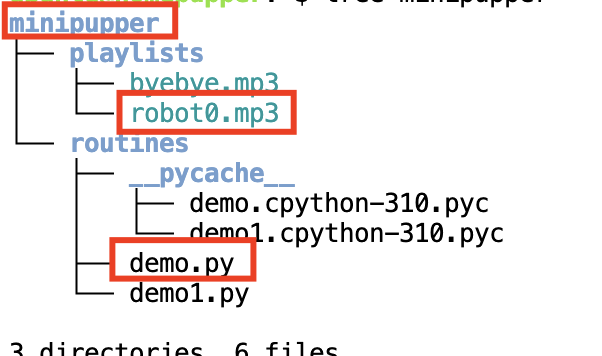
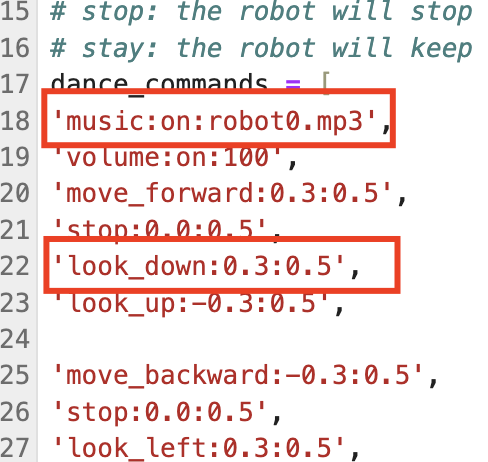
Play Music
Publish to topic music_file:
{
  "message": "robot0.mp3"
}
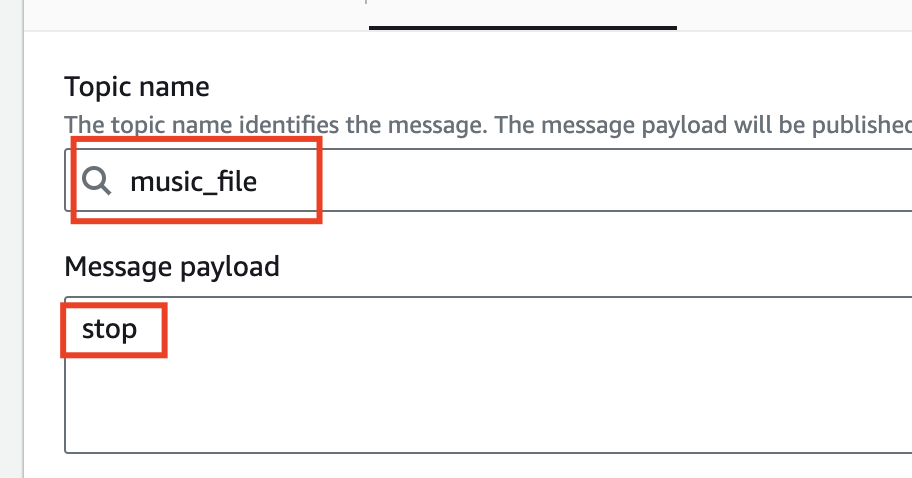
Available music files:
To stop music:
{
  "message": "stop"
}
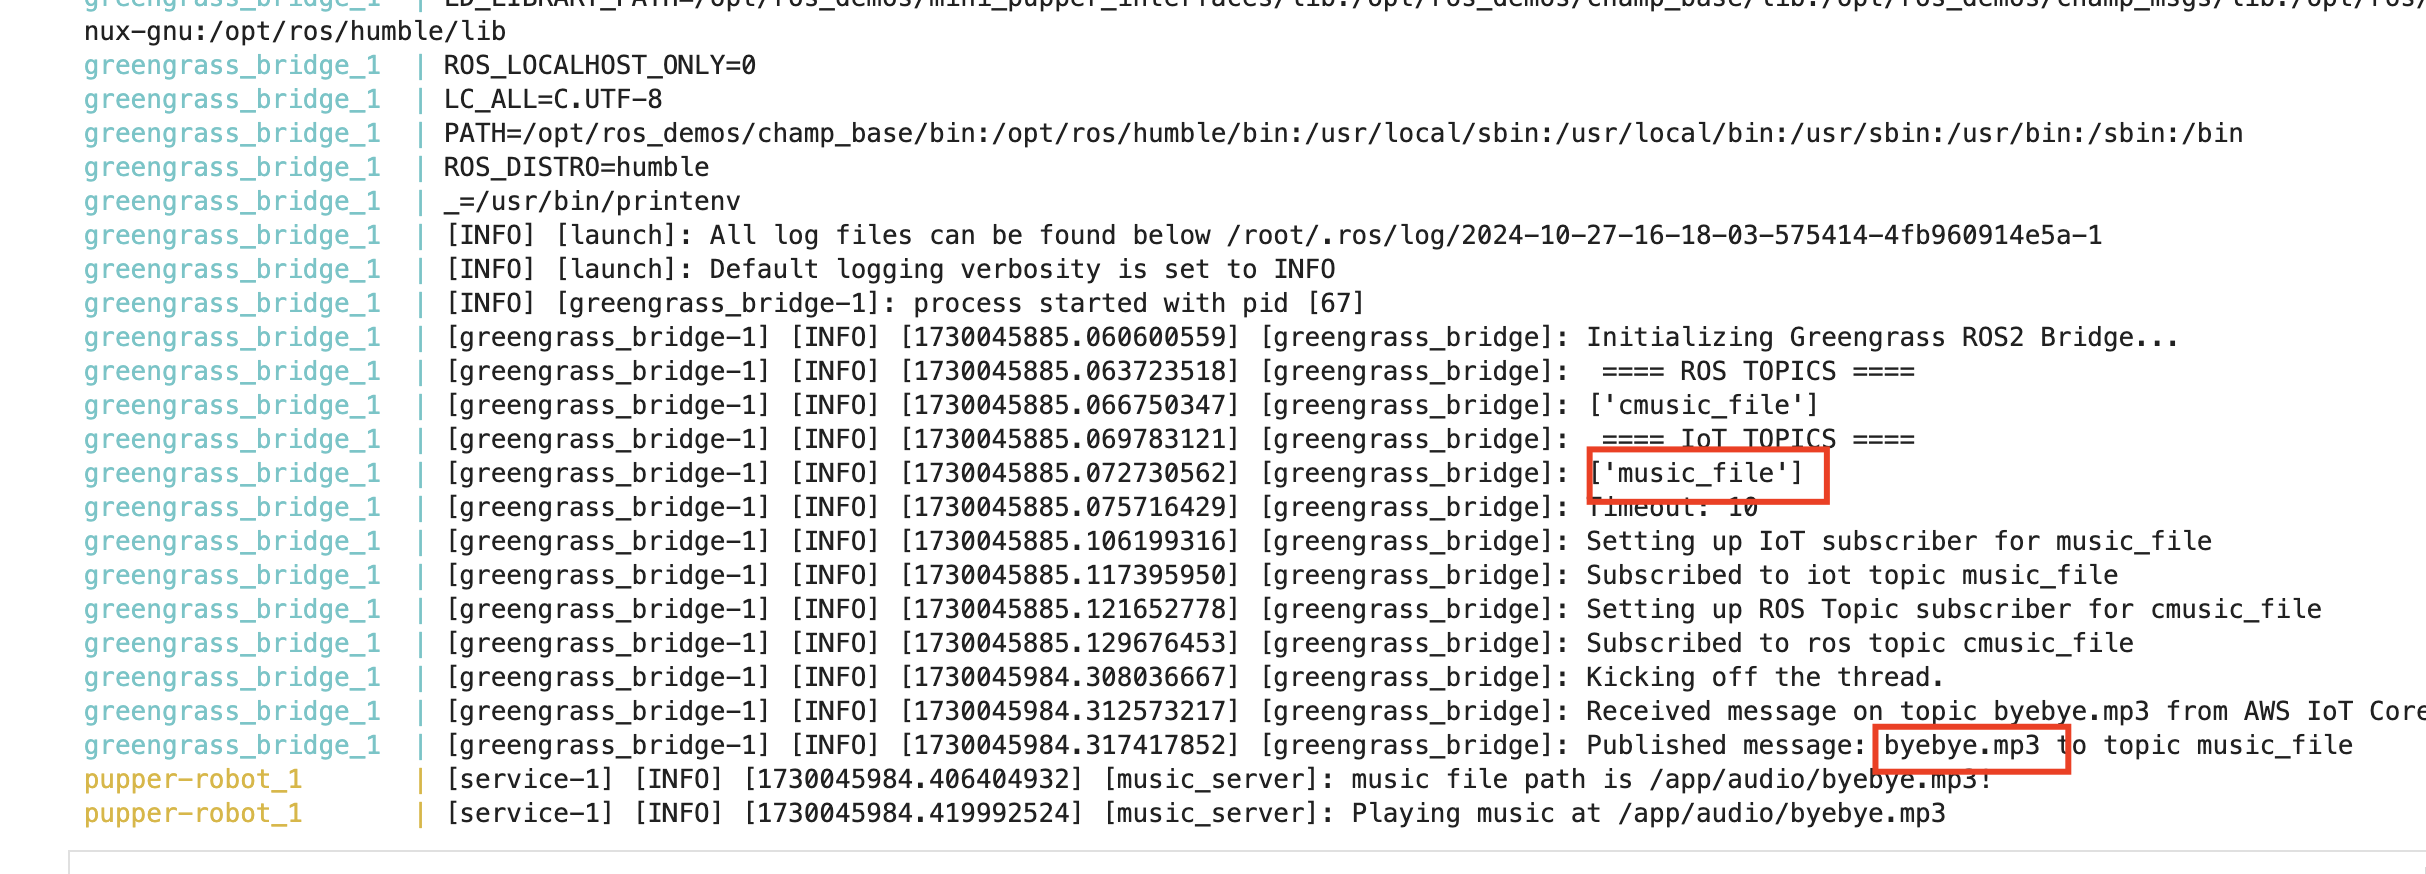
Check the log on Mini Pupper:
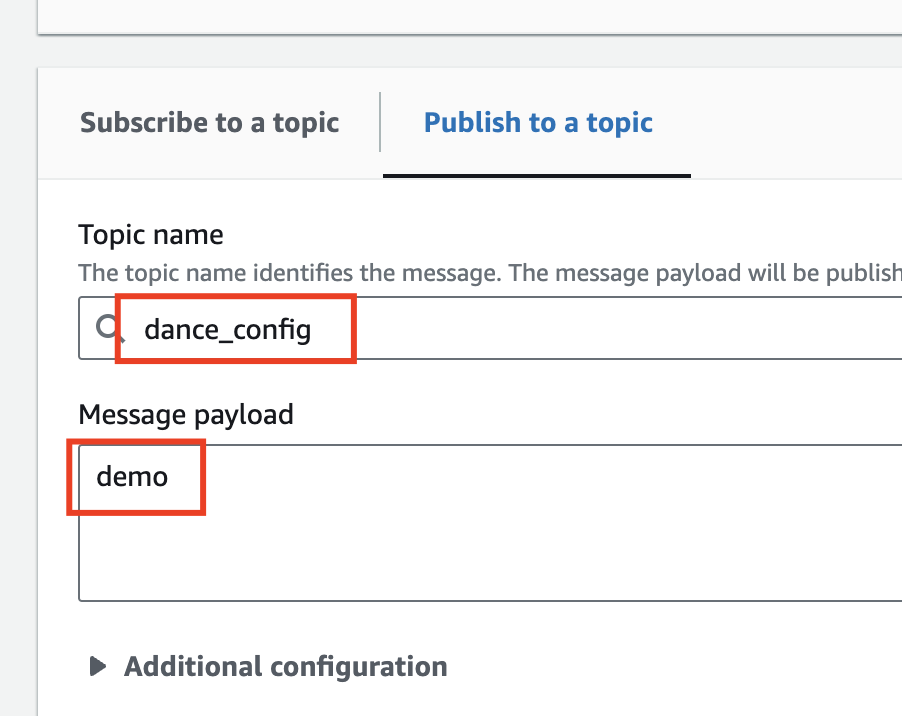
Trigger Dance
Publish to topic dance_config:
{
  "message": "dance1"
}
Part 9: Dance Exercise (Optional)
Build a Docker image with dance capabilities:
cd ~/
git clone -b ros2-dev-dance https://github.com/lbaitemple/mini_pupper_ros_aws/ mini_pupper_ros_dance
cd mini_pupper_ros_dance/
docker-compose build
Deploy using the same process and control via MQTT topic dance_config.
Troubleshooting
| Issue | Solution |
|---|---|
| Docker not starting | Check sudo systemctl status docker |
| ECR push fails | Verify AWS credentials and ECR login |
| Greengrass deployment stuck | Check Mini Pupper network connectivity |
| MQTT messages not received | Verify Greengrass bridge component is deployed |
| Container not running | Check docker-compose logs |
Check Docker Compose Logs
docker-compose logs
Verify Greengrass Status
sudo systemctl status greengrass
Summary
In this lab, you learned:
- How to set up Docker in WSL for ARM cross-compilation
- How to create and configure AWS S3 buckets
- How to push Docker images to AWS ECR
- How to set up AWS IoT Things and Thing Groups
- How to deploy containers via AWS Greengrass
- How to control Mini Pupper via MQTT topics
AWS Greengrass Workflow
WSL/Cloud9                    AWS Cloud                    Mini Pupper
    │                            │                            │
    │  1. Build Docker Image     │                            │
    │ ─────────────────────────► │                            │
    │                            │                            │
    │  2. Push to ECR            │                            │
    │ ─────────────────────────► │  ECR stores image          │
    │                            │                            │
    │  3. Push config to S3      │                            │
    │ ─────────────────────────► │  S3 stores config          │
    │                            │                            │
    │  4. Create IoT Component   │                            │
    │ ─────────────────────────► │  IoT Core ready            │
    │                            │                            │
    │                            │  5. Deploy to device       │
    │                            │ ──────────────────────────►│
    │                            │                            │
    │                            │  6. Pull image from ECR    │
    │                            │ ◄────────────────────────── │
    │                            │                            │
    │                            │  7. MQTT Control           │
    │                            │ ◄──────────────────────────►│
    │                            │                            │