flowchart LR
  A(("Software setup")) --> B(("Network setup"))
  B --> C(("Hardware check: camera and audio"))
  C --> D(("Google Gemini"))
  C --> E((" Linux ROS2 "))
  E --> F(("camera view"))
  E --> G(("line following"))

  %% Define custom styles for each node
  classDef nodeStyle width:150px, text-align:center, white-space:pre-wrap;
  classDef coloredNode fill:#1f96,stroke:#333,stroke-width:2px,width:150px,white-space:pre-wrap,text-align:center;


  %% Apply the custom style to the nodes
  class A,C,D,E,F,G nodeStyle;
  class B coloredNode;

  %% Add slide references to each block (adjust according to your presentation setup)
  click A "#software" "Go to Software setup slide"
  click B "#network" "Go to Network setup slide"
  click C "#hardware" "Go to Hardware slide"
  click D "#gemini" "Go to Google Gemini slide"
  click E "#ros2" "Go to ROS slide"
  click F "#ros2" "Go to ROS slide"
  click G "#linefollowing" "Go to ROS line following slide"
Robot Control using Raspberry Pi CM4
Workshop - A minimal introduction to Minipupper V2
Li Bai 
Temple University
October 6, 2024
Install VScode
- edit file in text mode

Install Window Terminal
- seems to be better than power shell

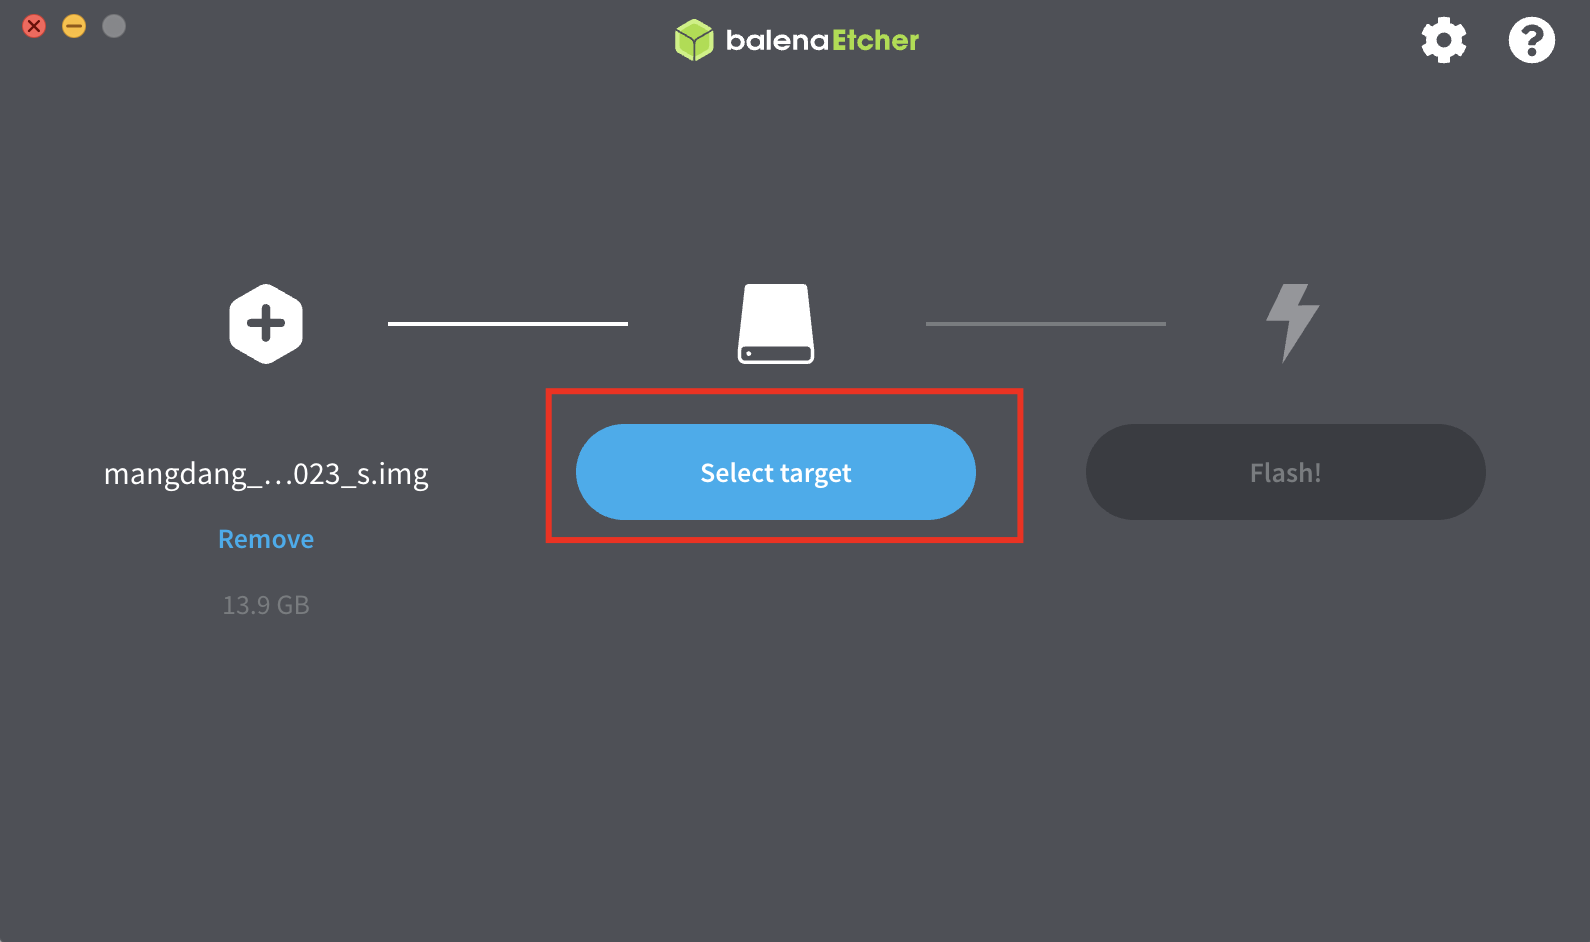
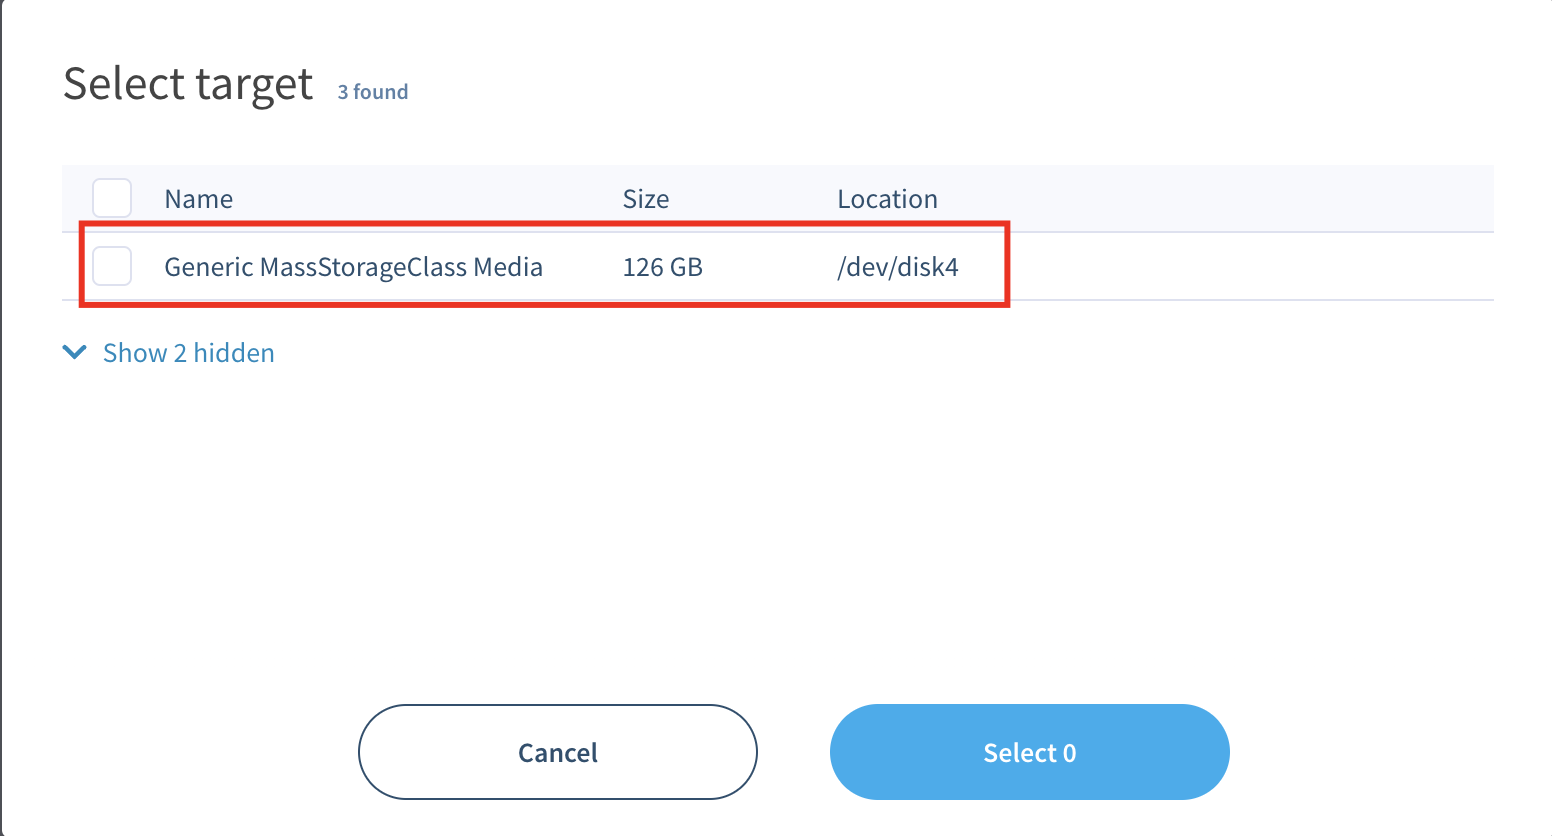
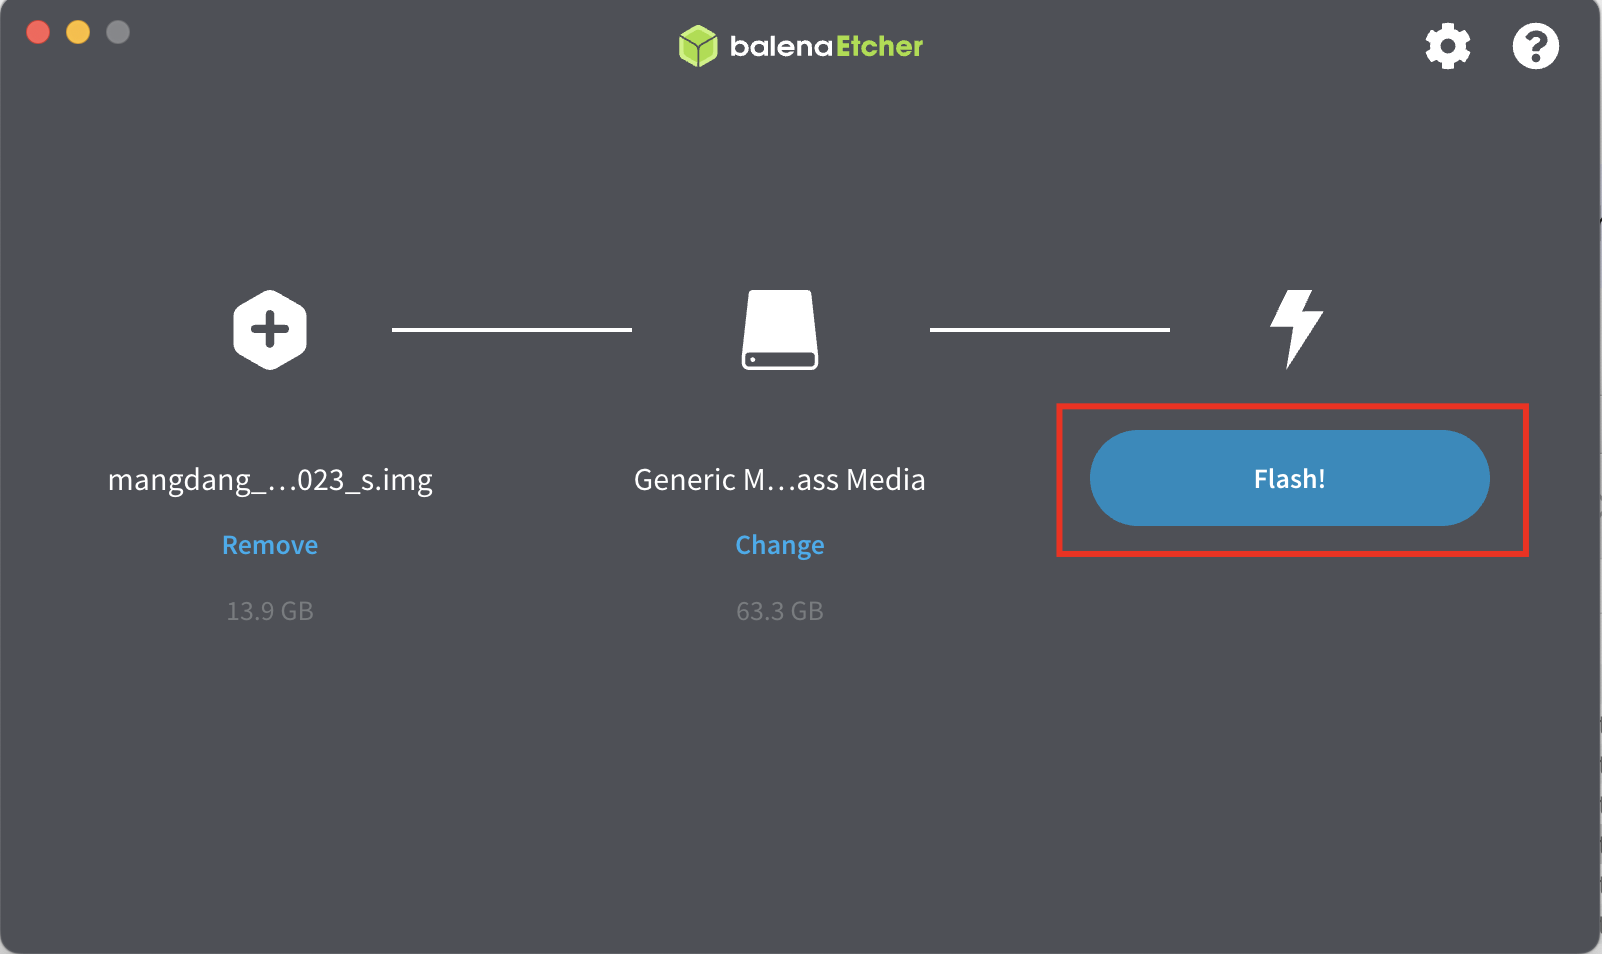
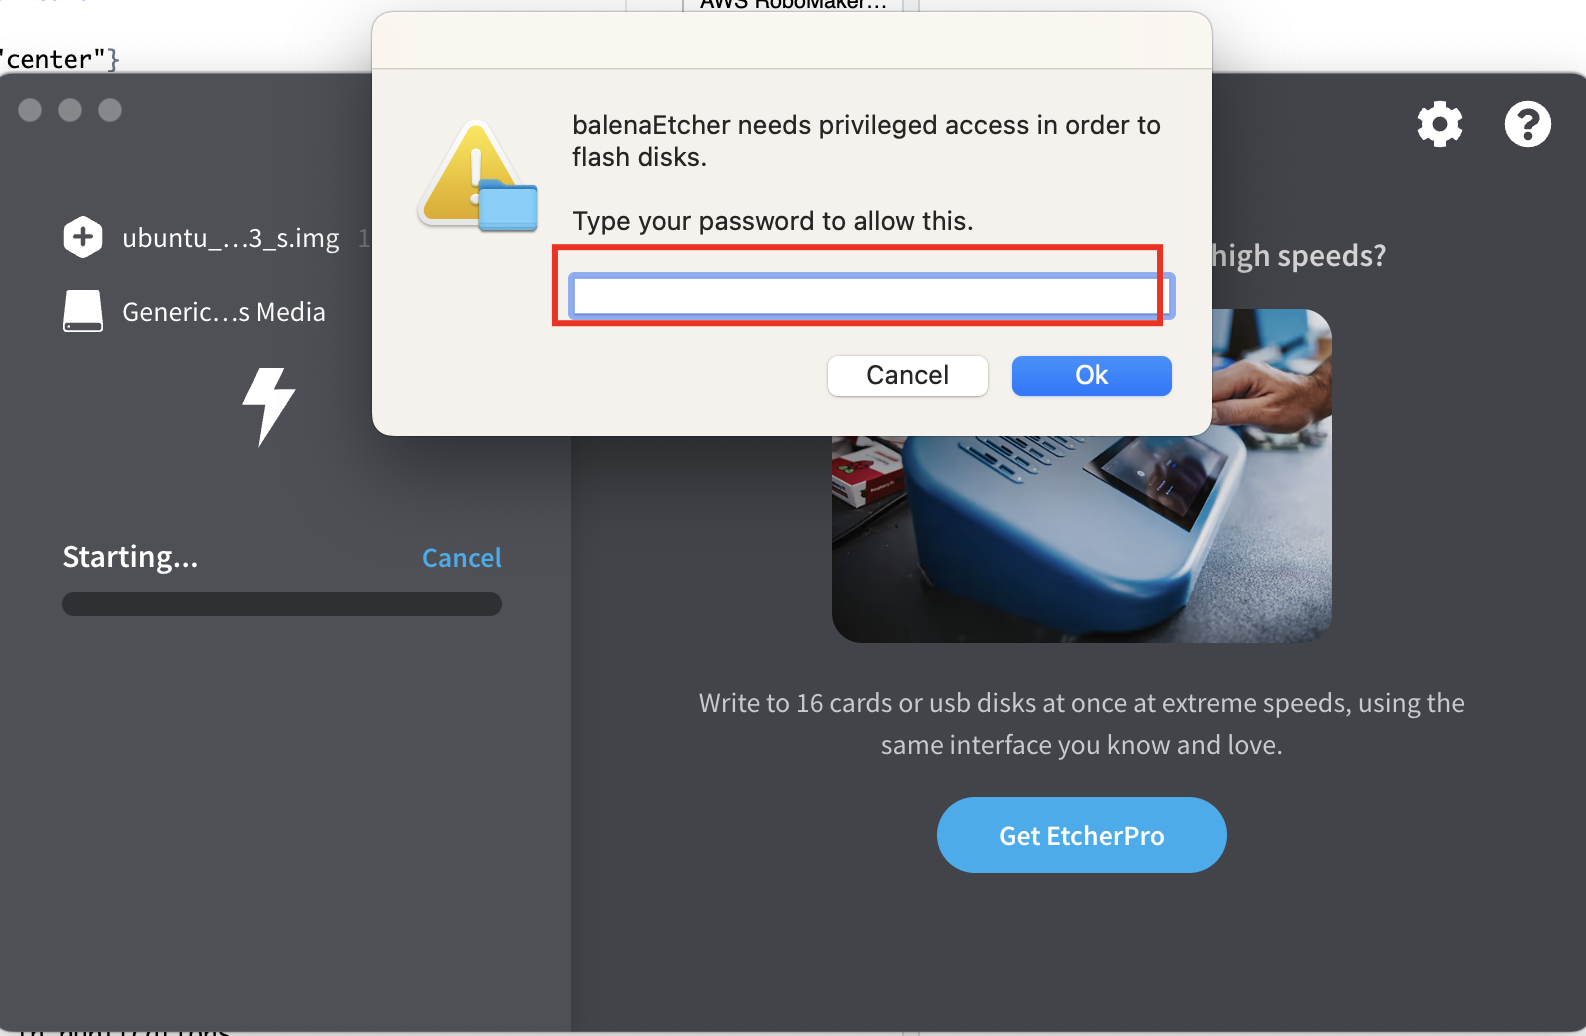
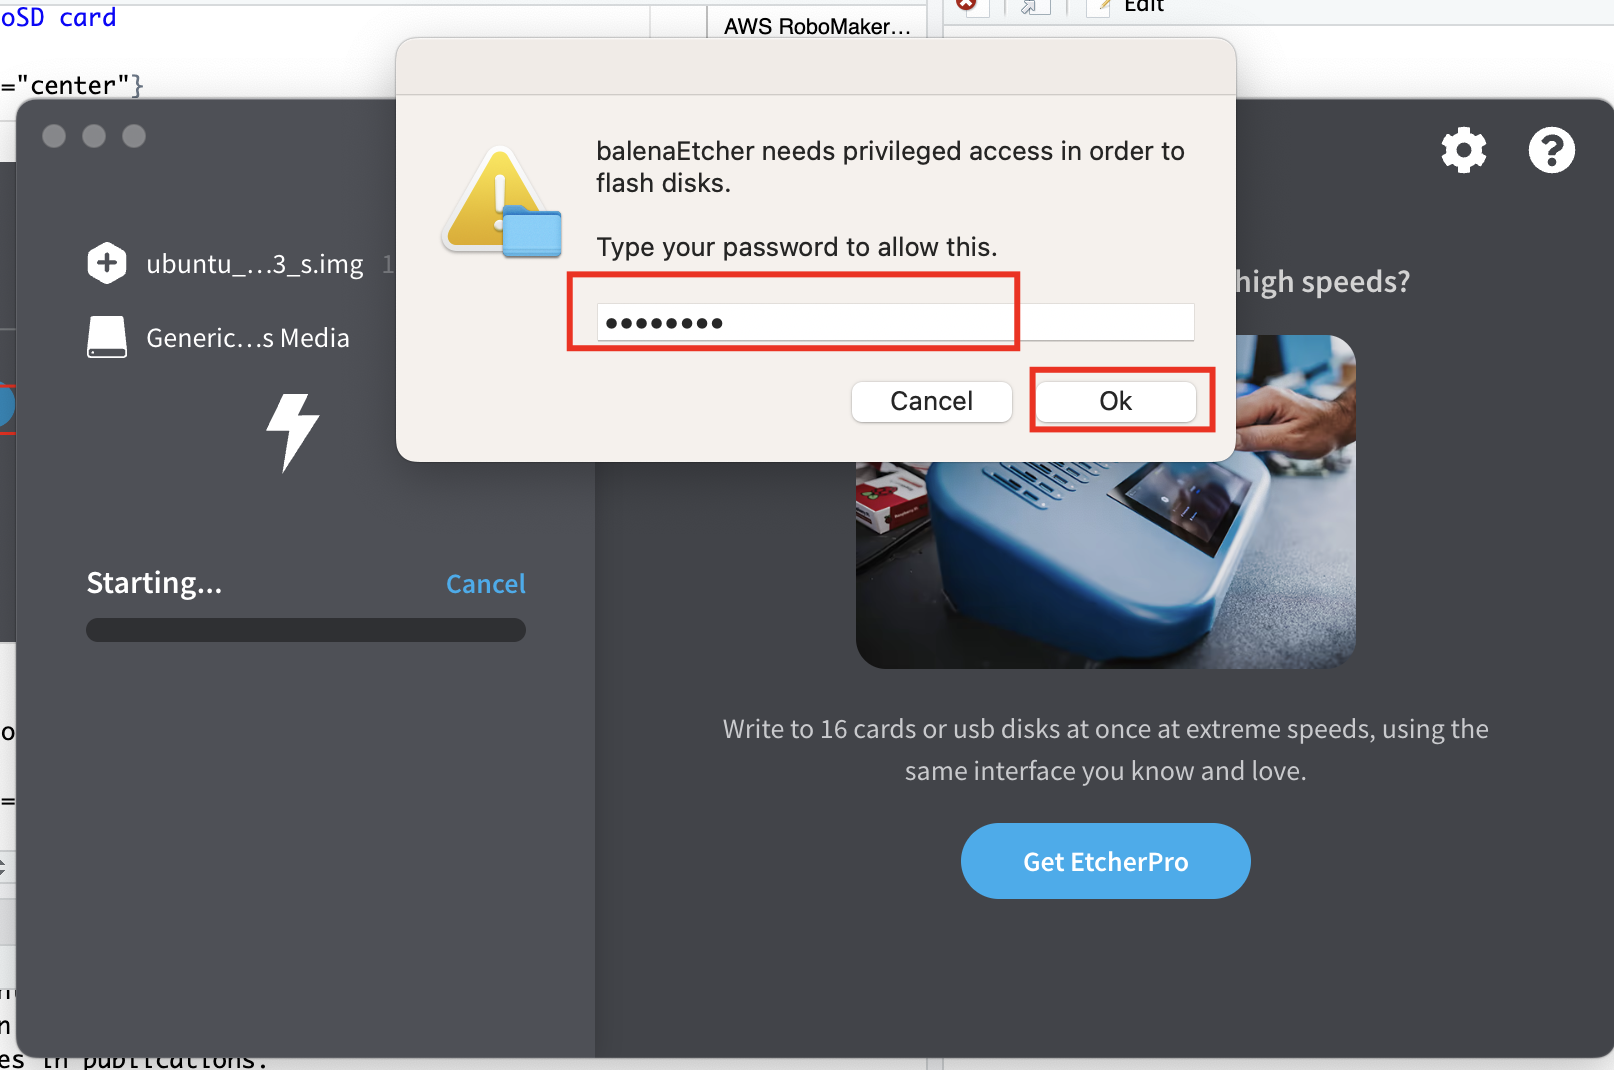
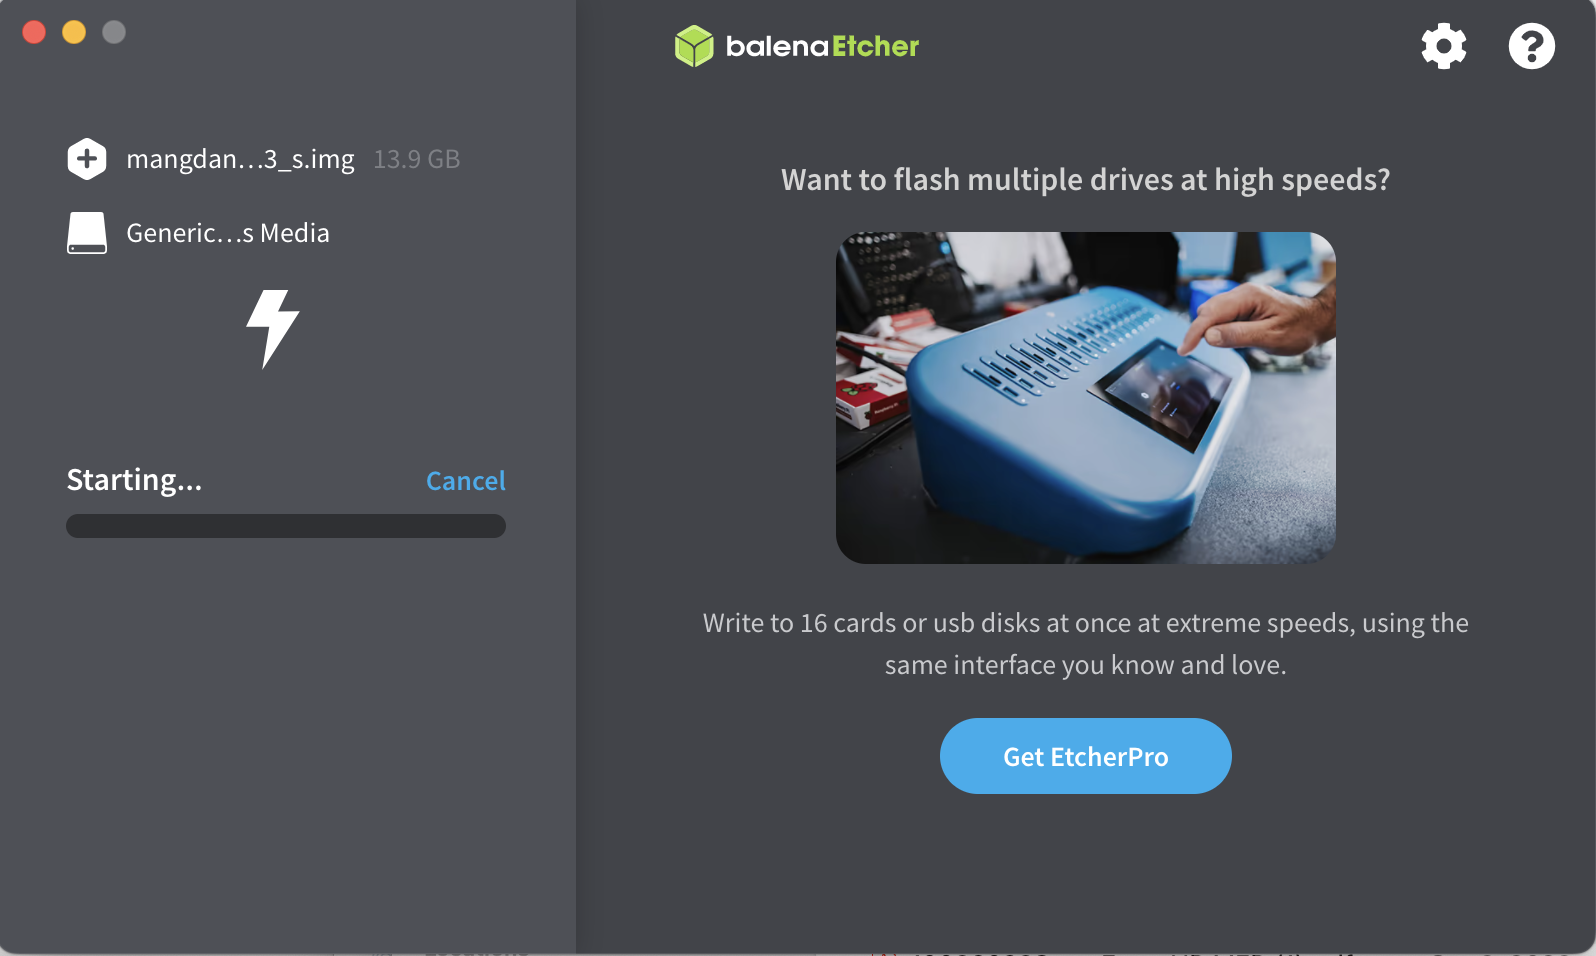
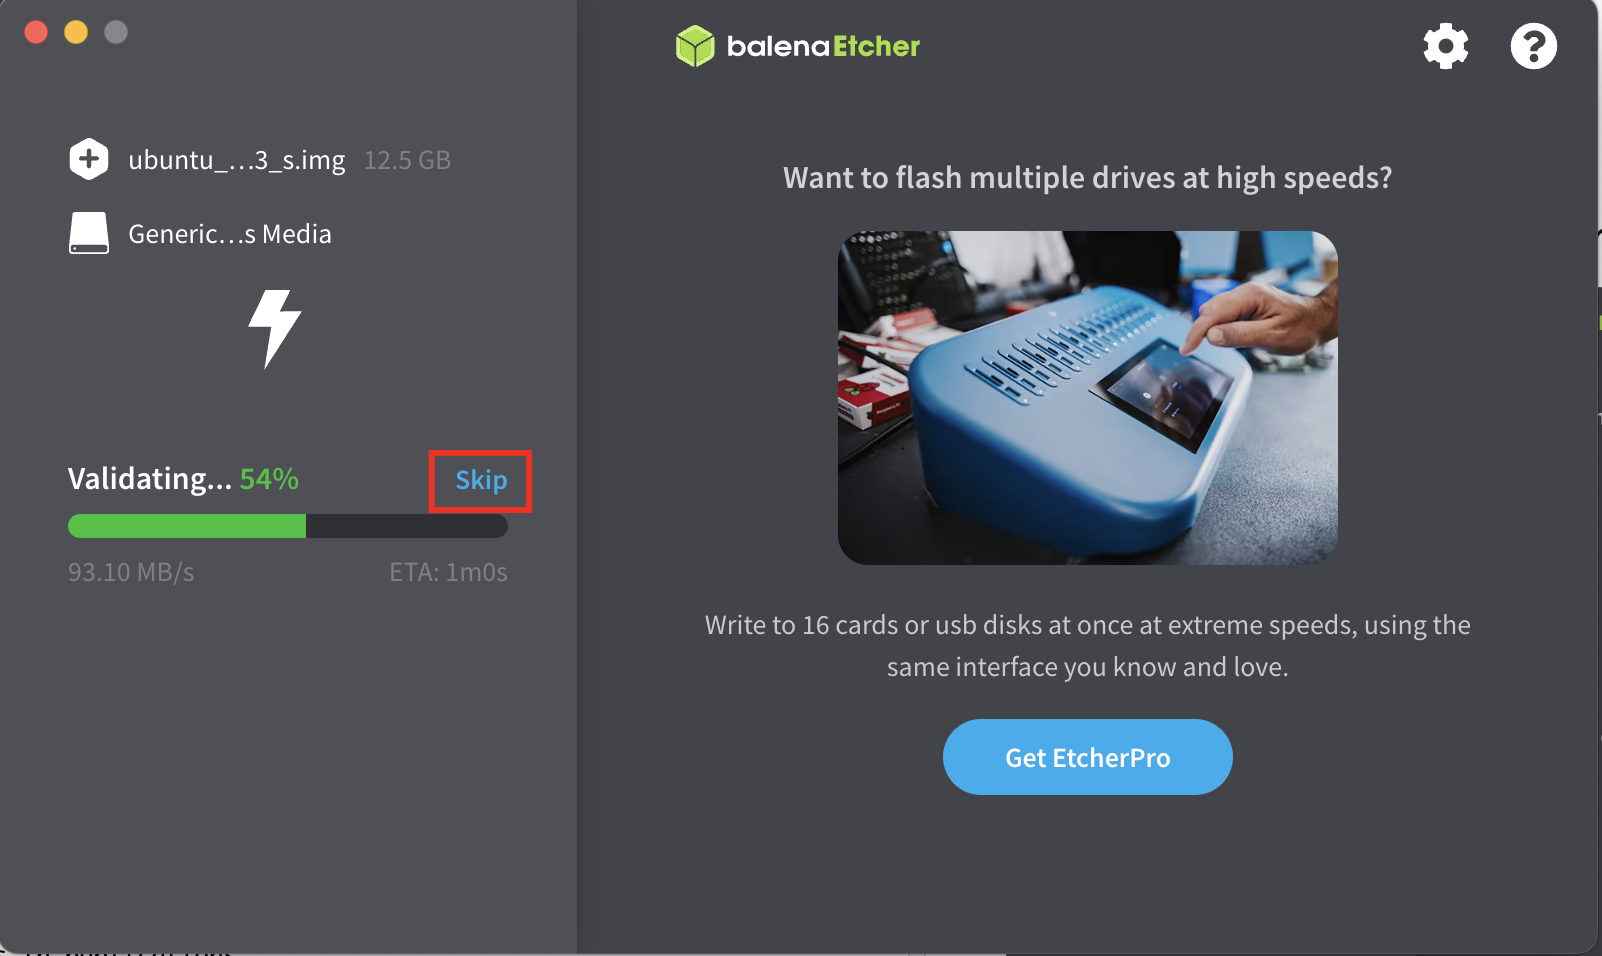
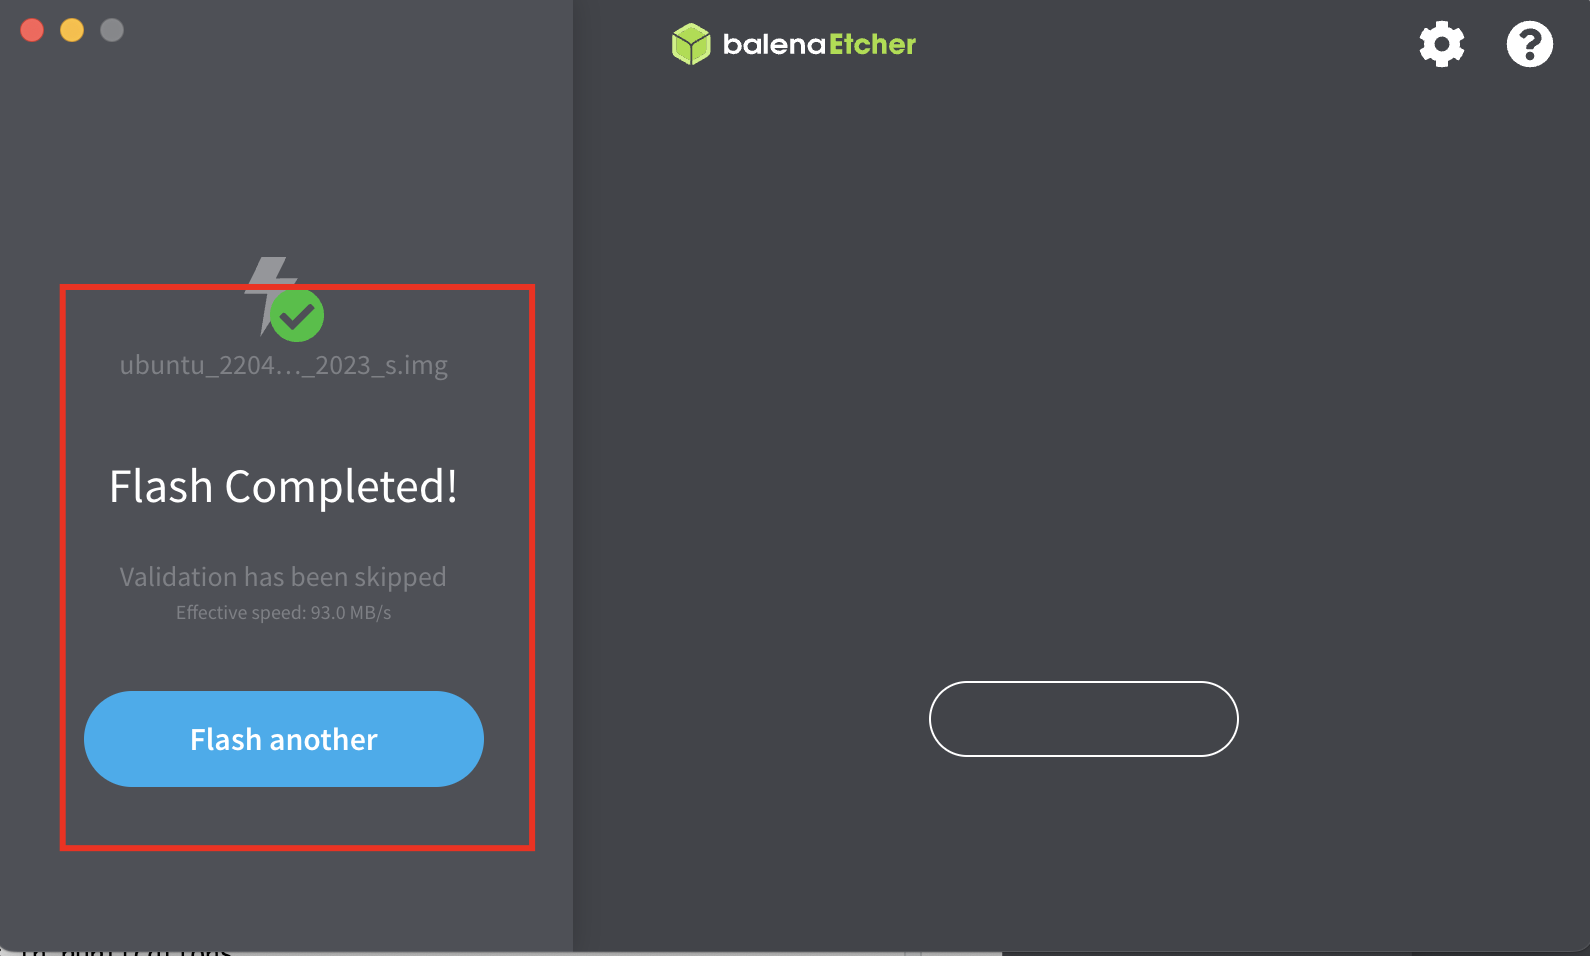
Install Balena Etcher
- Download Balena Etcher https://etcher.balena.io/ to copy the new image to your MicroSD card
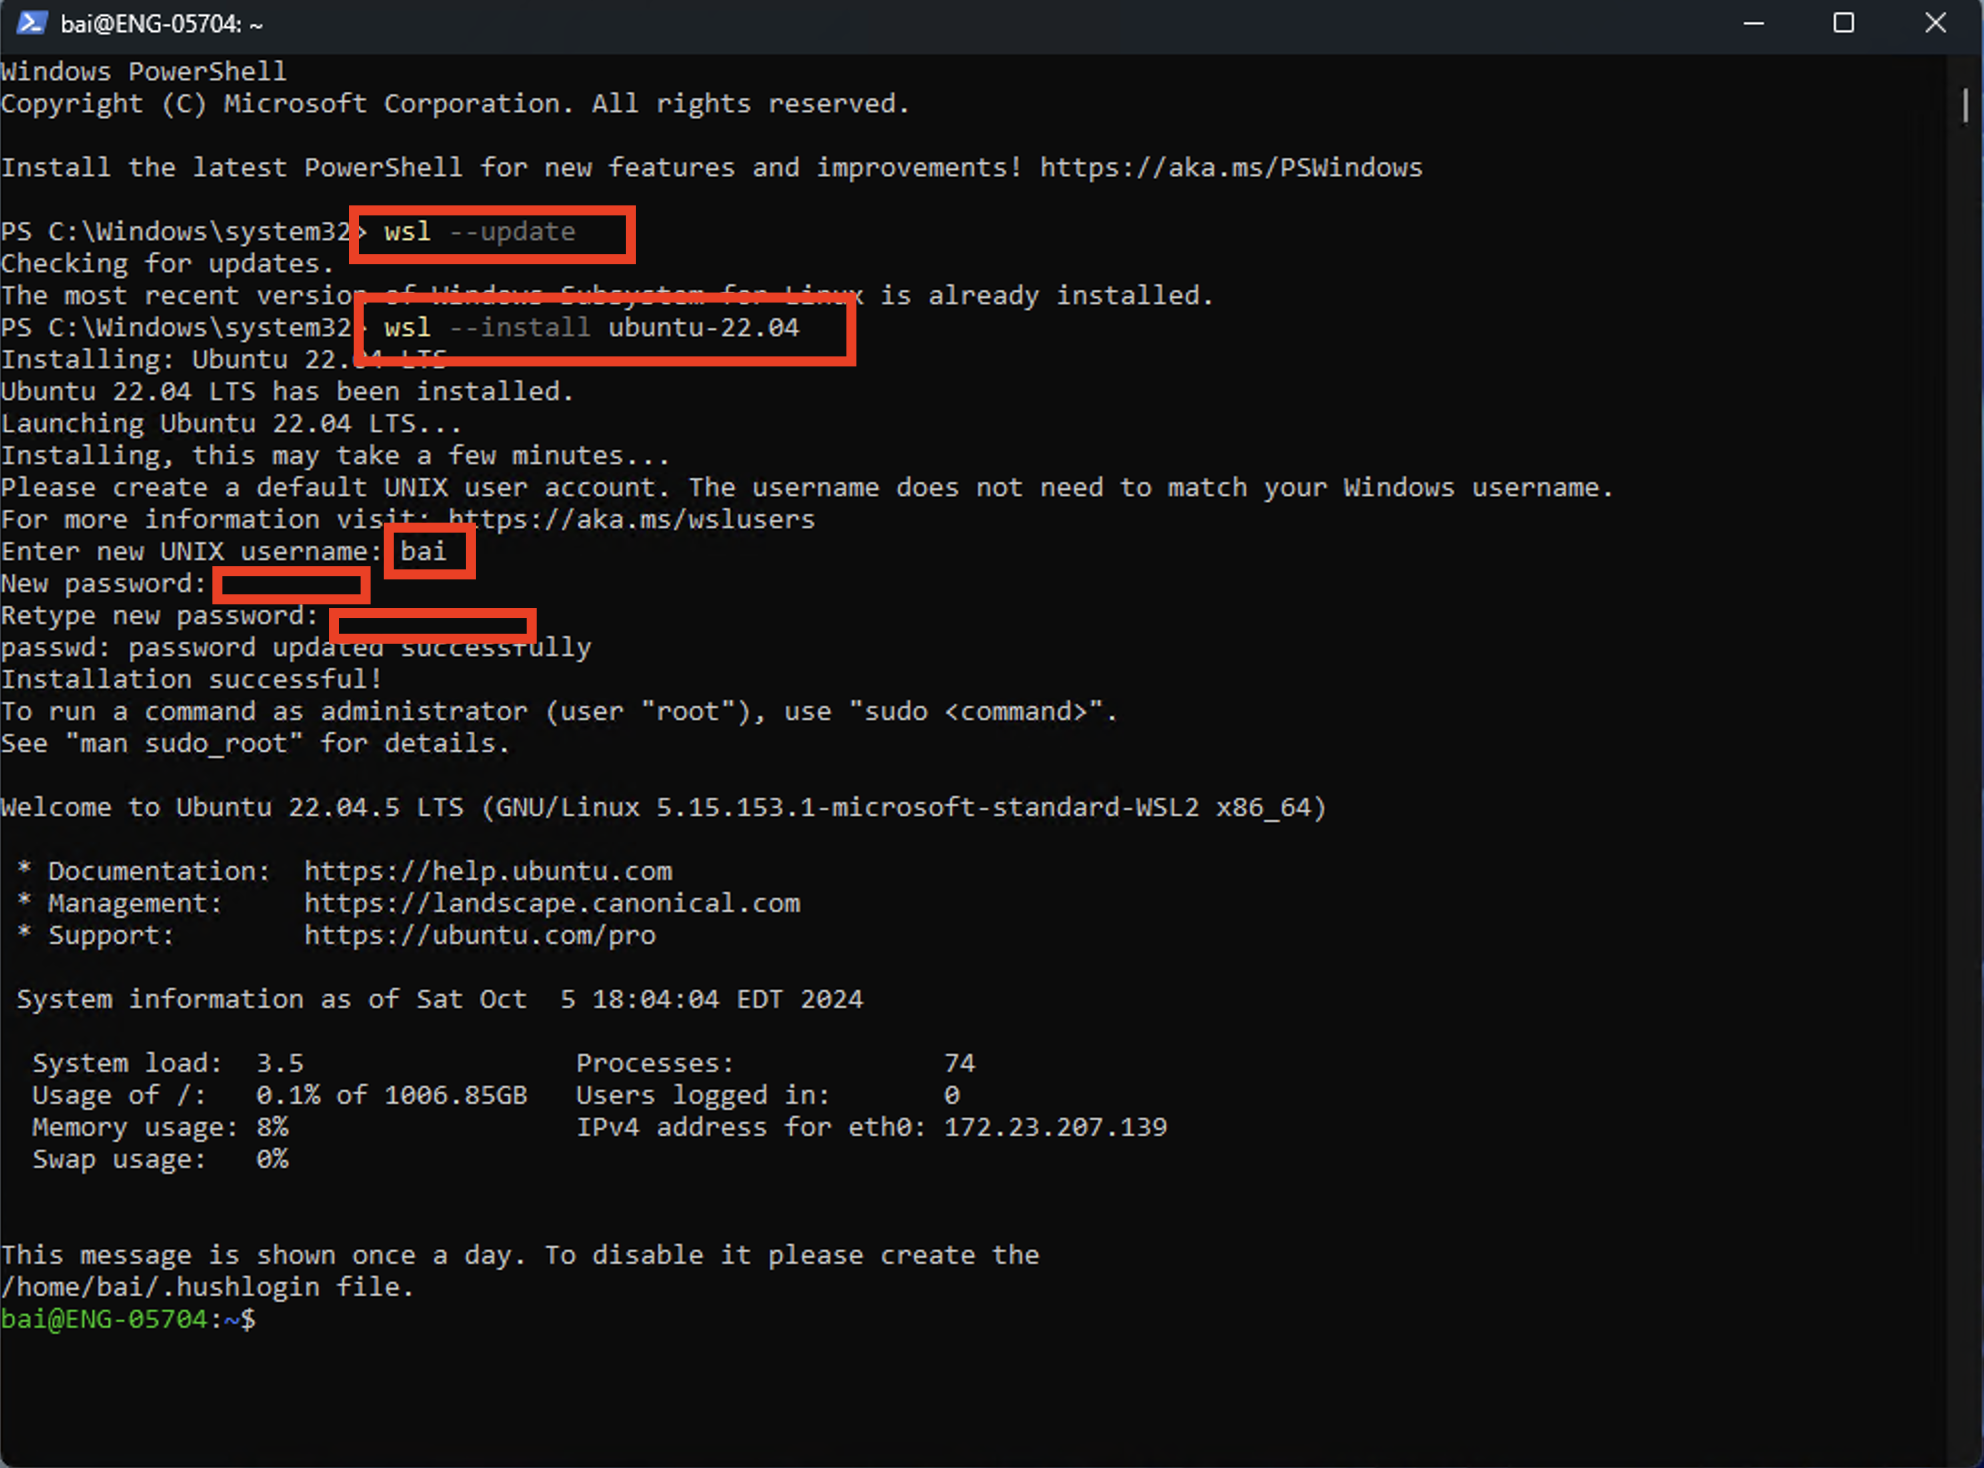
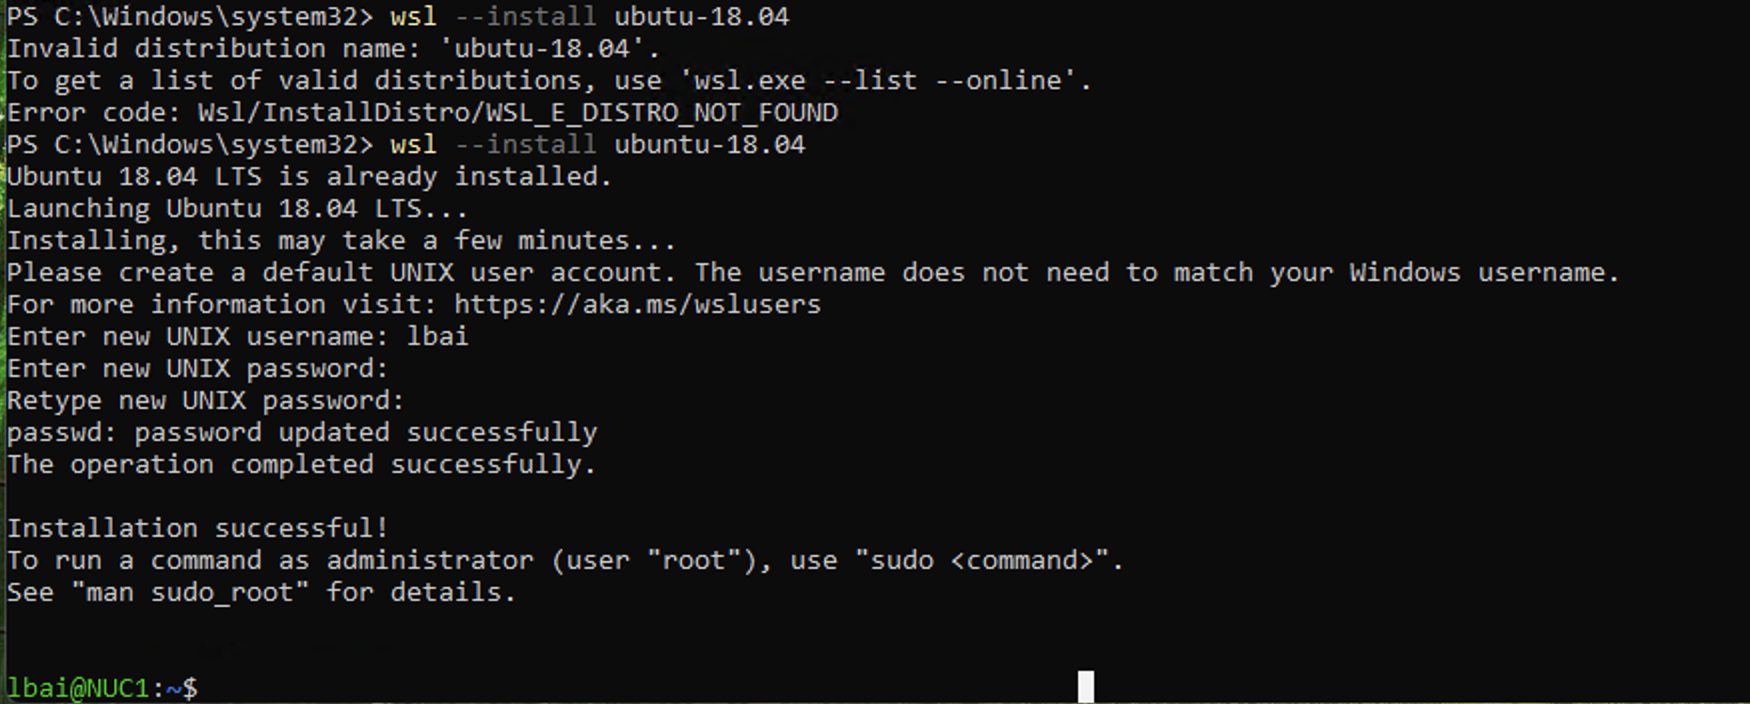
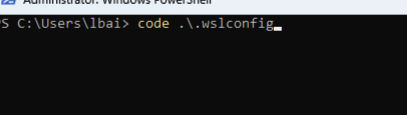
Install WSL
- run cmd in administrative mode
- setup username and password
WSL folders on Windows

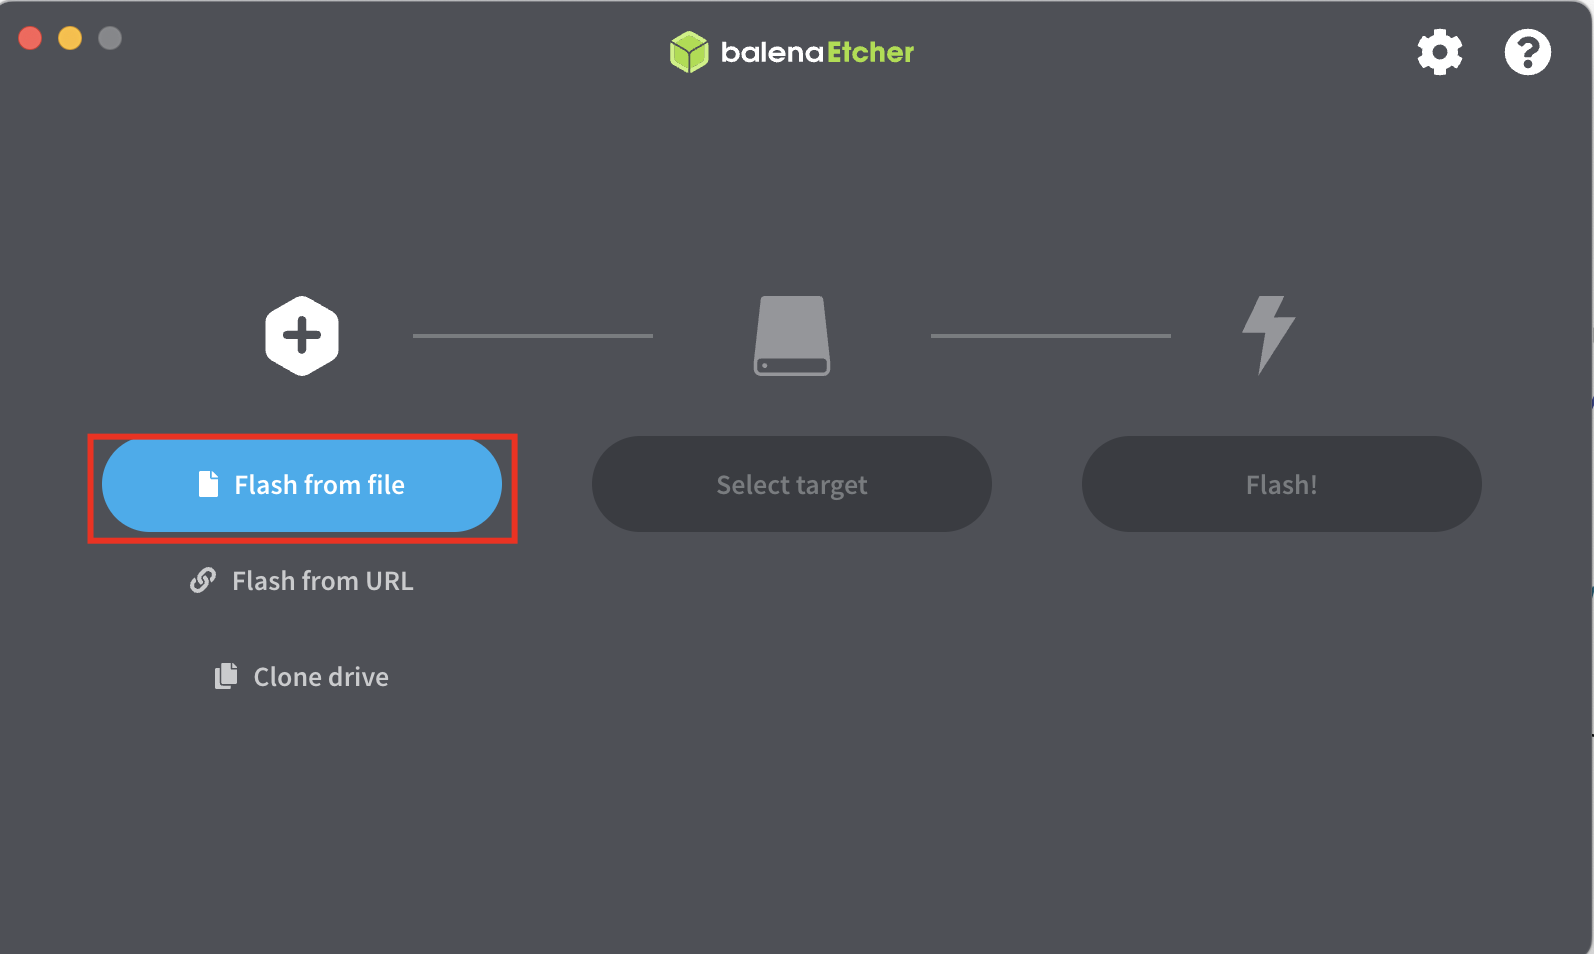
Setup Raspberry Pi - Balena Etcher (preflashed)
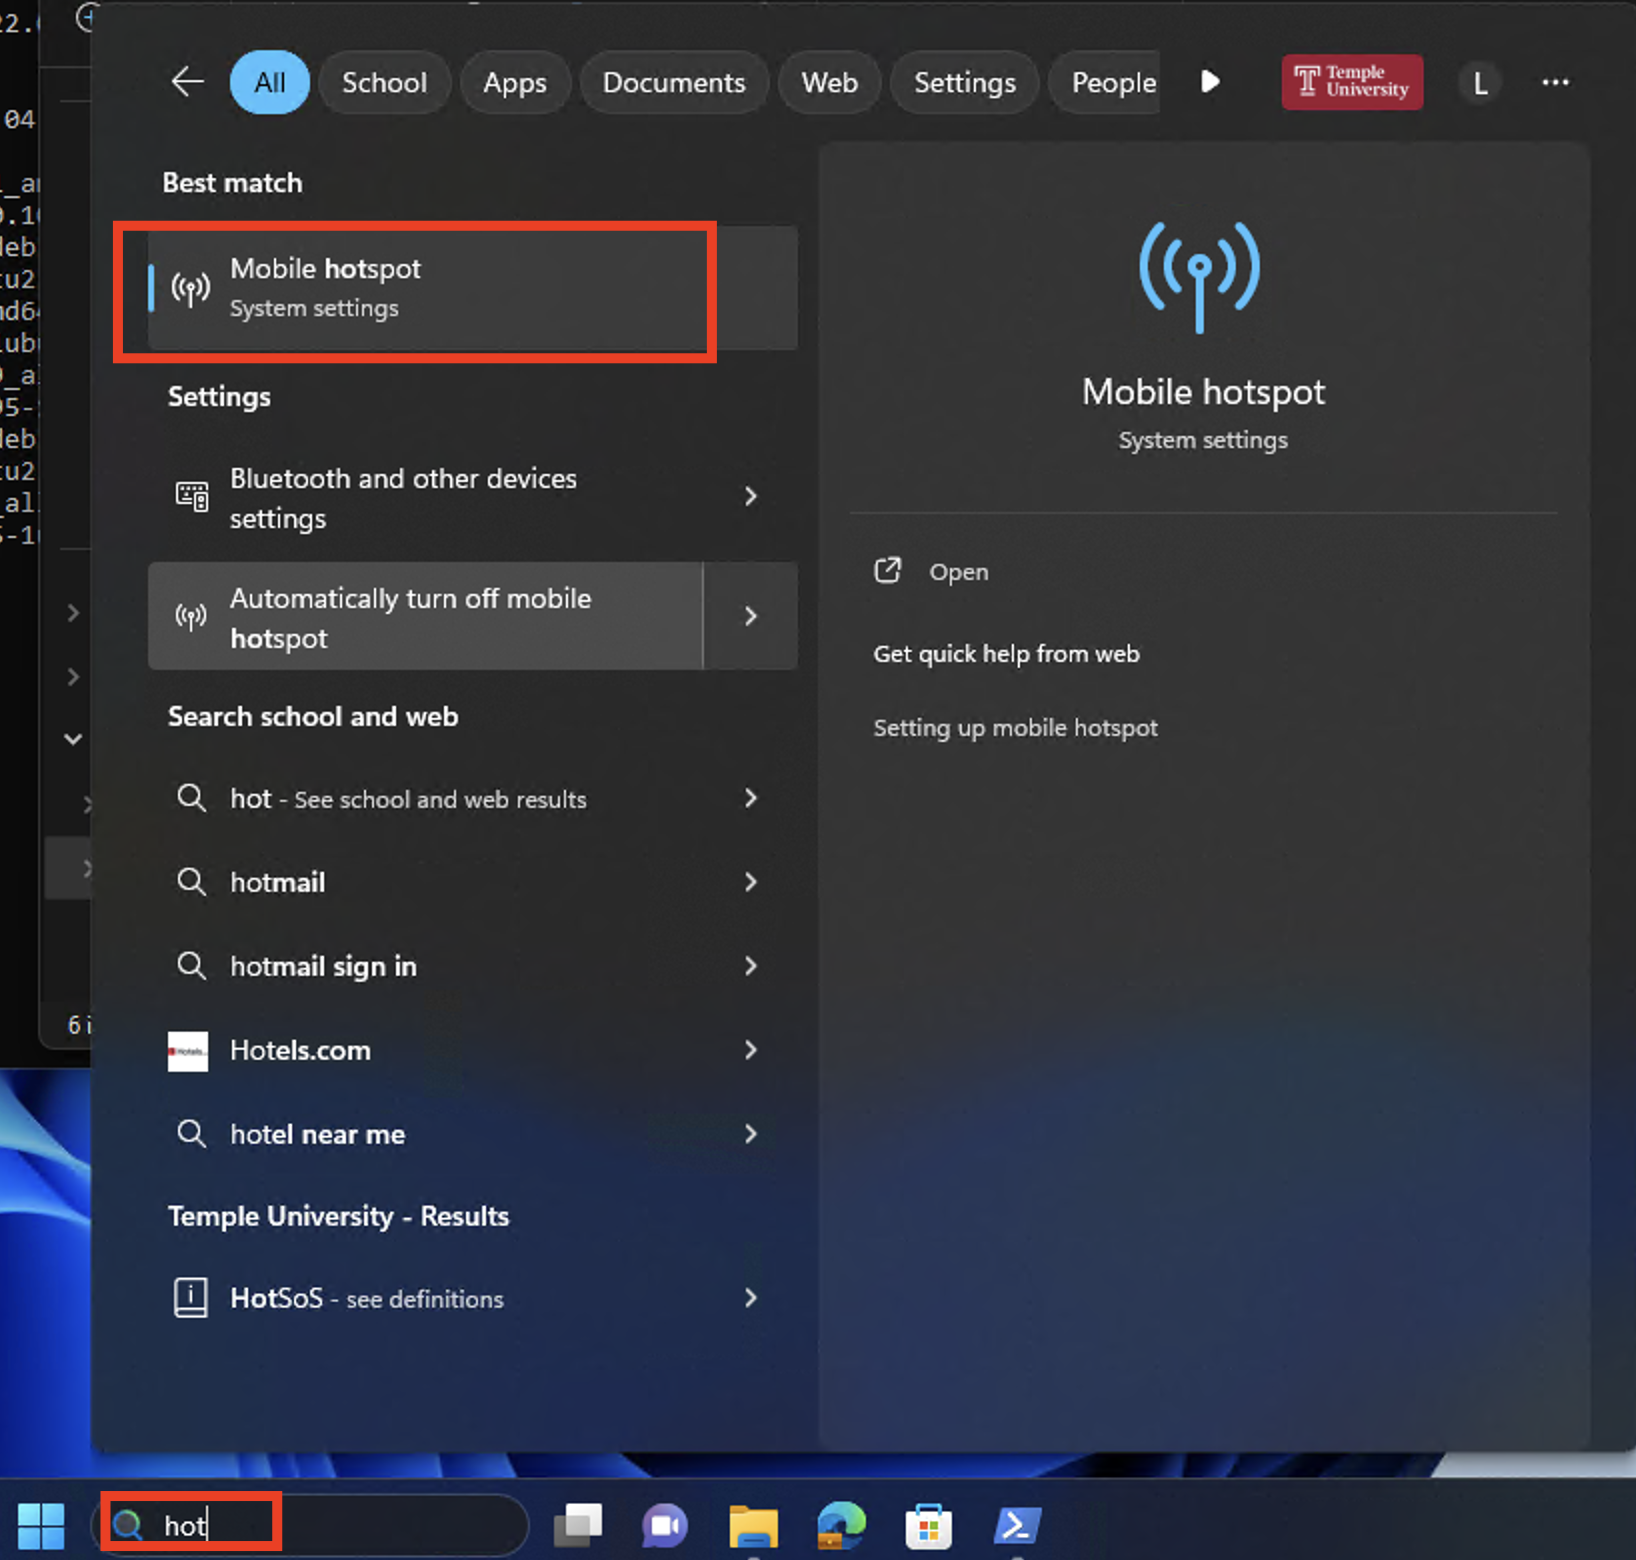
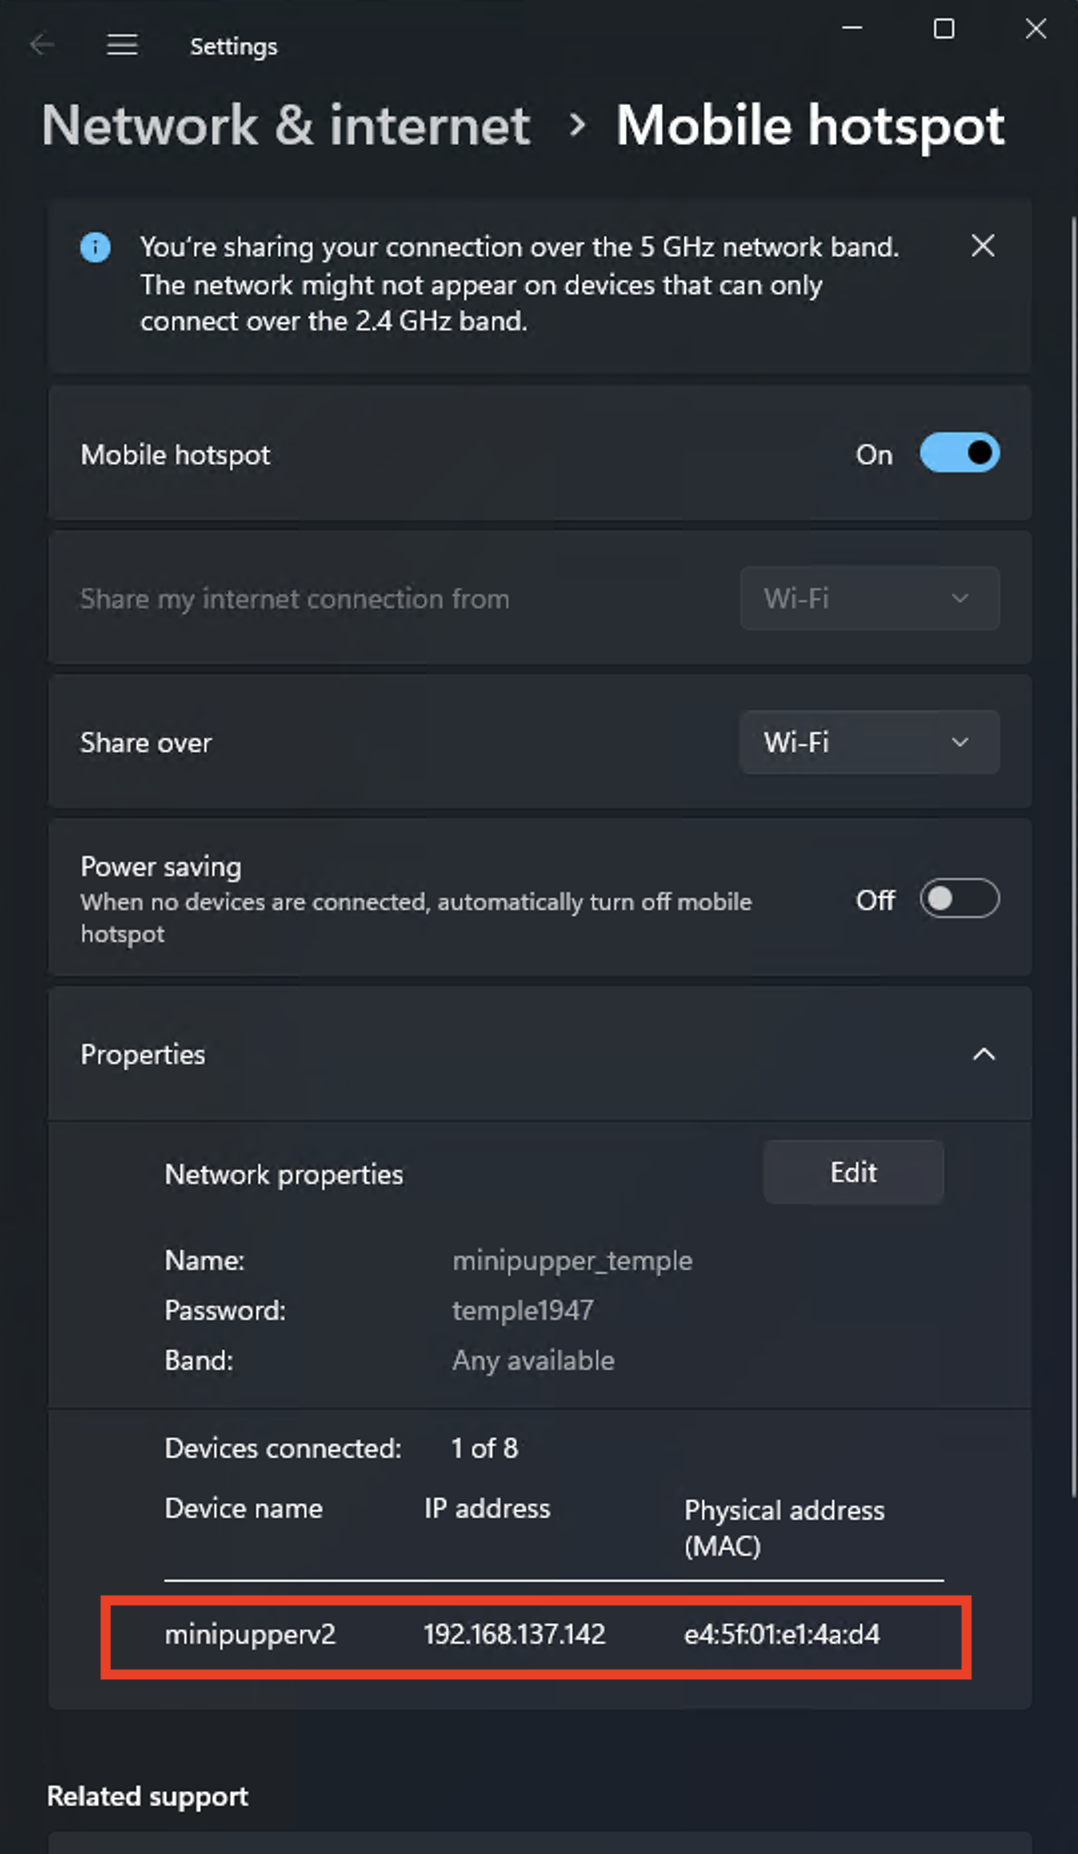
Mobile Hostpot on Windows 11 - method 1

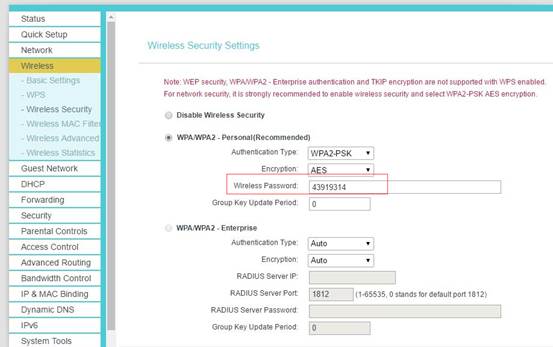
Wireless router - method 2
eduroam - method 3
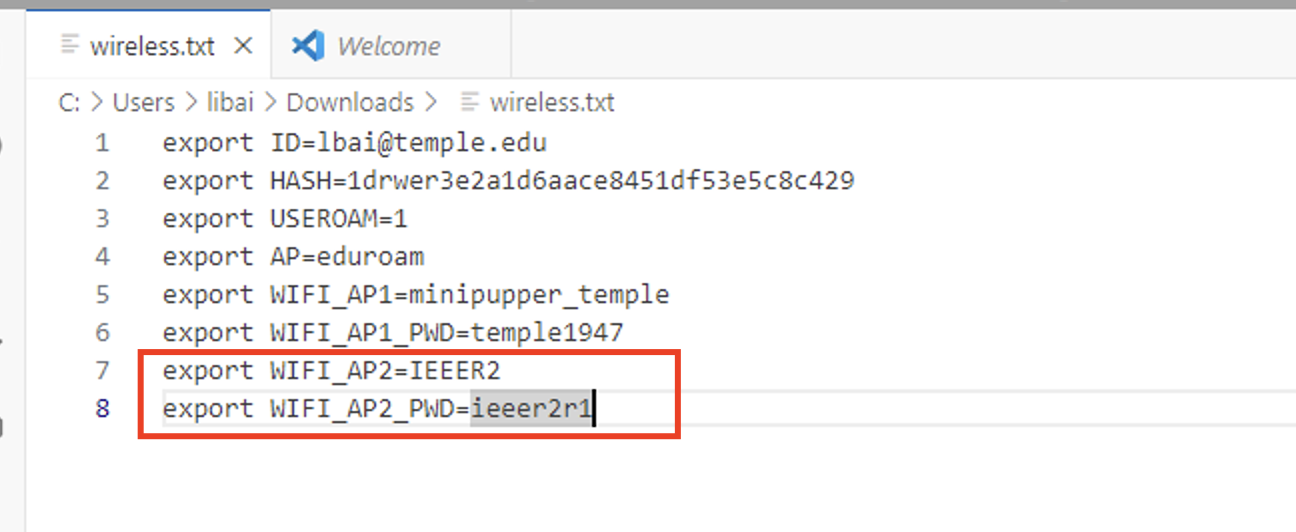
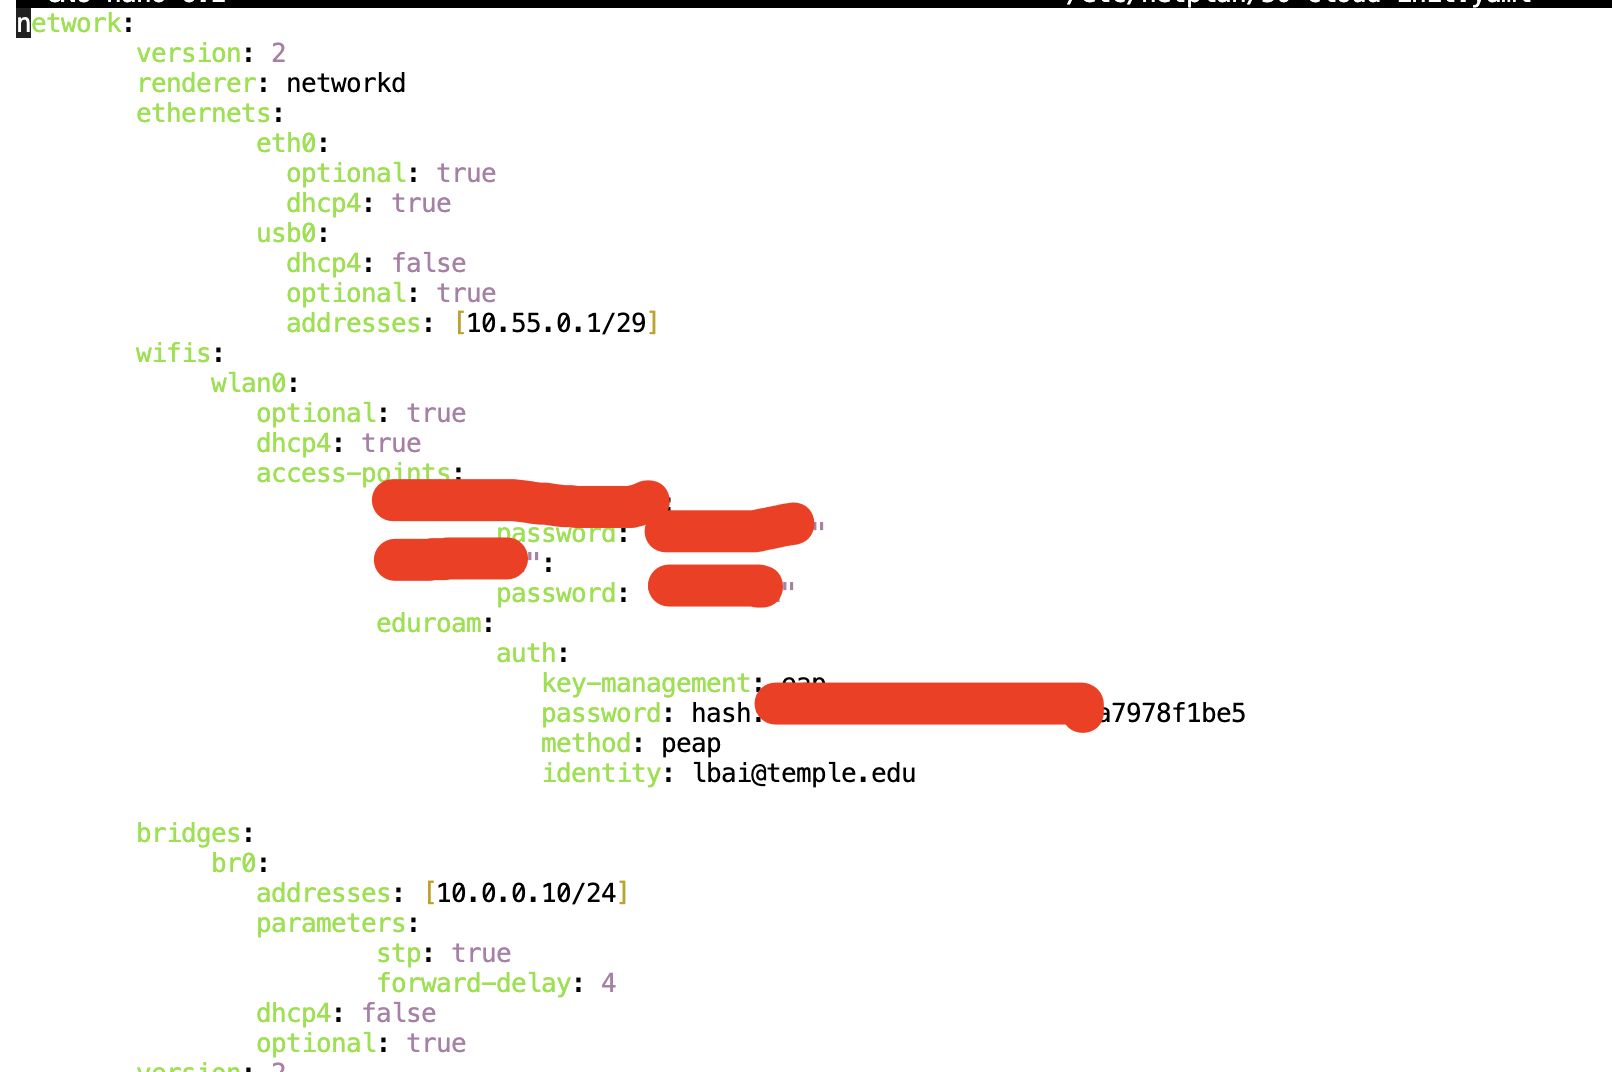
Generating a Password Hash (case sensitive, space sensitive)
Passowrd Hash: cryptographic representation of a password

Generate your Password Hash
- replace “password” in command line with your password used to log in to school organization email
- enter to regenerate unique hash

- save value for your WiFi access (in google doc or notebook)!
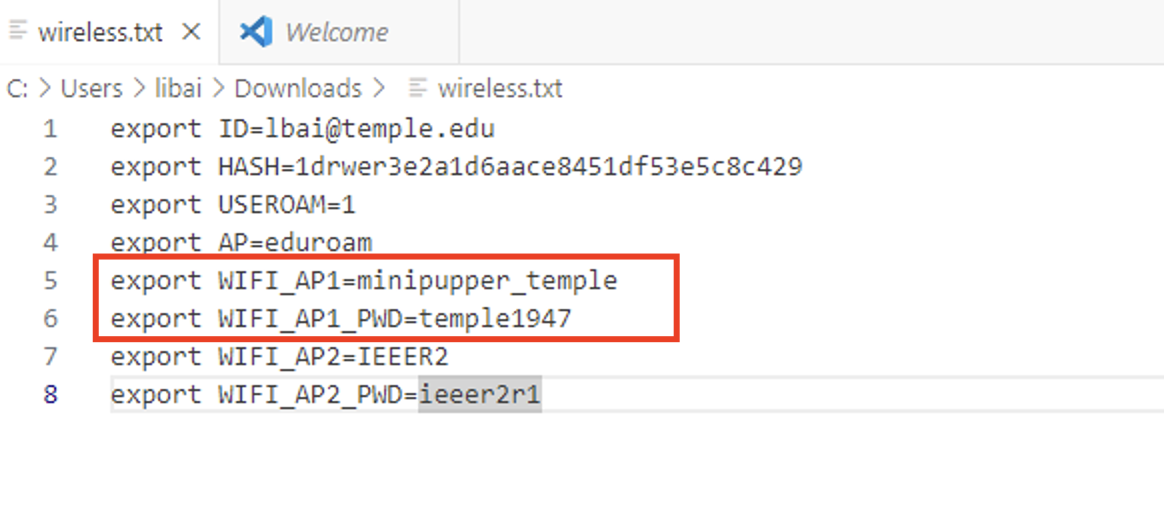
- Line 1: use your school email address
- Line 2: use the hash passcode that you previously saved in a document or notebook
![]()
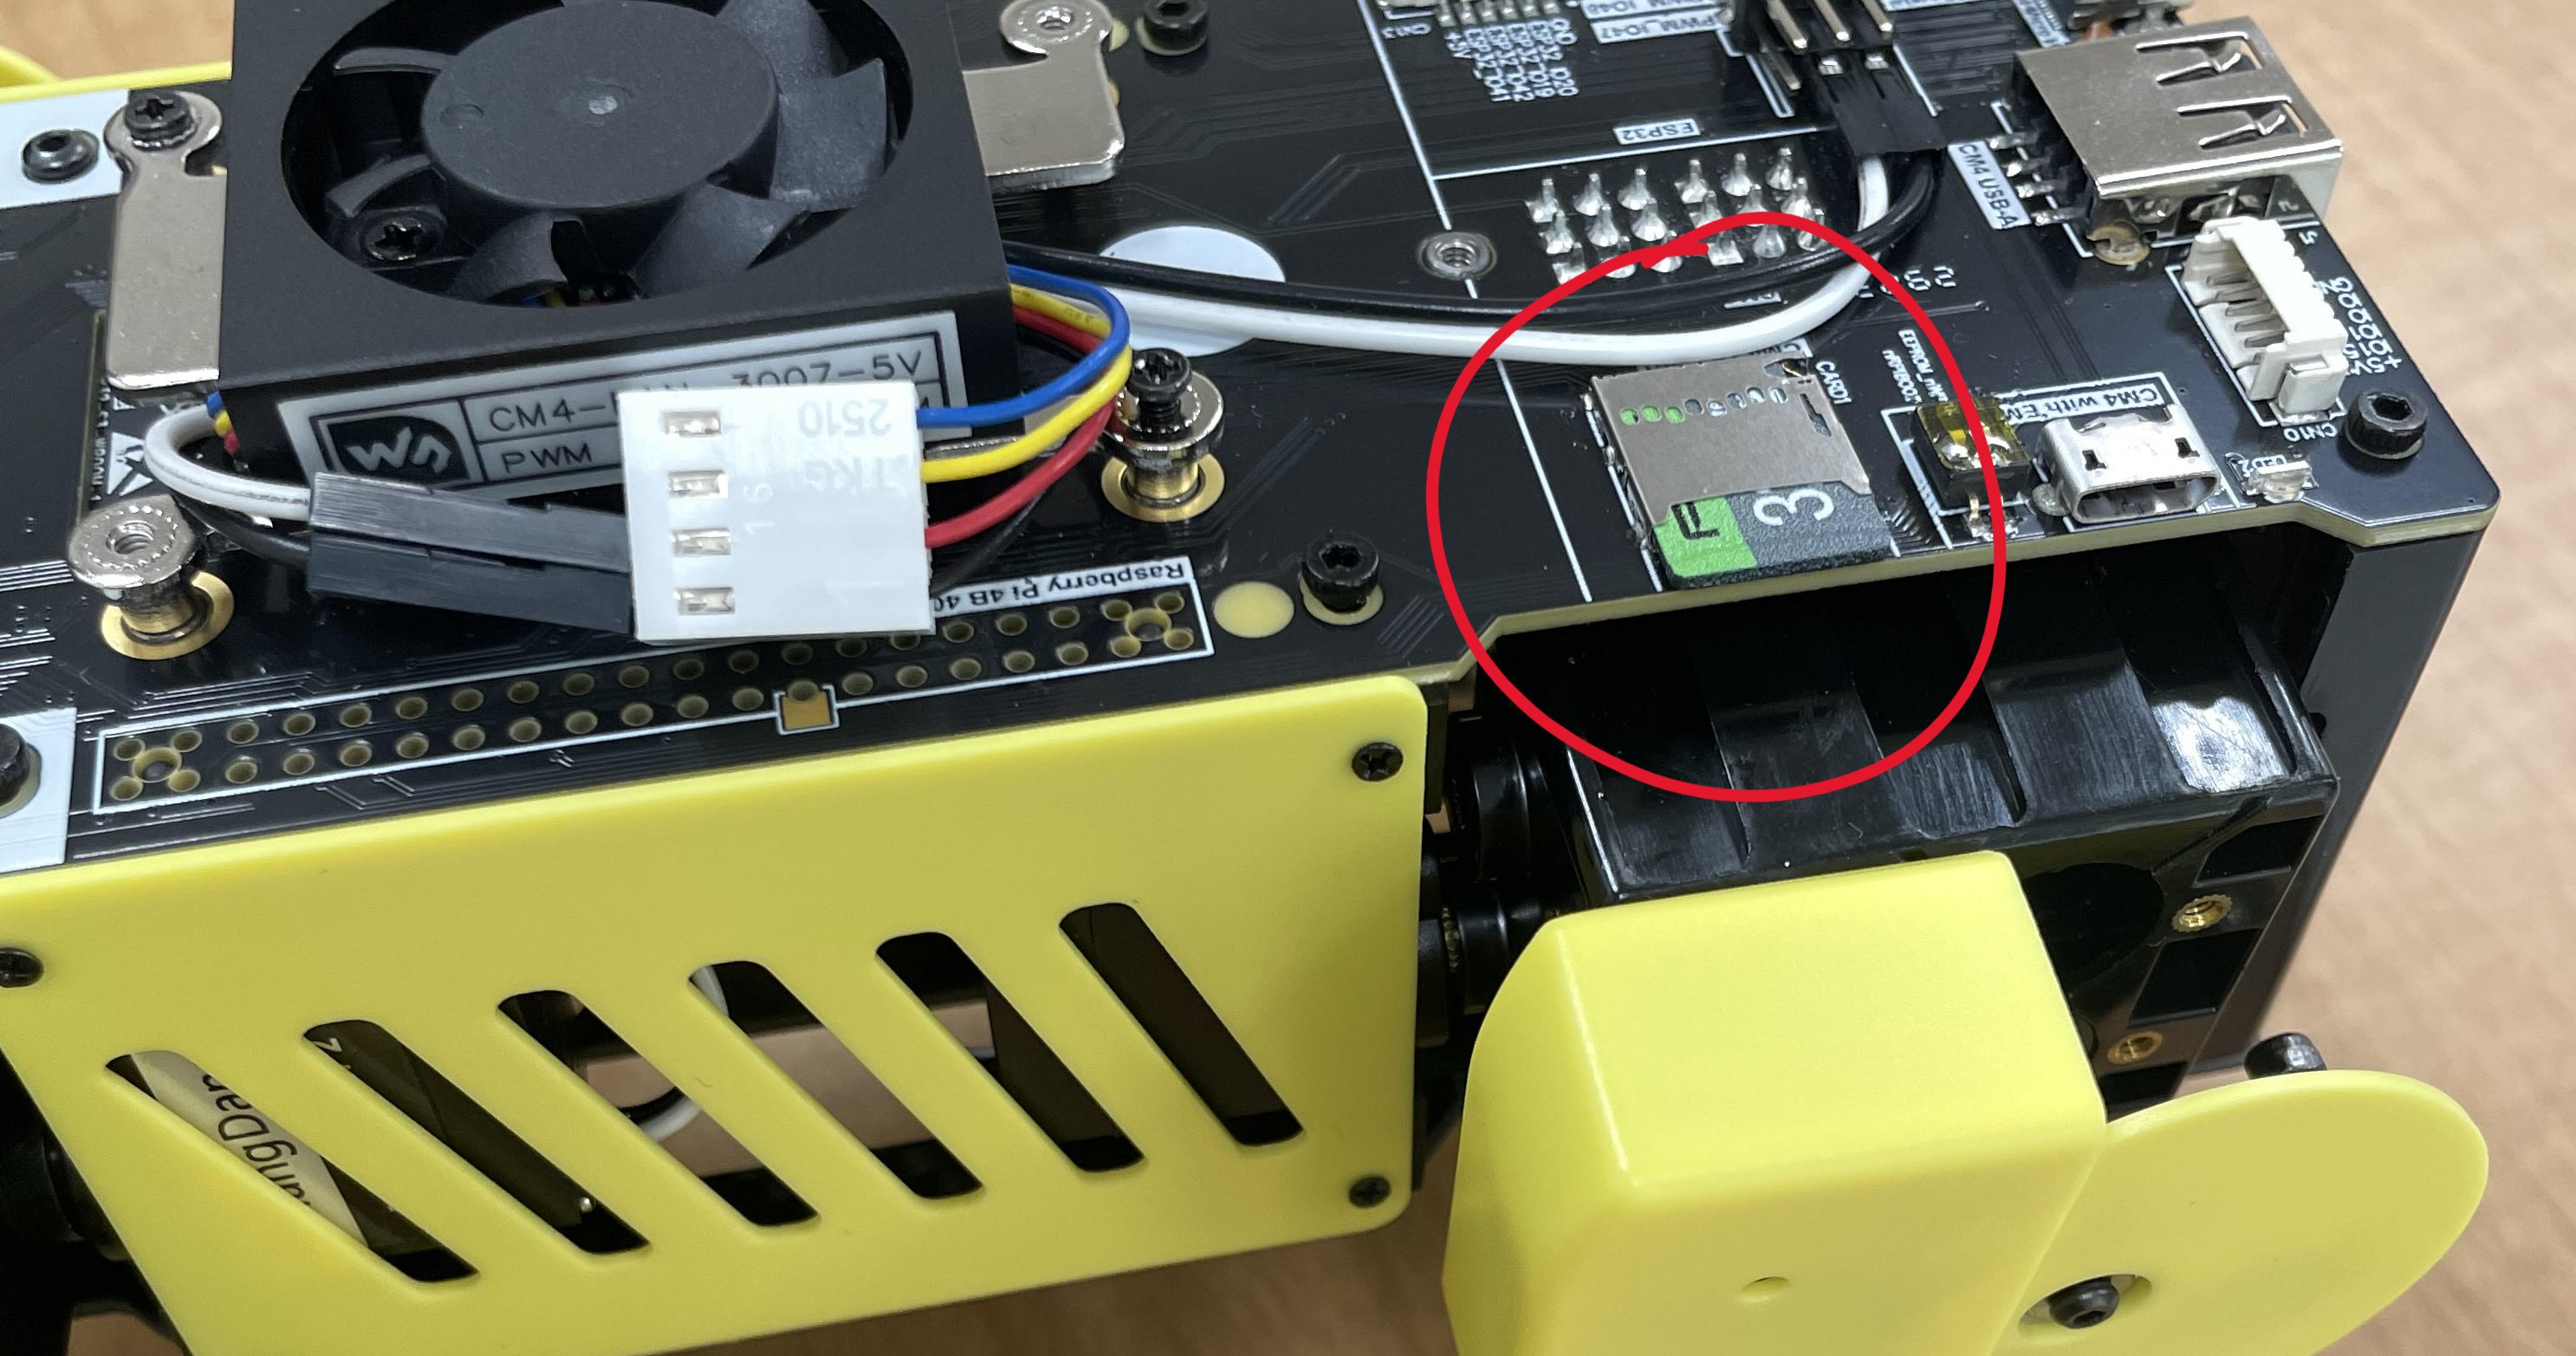
- make sure you see a new driver system-boot

- IP address does not show up on first time boot up, wait for power on sound, then disconnect power and reconnect
- reboot second time, you can see the IP address
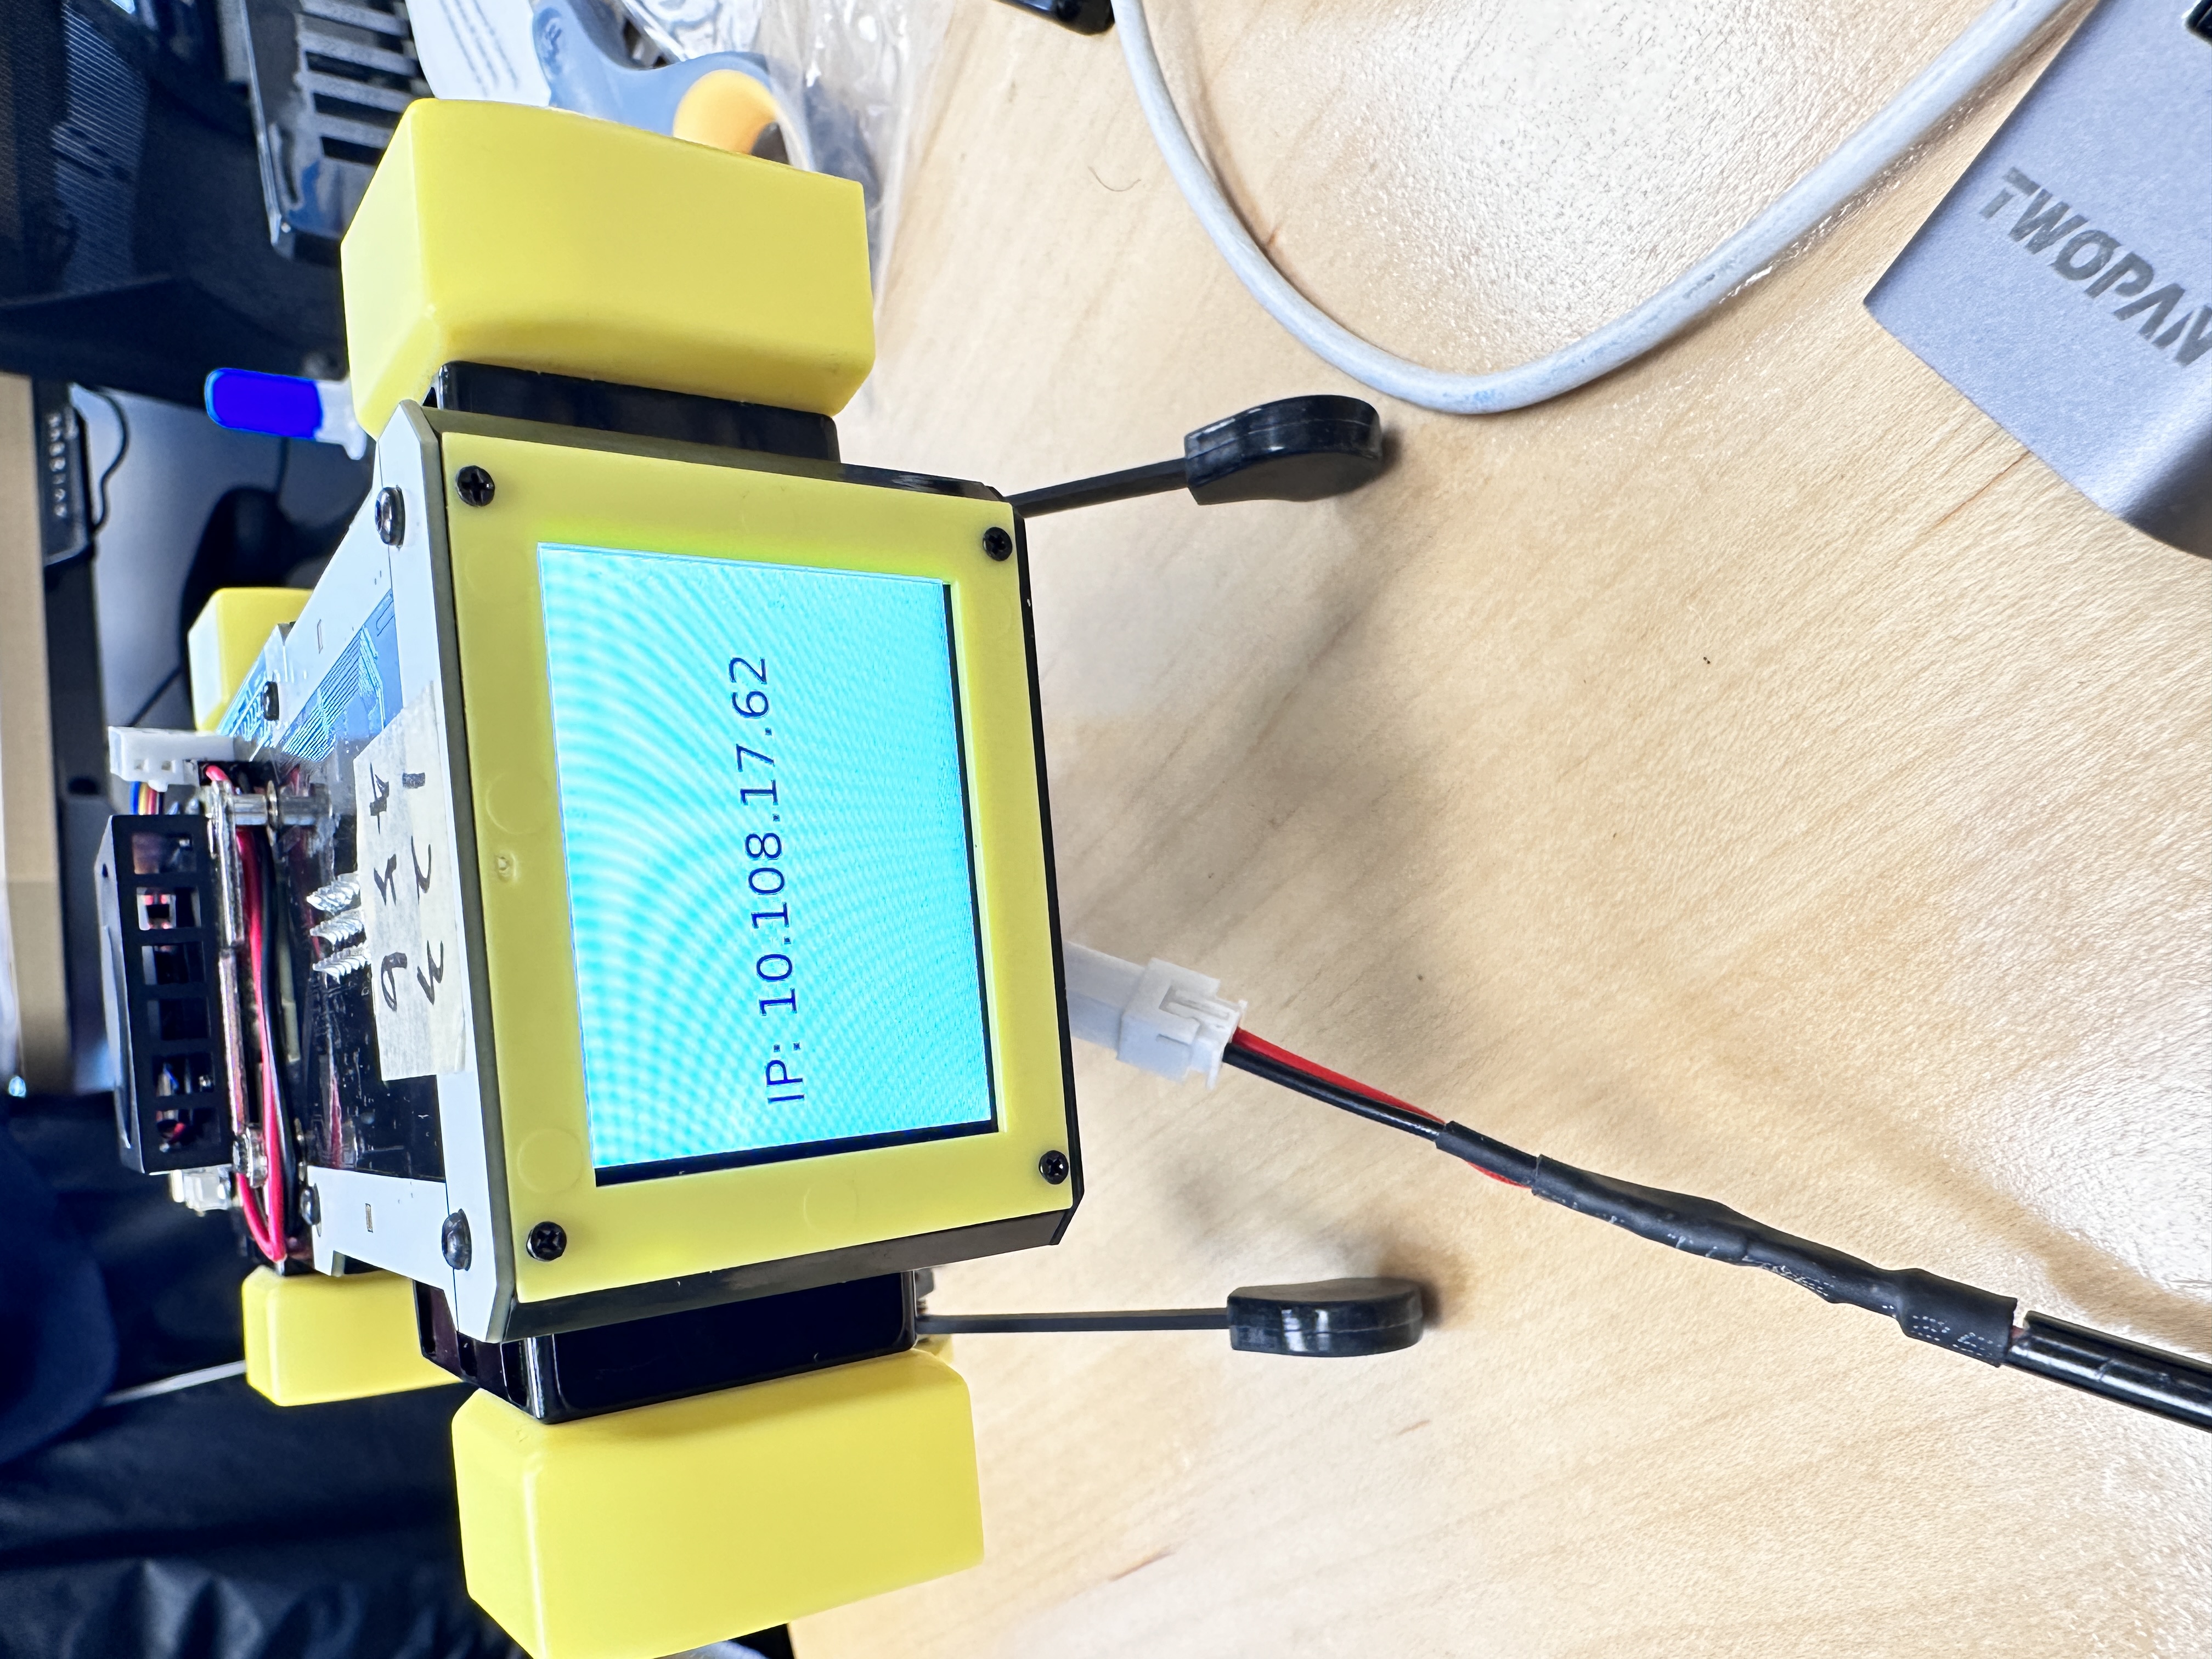
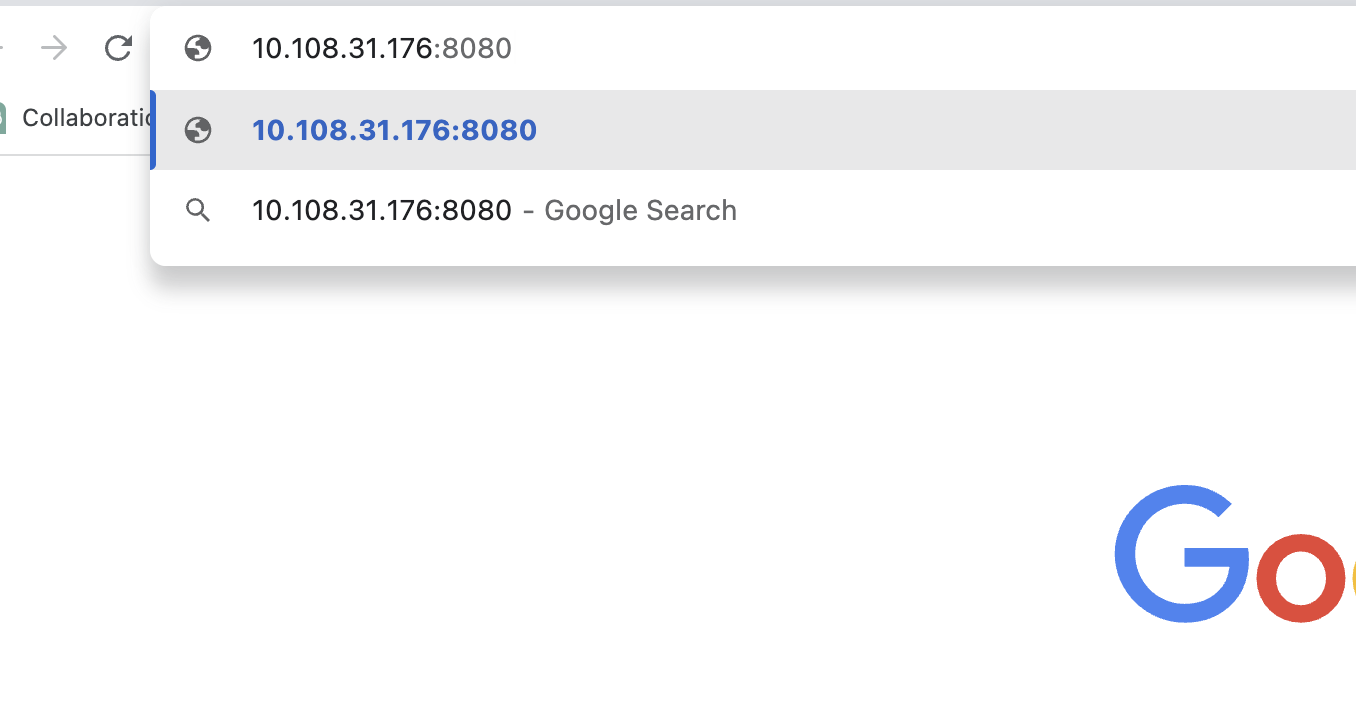
- If you see the IP address on the screen in the second time power on, type
http://[ipaddress]:8080for a web remote control
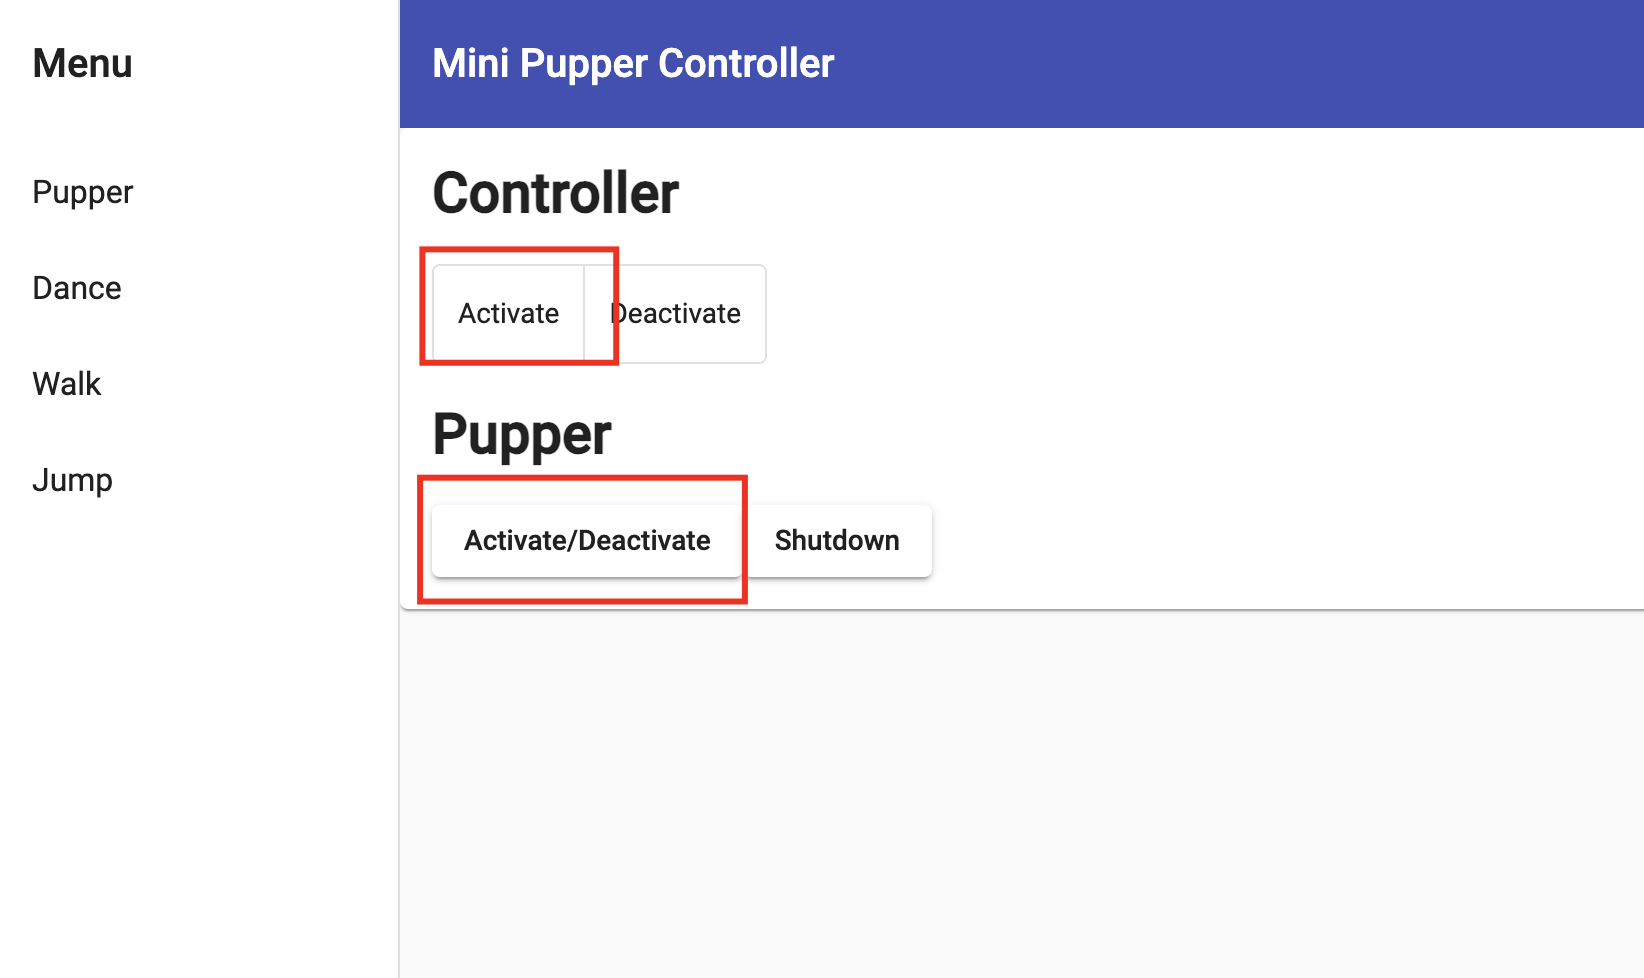
Web Control - Activate the robot
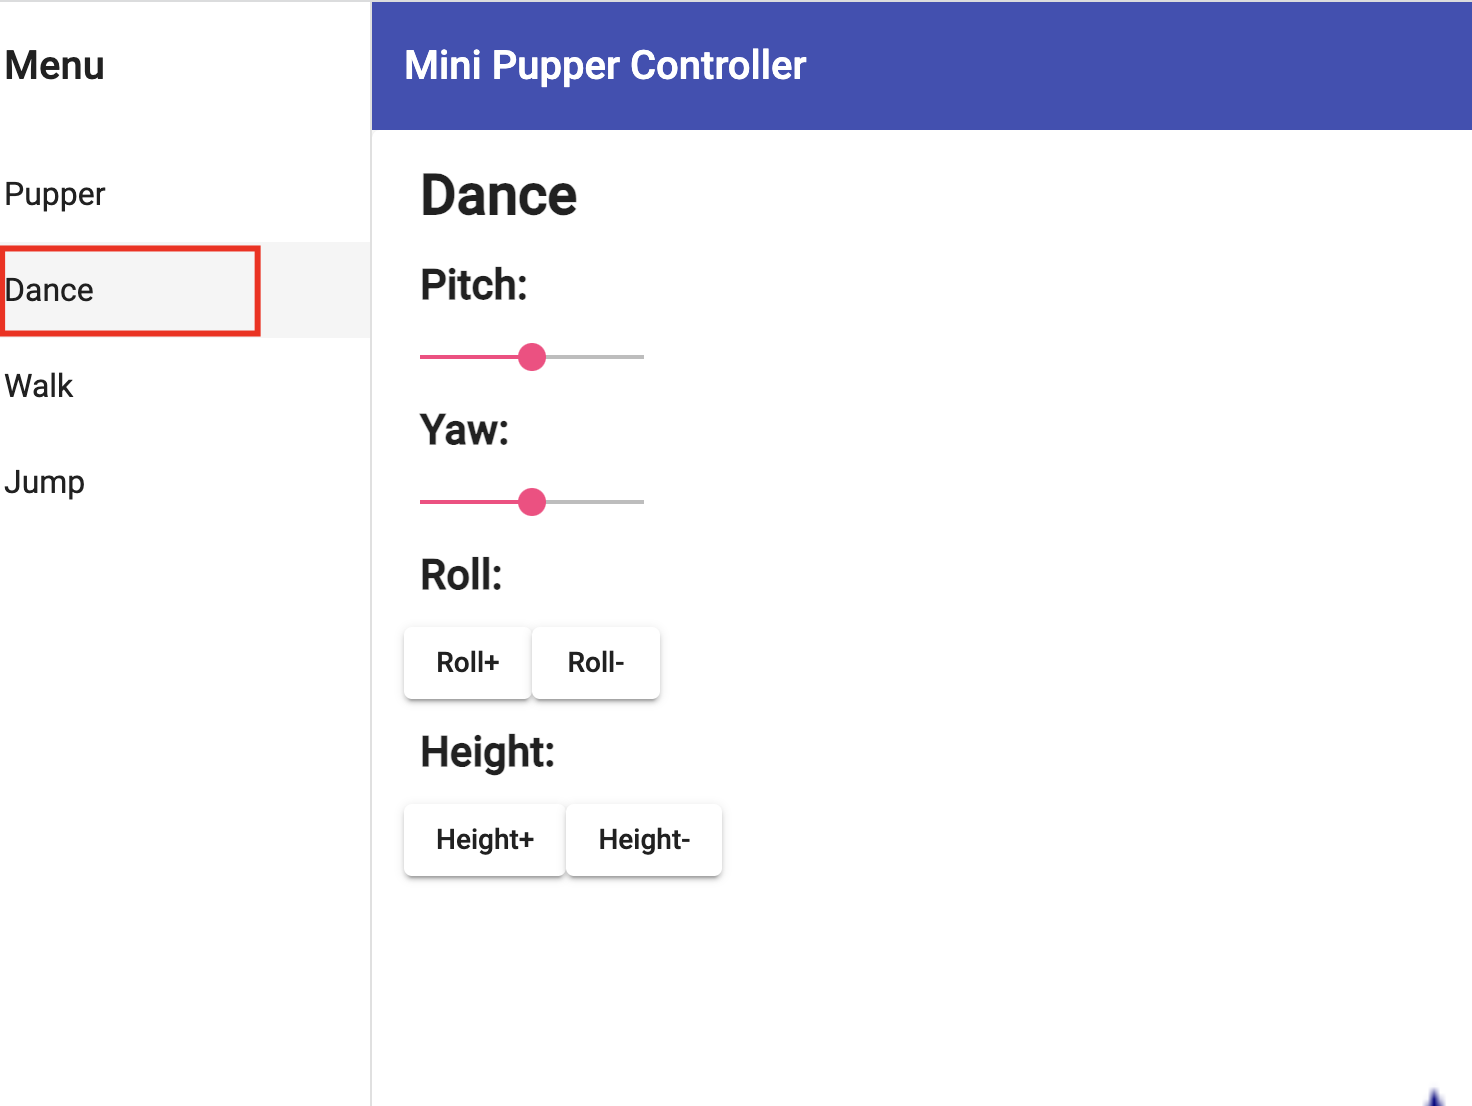
Web Control - Make it for dance move
Web Control - Make it for walk

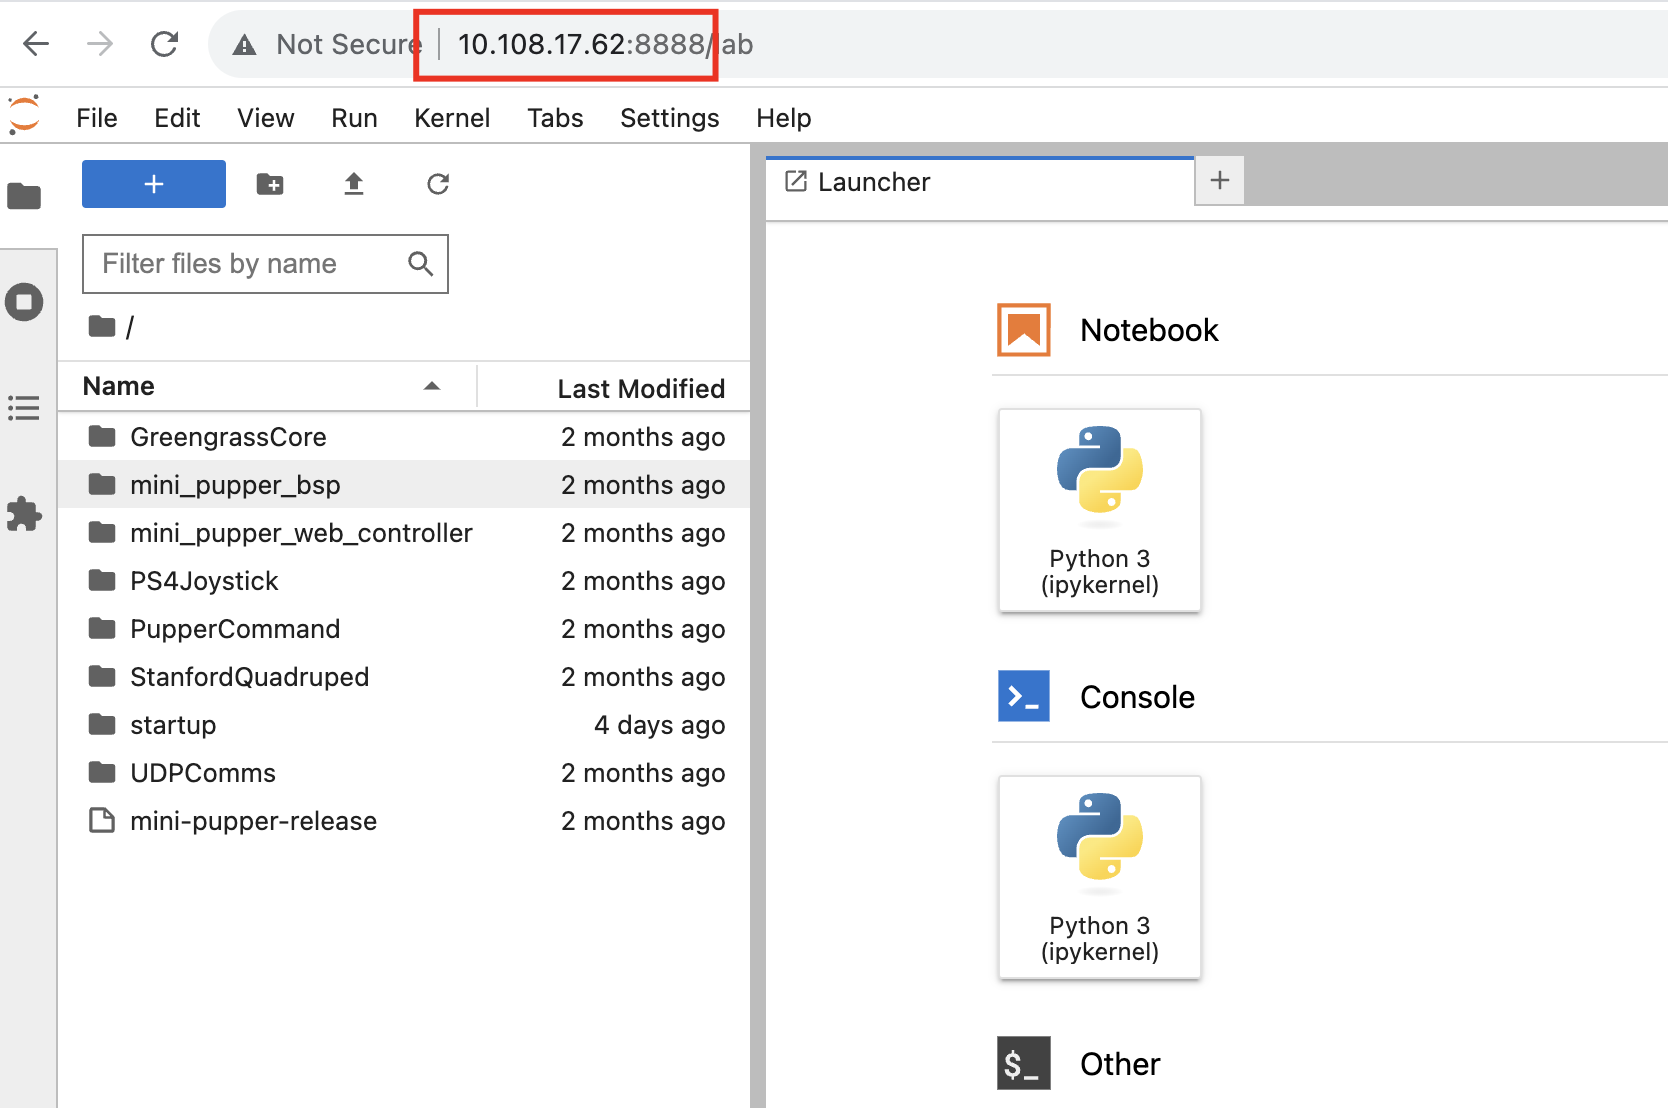
Revise the WiFi in Jupyter Lab
- Open a browser, type
http://[ipaddress]:8888 - password
mangdang
at least keep one connection working
50-cloud-init.yamlis indentation sensentive, any mistake will have no IP address shownIf file changed, try the following commands to ensure if you have any errors before reboot
- the worst sitation is to use a HDMI monitor and a USB cable to troubleshoot the yaml file
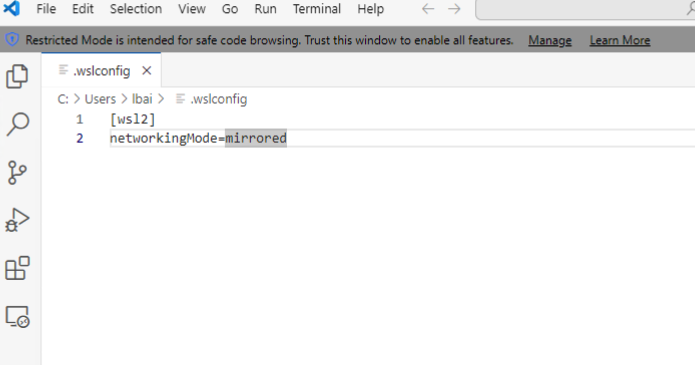
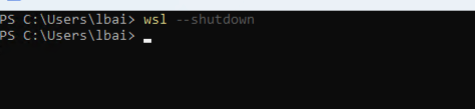
WSL Mirror Mode


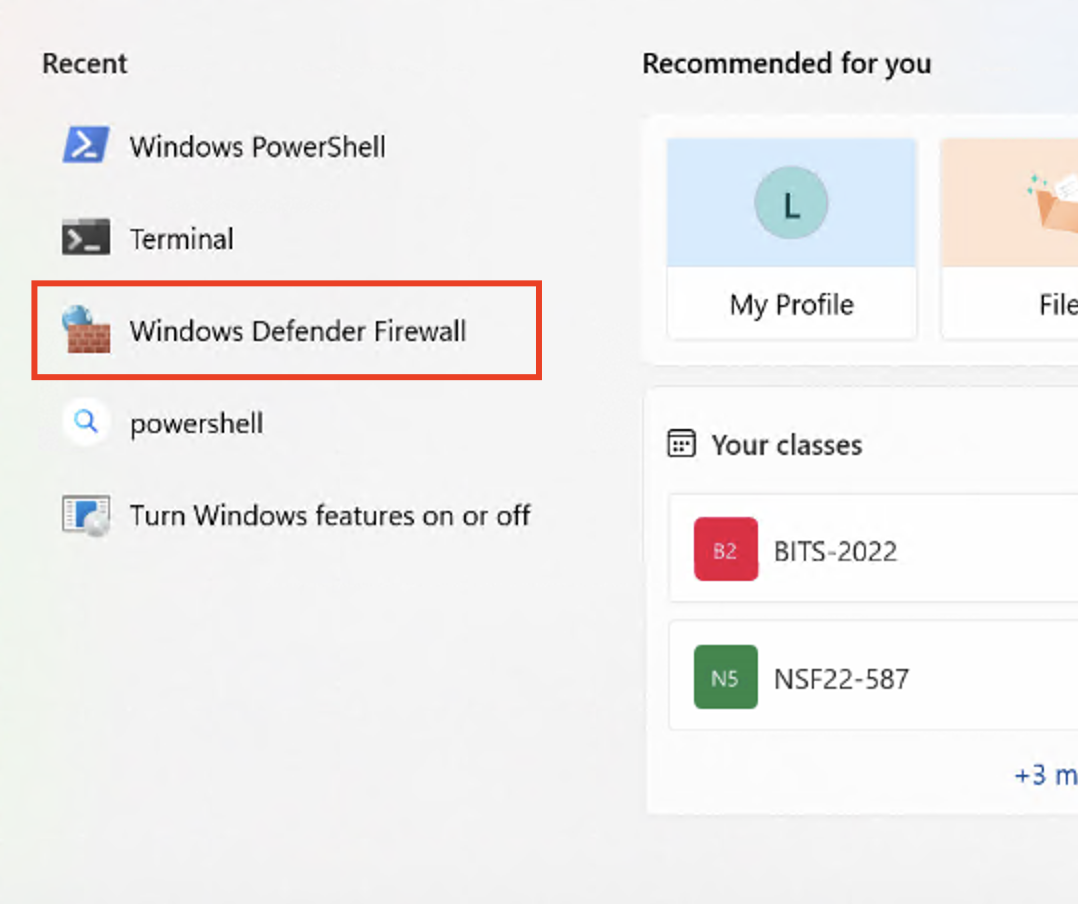
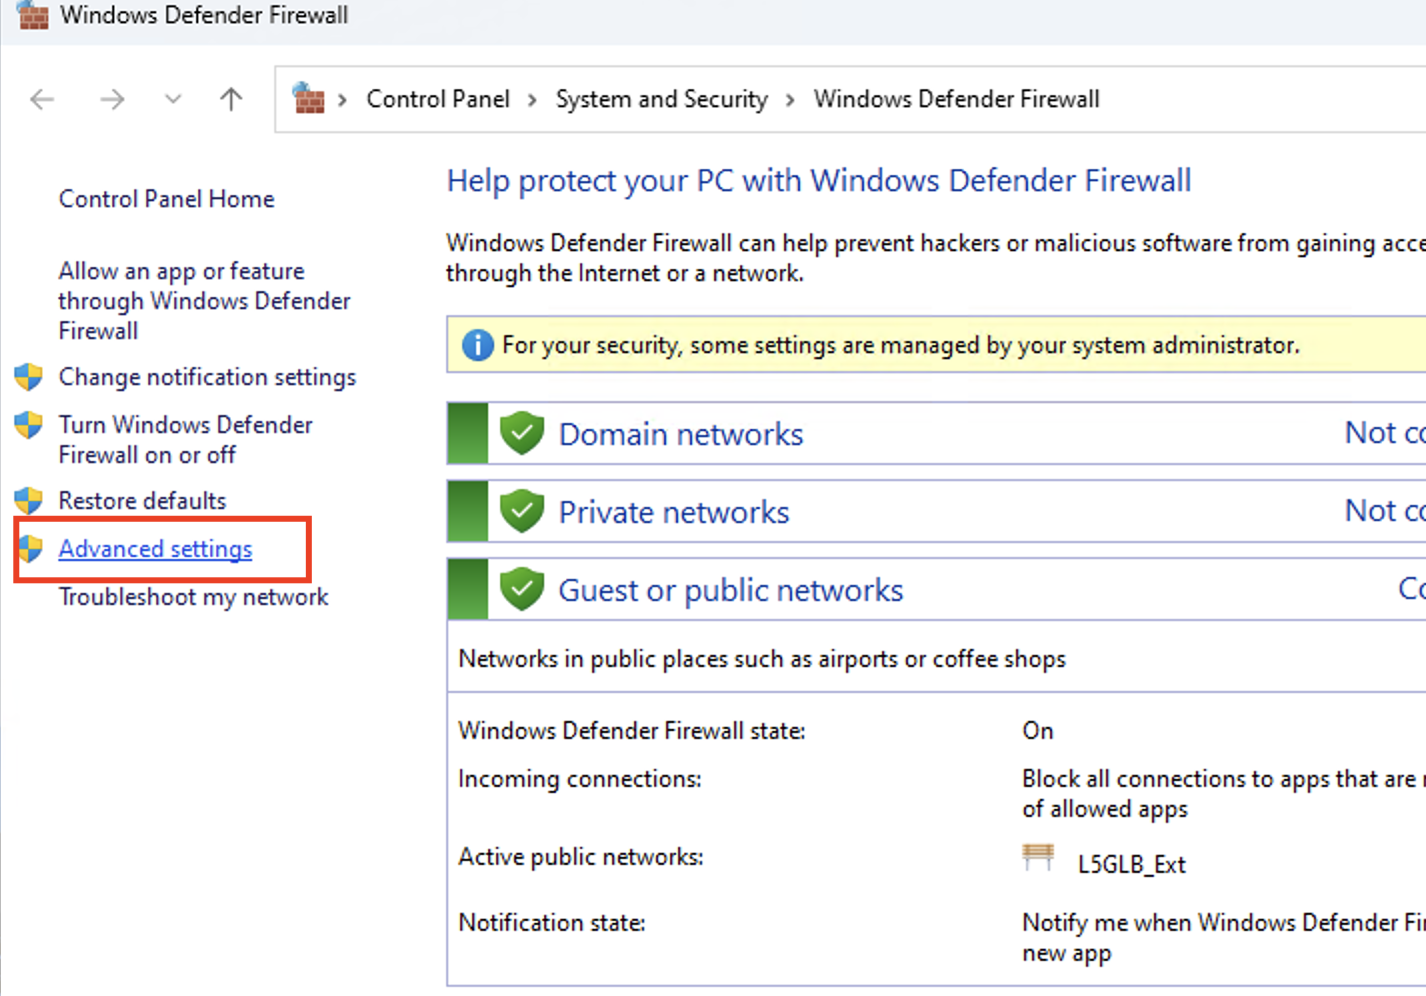
Firewall enable port (multicast)
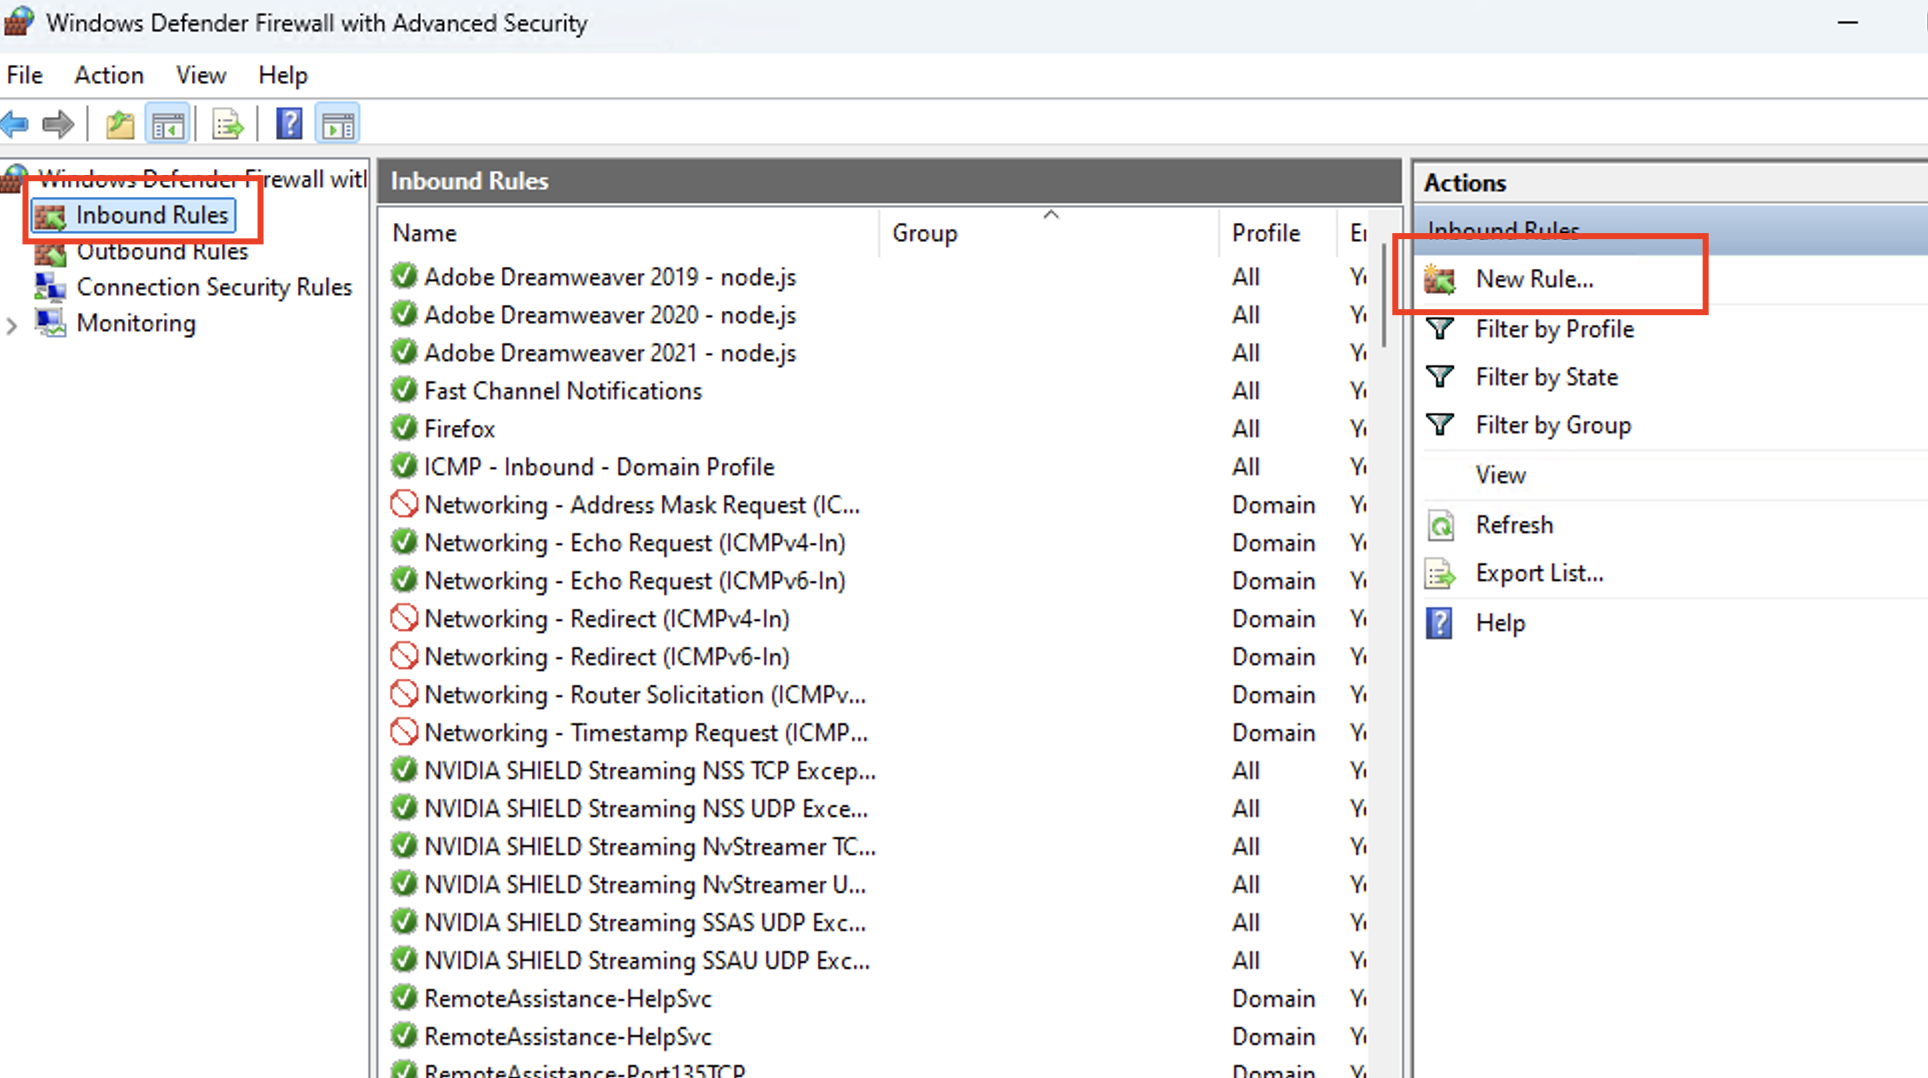
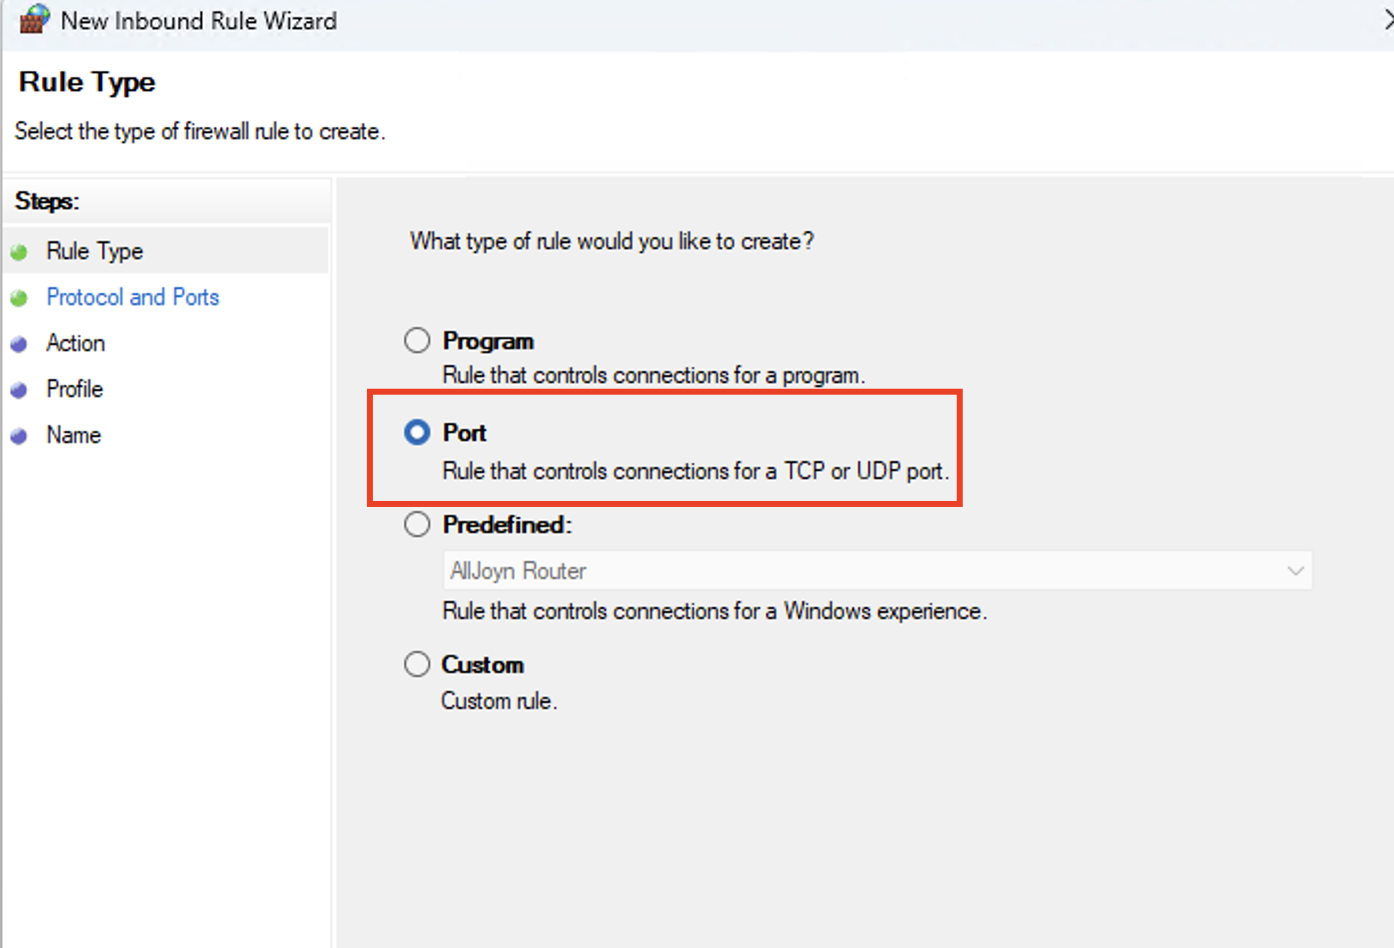
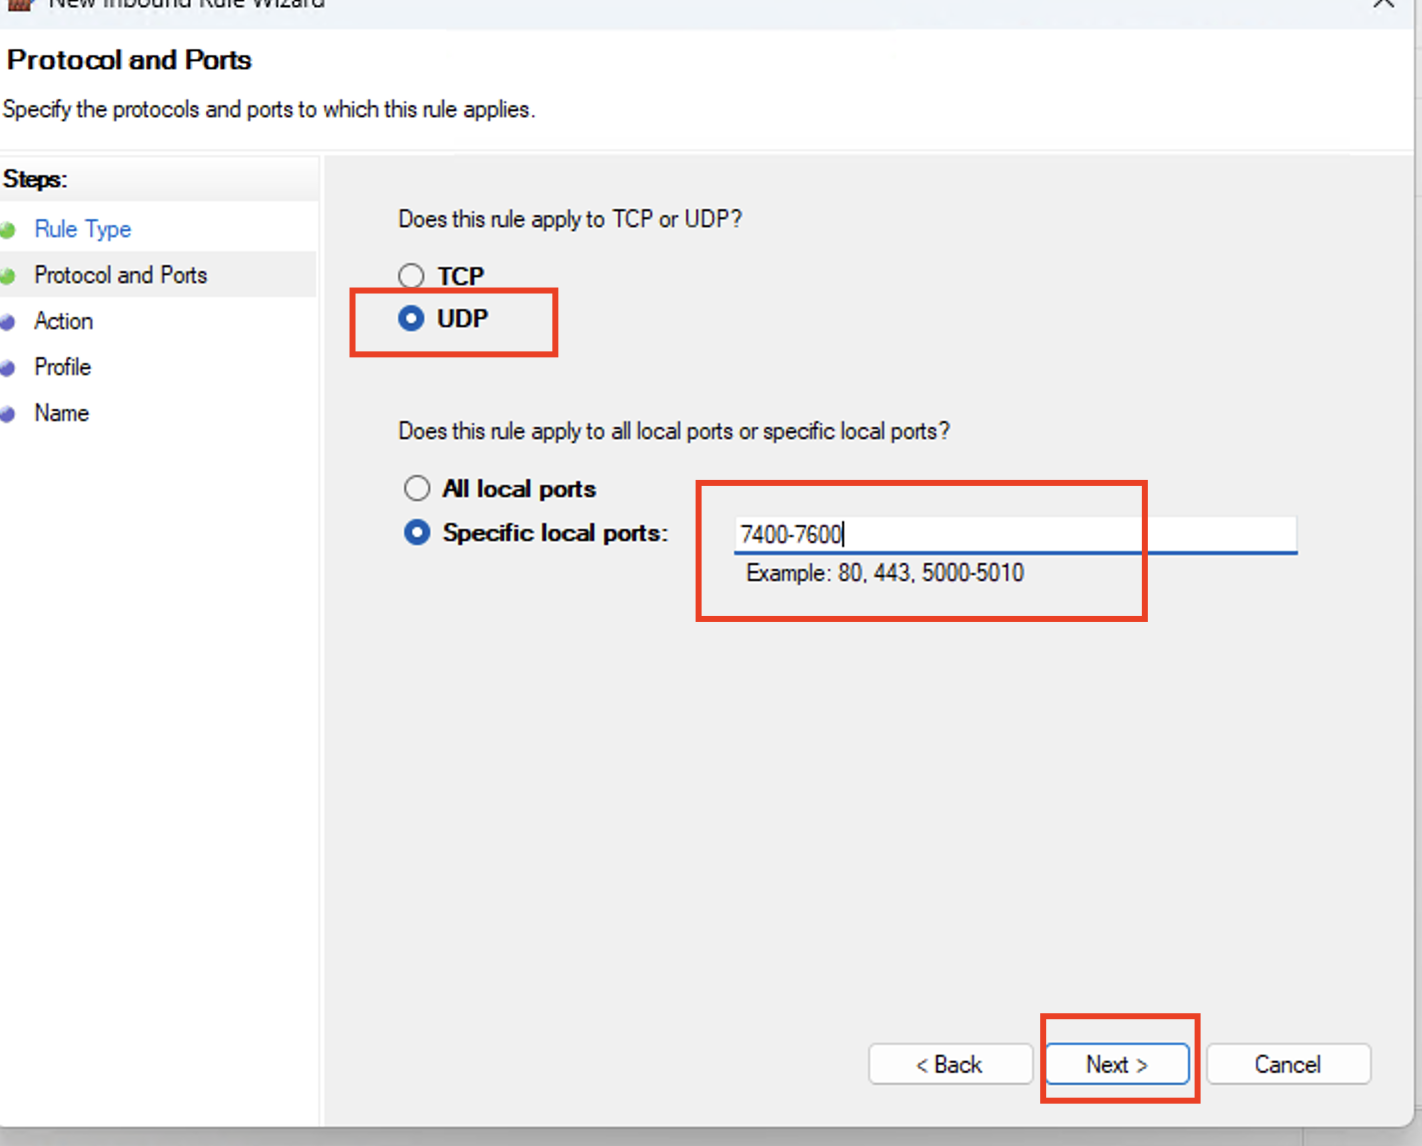
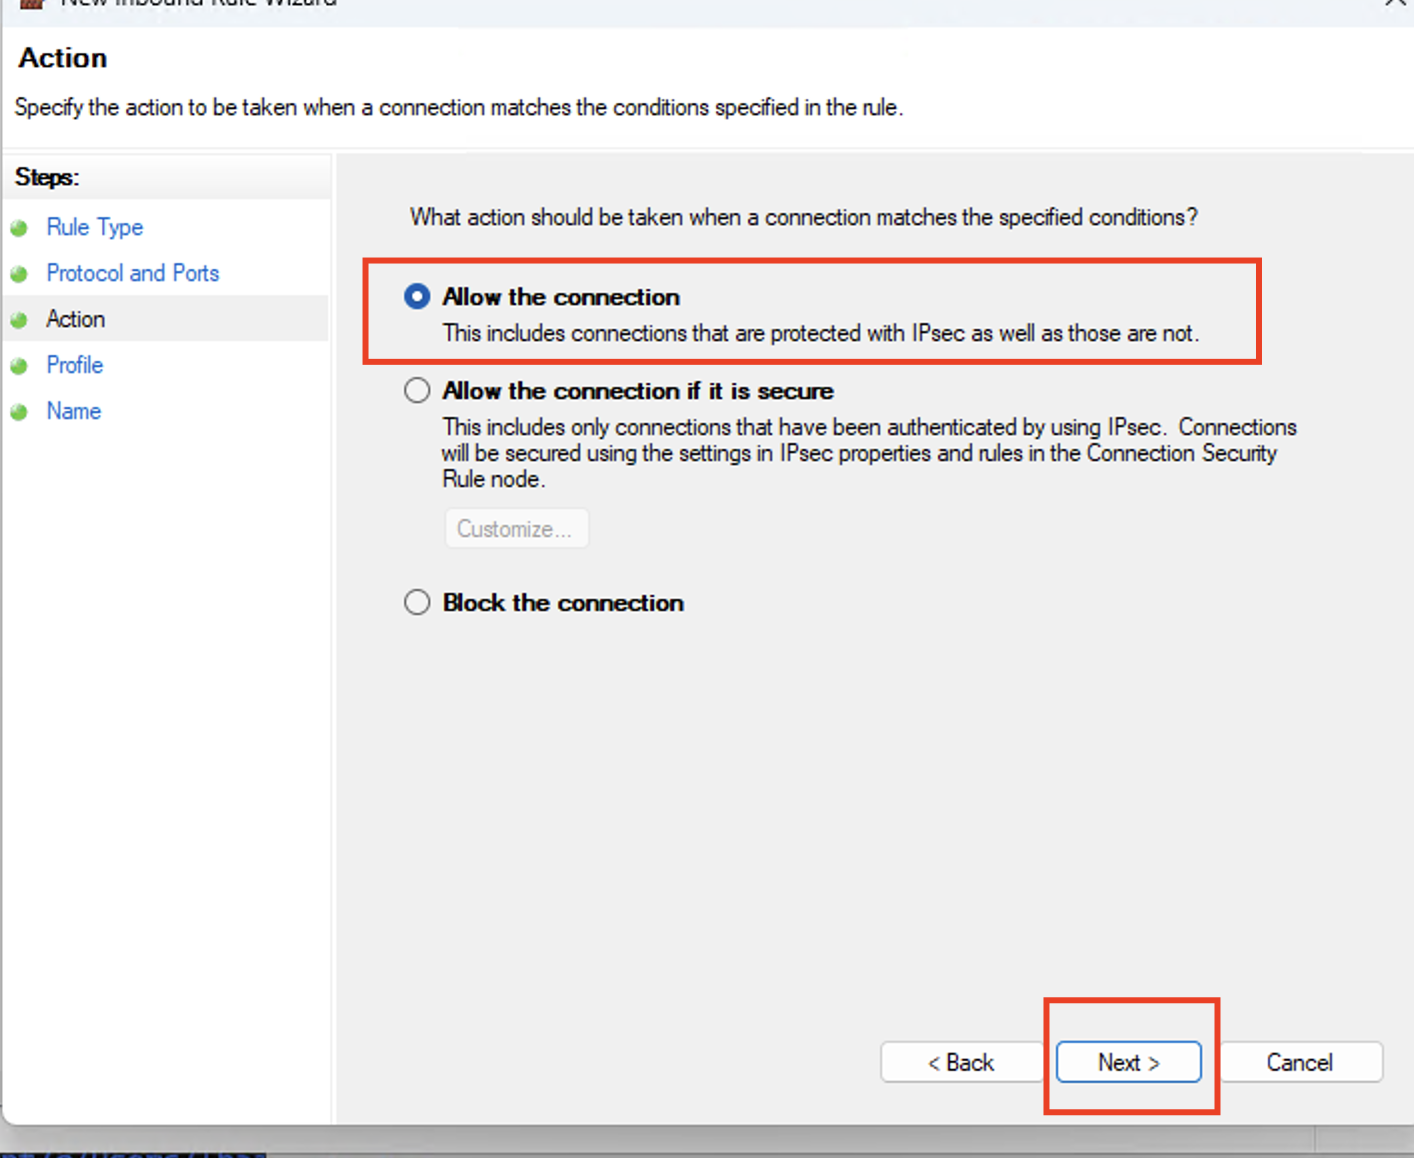
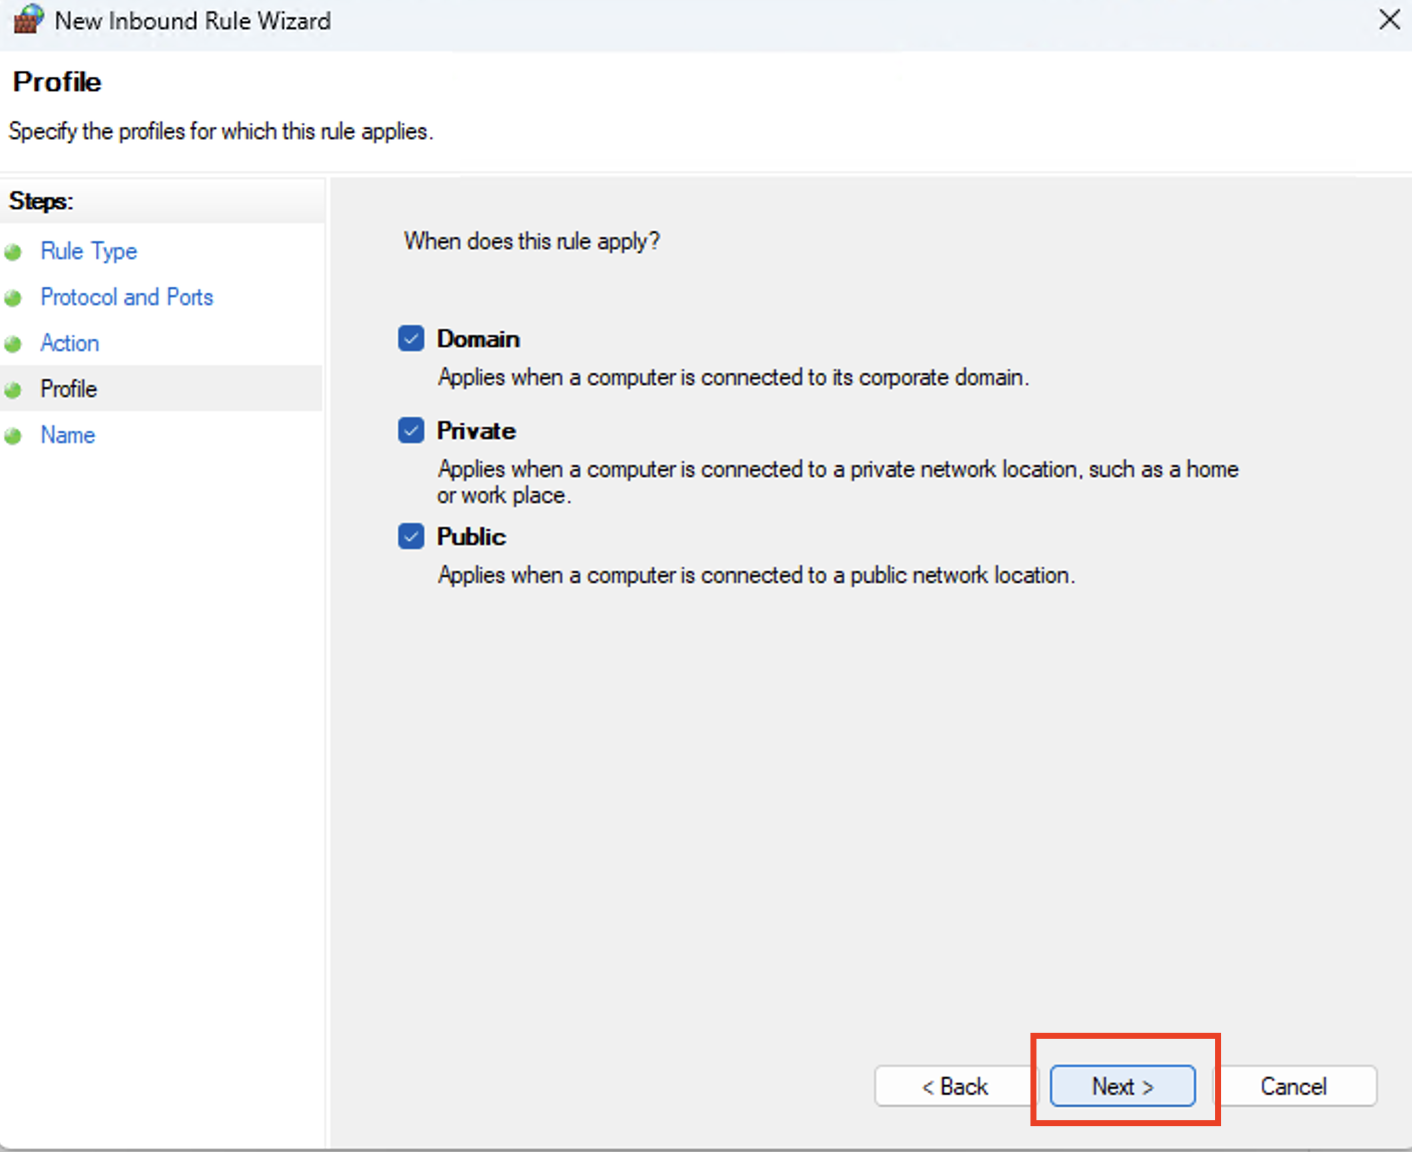
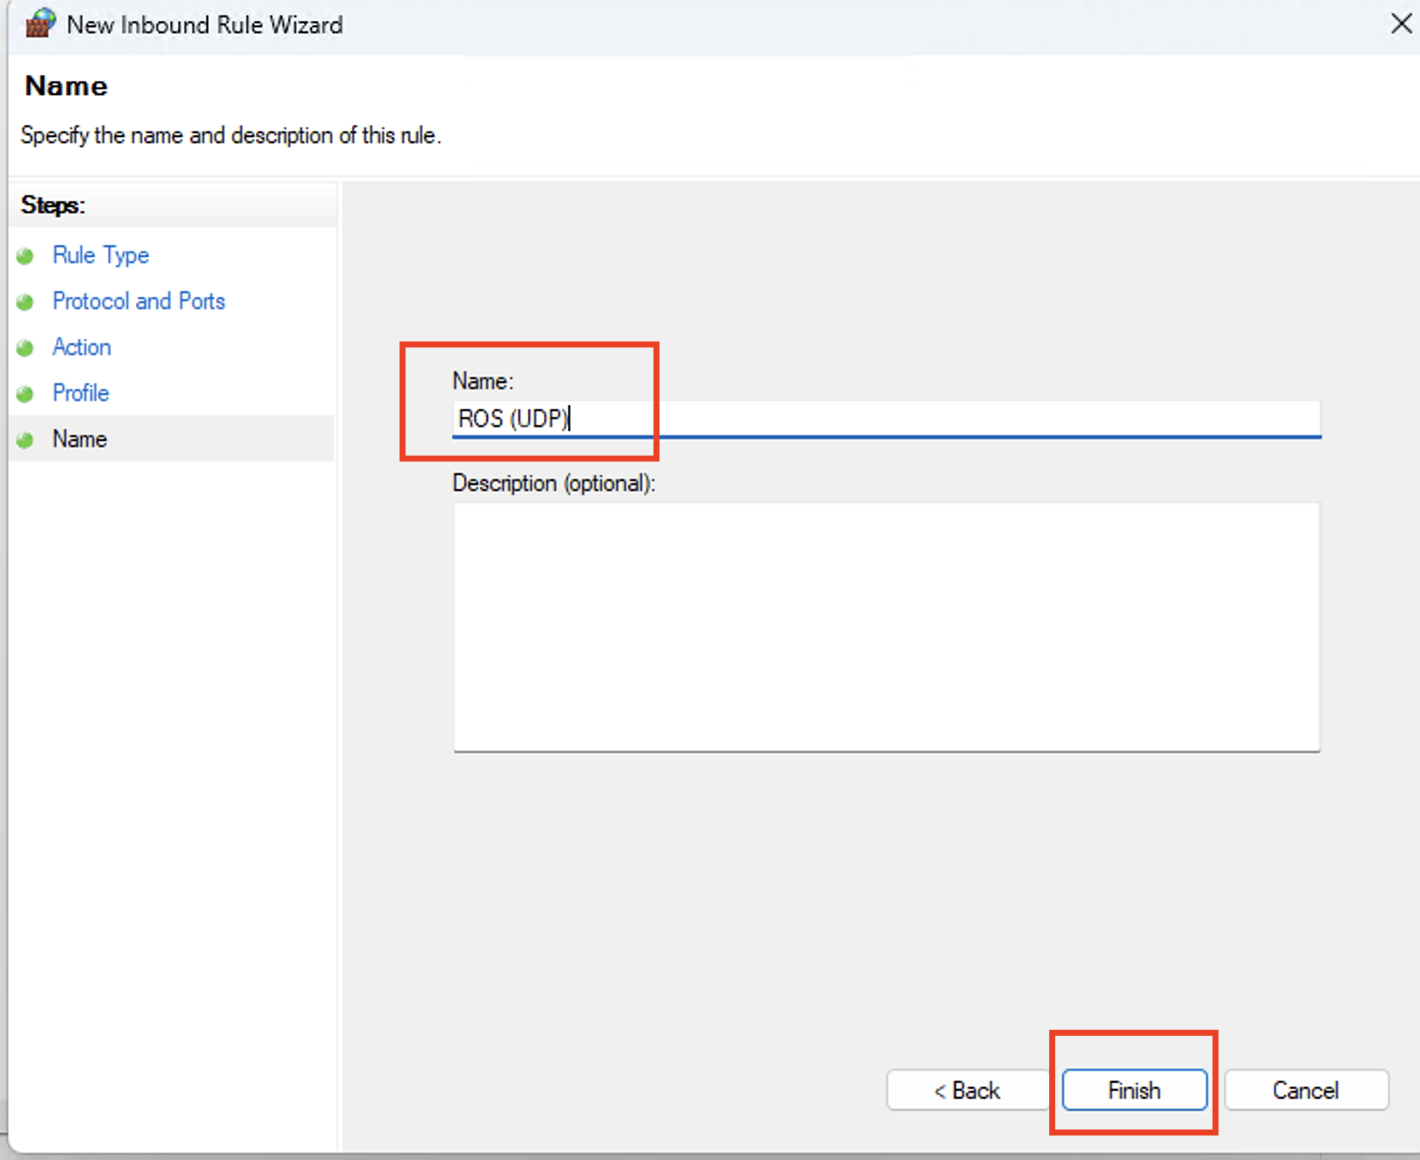
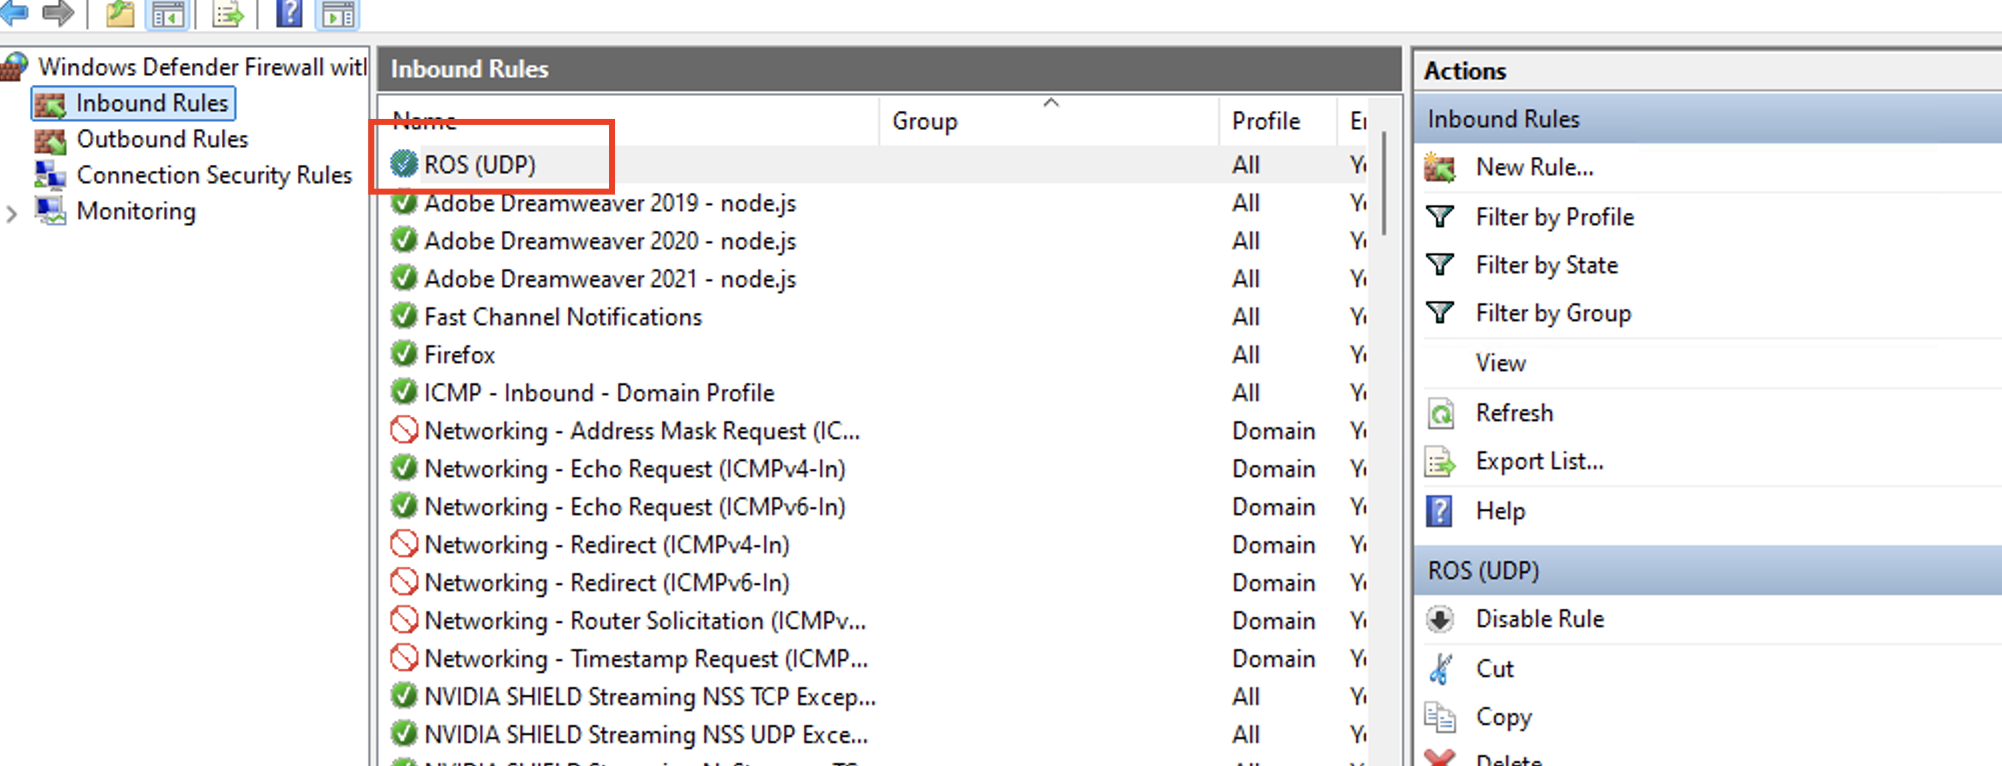
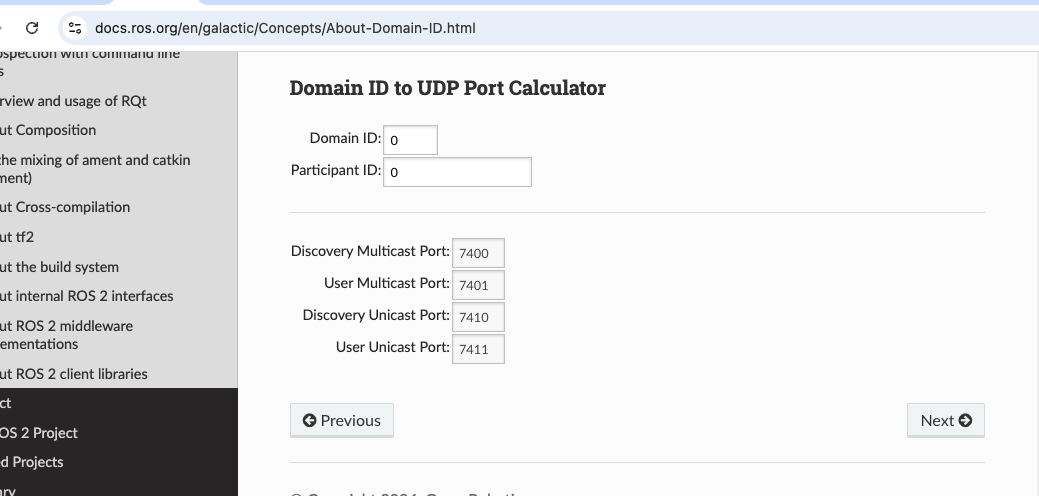
ROS2 UDP port Access
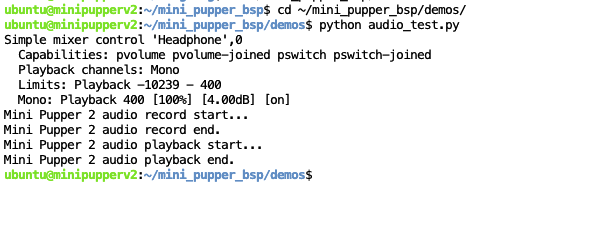
Hardware Check
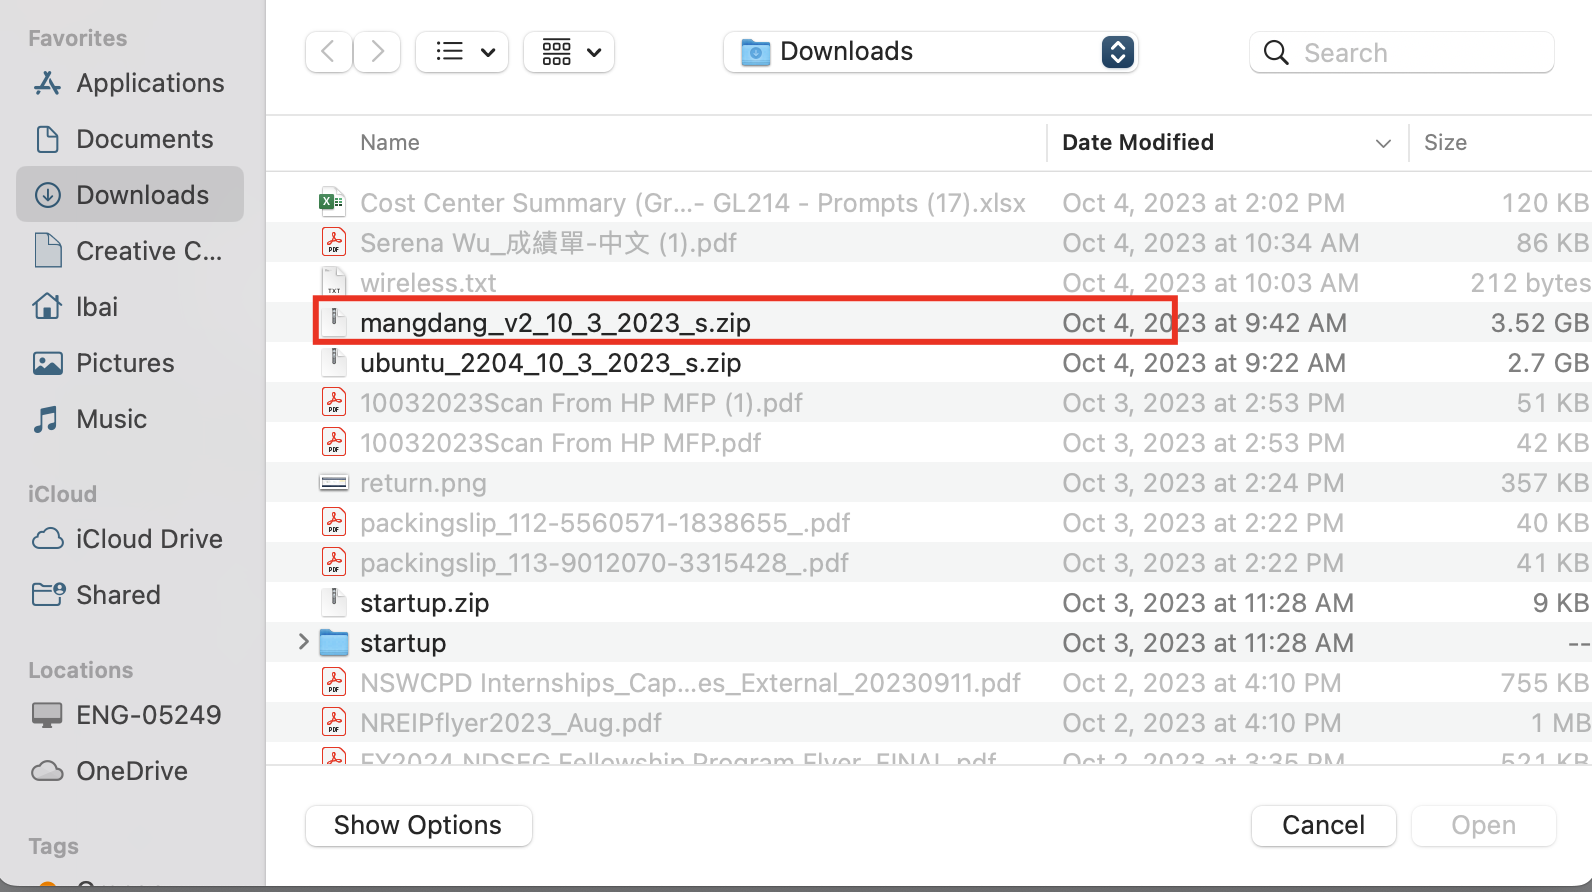
- download the mangdang using the following command
ROS2 Installation
git clone https://github.com/mangdangroboticsclub/mini_pupper_ros.git -b ros2-dev mini_pupper_ros
cd mini_pupper_ros
bash ./pc_install.sh
Demo (line following)
- ensure your computer and laptop on the router network
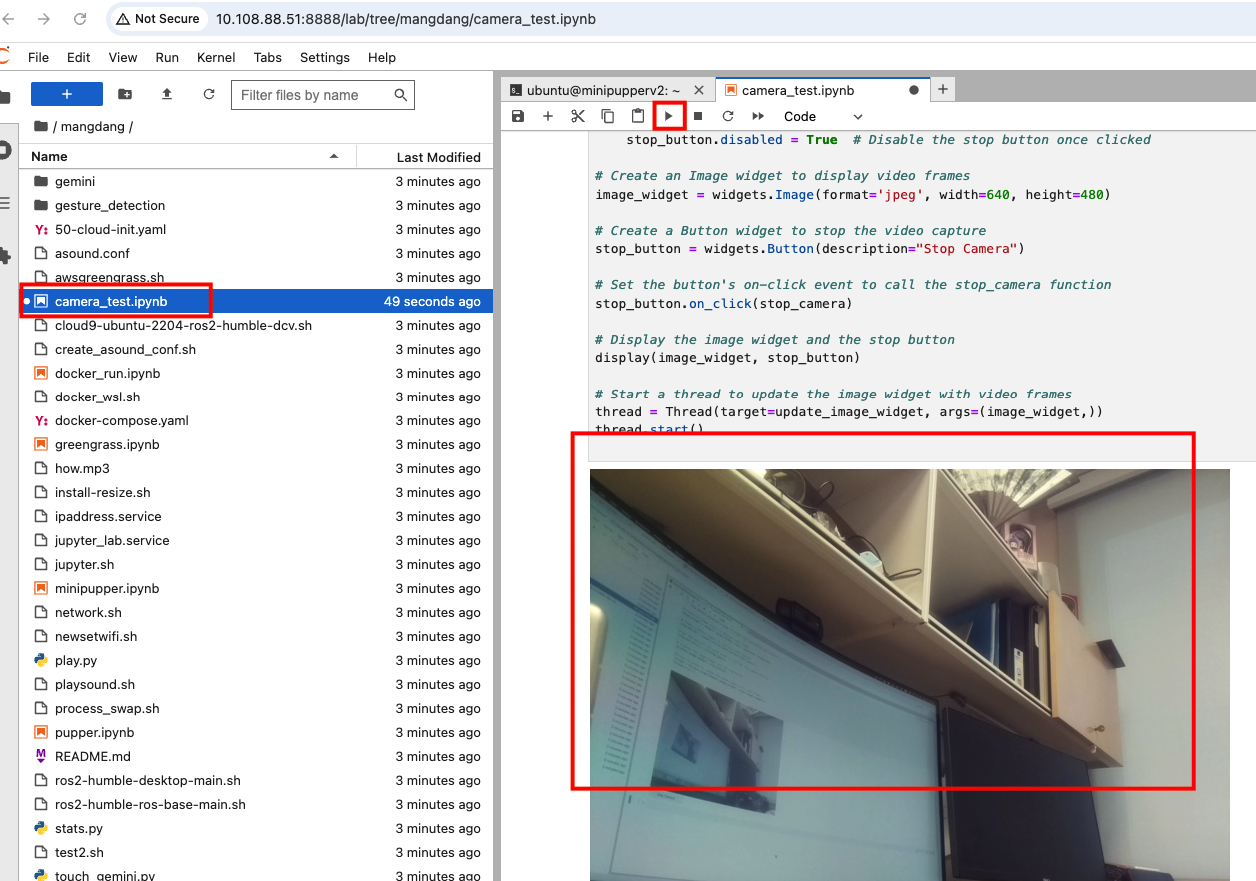
- make sure your camera works
- start bring up
- check image_raw toic
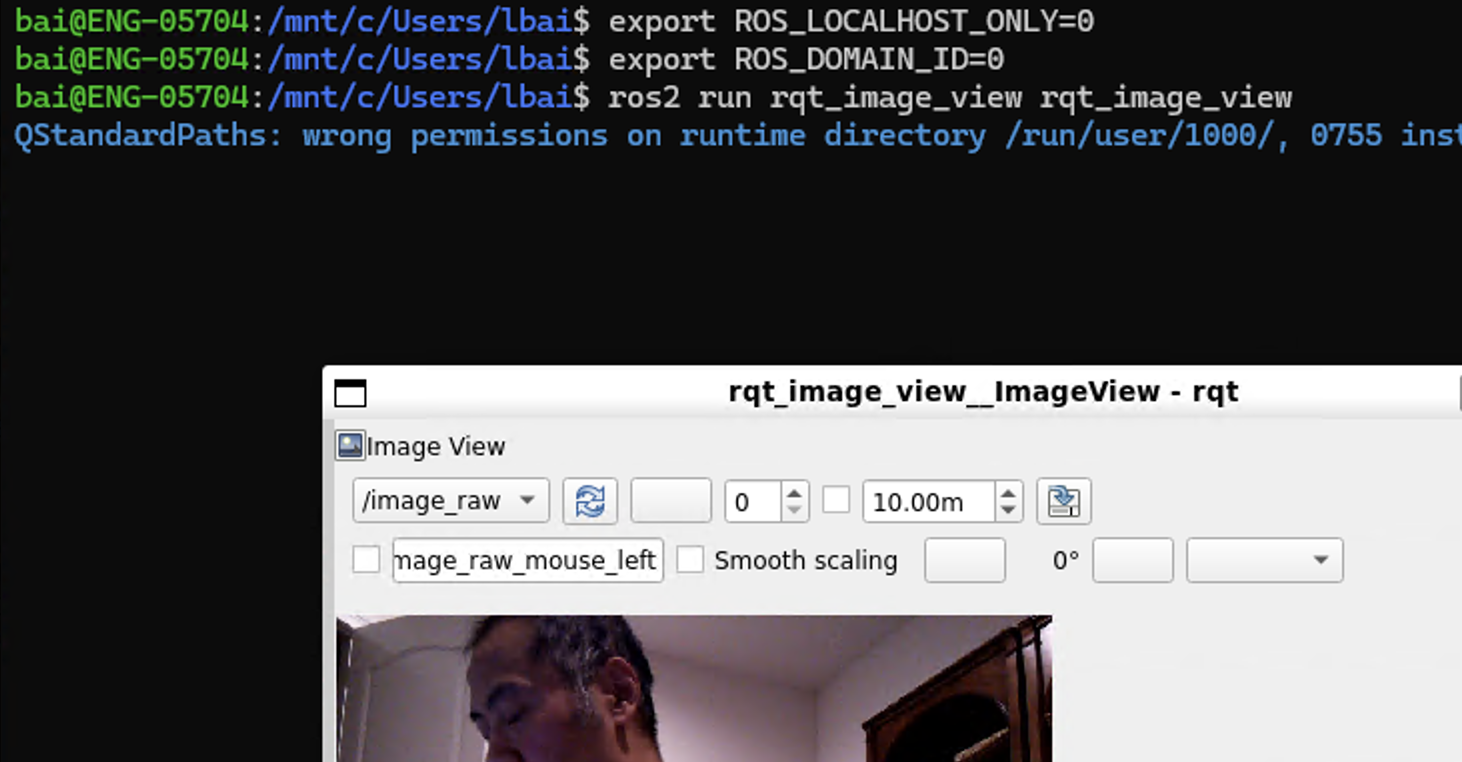
- if image_raw exists, run the following
Demo (Dance)
- ensure your computer and laptop on the router network
- make sure you launch bring and music service on minipupper